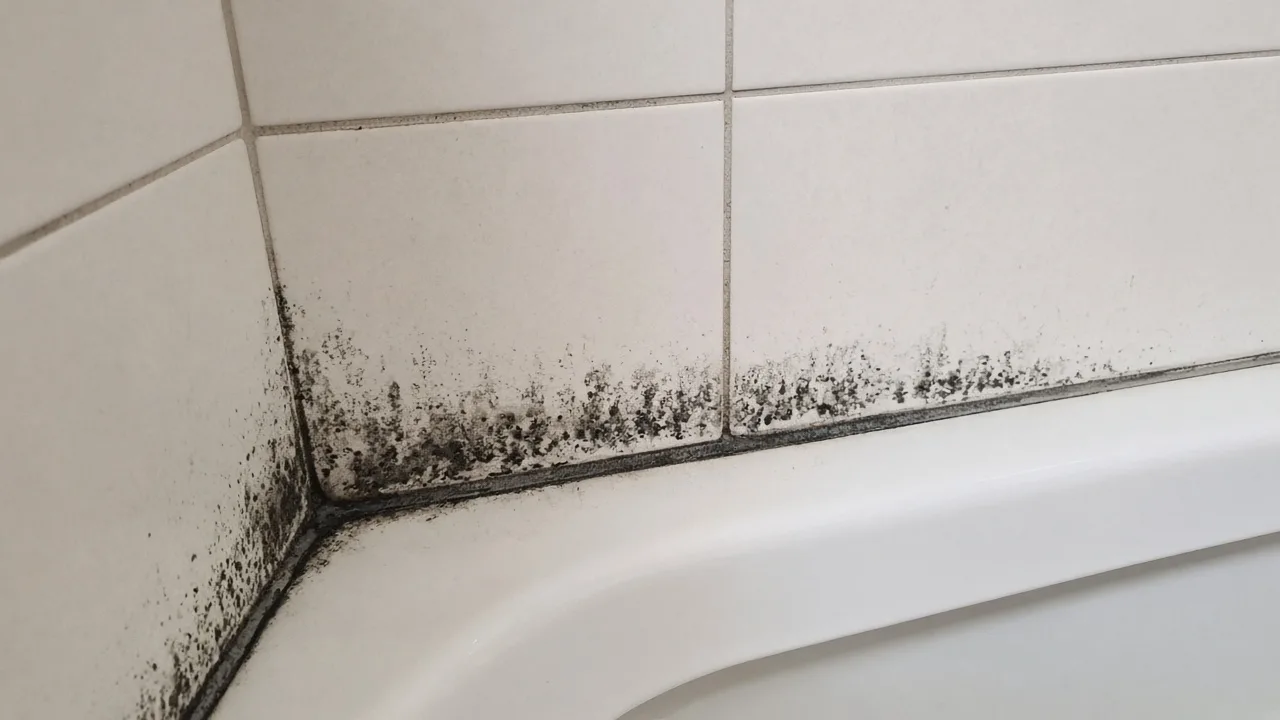
Few bathroom chores are as discouraging as recaulking a shower only to watch the new line turn spotty and dark within months. Many homeowners assume they did something wrong, or that they bought a bad tube of caulk. Sometimes that is true. Often, though, the black spots are a sign of conditions in the shower that no tube of caulk can fix by itself.
Understanding the cause helps you decide whether to recaulk again, change how the bathroom is used or look more closely at the shower itself.
What the Black Spots Really Are
In most cases, black or dark grey spots in shower caulk are mold or mildew. These organisms need moisture, warmth and something to feed on. A shower provides all three. Soap residue, body oils and skin cells collect along the joint and give mold a steady food source.
Caulk sits exactly where water lingers longest: along the joint between the tub or base and the walls, and in inside corners. Even when the walls dry quickly, those joints may stay damp for hours.
Why It Grows Inside, Not Just on Top
Surface mildew can often be cleaned off. The frustrating cases are when the black is under the surface of the caulk. That happens when mold roots grow into soft or porous sealant, or when moisture is trapped behind the bead. Scrubbing or bleaching may lighten it briefly, but the color returns because the growth is inside the material.
At that point, the only real fix is removing the caulk completely and starting over.
The Wrong Caulk for the Job
Not every caulk belongs in a shower. Acrylic latex caulk, sometimes called painter's caulk, is easy to apply and clean up but is generally not made for constant water exposure. In a shower it can soften, shrink and grow mold quickly.
For wet areas, most manufacturers recommend a 100 percent silicone or a product specifically labeled for tubs and showers, preferably one that includes a mildew resistant additive. Reading the label before buying makes a real difference.
Applying Over Old Caulk
One of the most common mistakes is running a new bead over the old one. It looks fine at first, but the old caulk still holds mold and moisture underneath, and new silicone does not bond well to old silicone. The mold simply grows through, and the new bead may peel away.
Old caulk needs to come out completely, using a plastic scraper or caulk removal tool, followed by cleaning the joint and letting it dry thoroughly.
Not Letting It Dry and Cure
Moisture trapped in the joint when new caulk goes on is a direct invitation to mold. After removing the old bead and cleaning, the joint should be completely dry before applying fresh sealant. In a bathroom that is used daily, that may mean waiting a day or more, sometimes with a fan running.
Once the new caulk is applied, it needs time to cure before water touches it. Cure times vary by product, so following the label is important. Using the shower too soon can weaken the bead and leave it vulnerable.
Movement in the Joint
Tubs and shower bases move slightly when filled or stood on. If the tub was not fully supported, or if the base flexes, the joint opens and closes with every use. Caulk can tear or pull away at the edges, creating small gaps where water and mold collect.
Filling a tub with water before caulking the joint is a common tip, because it lets the caulk cure in the tub's loaded position.
Ventilation and Drying Habits
Even perfect caulk will struggle in a bathroom that never dries out. A working exhaust fan, run during the shower and for a while afterward, removes much of the moisture. Wiping or squeegeeing the walls and joints after showering helps too, as does leaving the door or curtain open so air can circulate.
In many homes, these habits do more to slow black caulk than any product change.
Cleaning to Prevent Regrowth
Regular light cleaning keeps the food supply for mold low. A weekly spray with a bathroom cleaner along the caulk lines, followed by a rinse, removes soap residue before it builds up. Avoid harsh scrubbing tools that scratch the bead, since scratches give mold places to settle.
When Black Caulk Is a Warning Sign
If caulk turns black again within weeks even after a careful replacement, or if it keeps pulling away from the wall, it may point to something larger. Water may be getting behind the tile or surround, the wall behind may be damp, or the tub or base may be moving more than it should.
Other signs to watch for include loose or hollow-sounding tiles, soft spots in the floor near the tub, peeling paint on nearby walls, stains on the ceiling below and a musty smell that lingers. These suggest the problem is not on the surface.
A Quick Recaulking Checklist
For homeowners tackling the job themselves, the order matters. Remove every trace of the old bead. Clean the joint with a suitable cleaner and let it dry completely. Apply painter's tape along both sides for a neat line if you like. Run a steady bead of tub and shower silicone, smooth it with a tool or gloved finger, remove the tape and leave the shower unused for the full cure time listed on the tube.
Doing all of these steps once usually lasts far longer than repeating a rushed version every few months.
Fewer Joints, Fewer Problems
Showers built with large acrylic wall panels and a matching base reduce the number of joints dramatically compared with tile. Instead of dozens of grout lines plus caulk joints, there are a few sealed seams. That means fewer places for moisture and mold to settle. JSM Bath Solutions, based in Lewis Center, installs acrylic shower and bath systems sealed as one system, with framing and subfloor inspected after removal and any damage shown and priced in writing before work continues.
Recaulking is often worth doing well once. If the black keeps returning no matter what you try, it can help to understand when a shower needs replacing rather than recaulking, or call (614) 881-5128 for a free in-home consultation.