
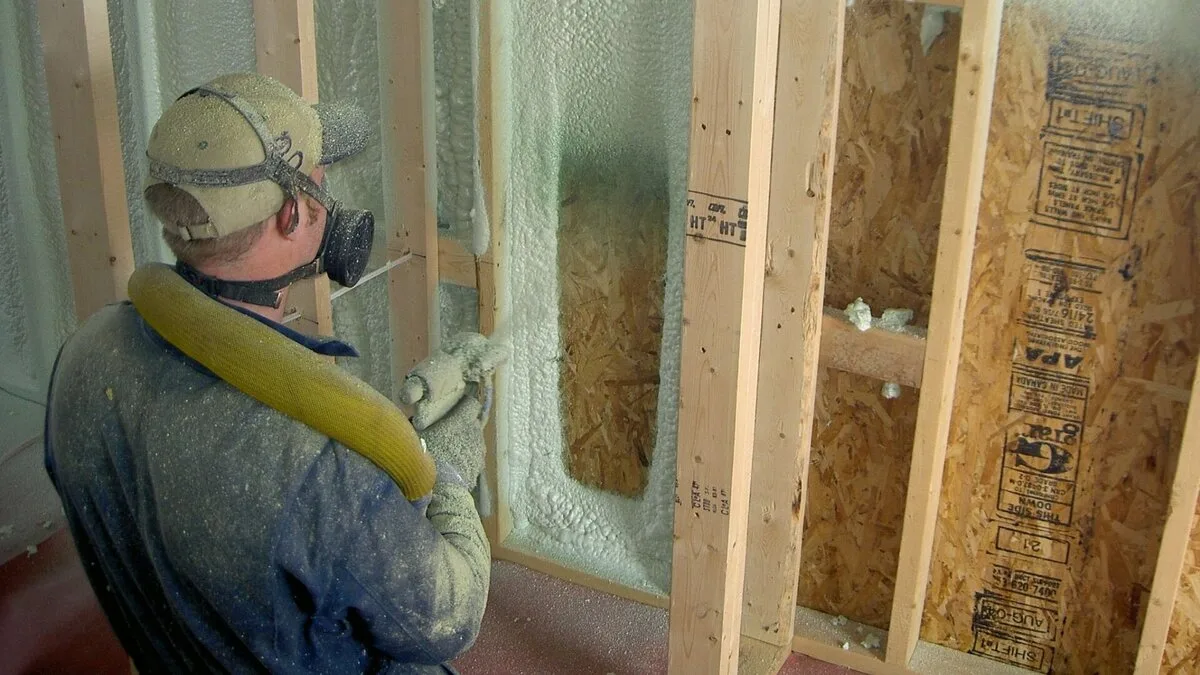
A proper spray foam insulation inspection evaluates your building envelope, checks framing moisture, reviews ventilation paths, and identifies existing air leaks before any chemical application starts. As the job moves forward, evaluations track chemical ratios, pass thickness, and proper curing to guarantee an airtight thermal boundary.
Planning an insulation upgrade requires clear steps so you get the performance you pay for. Professional building science practices ensure that your project meets local safety codes and delivers expected energy efficiency without causing hidden structural damage.
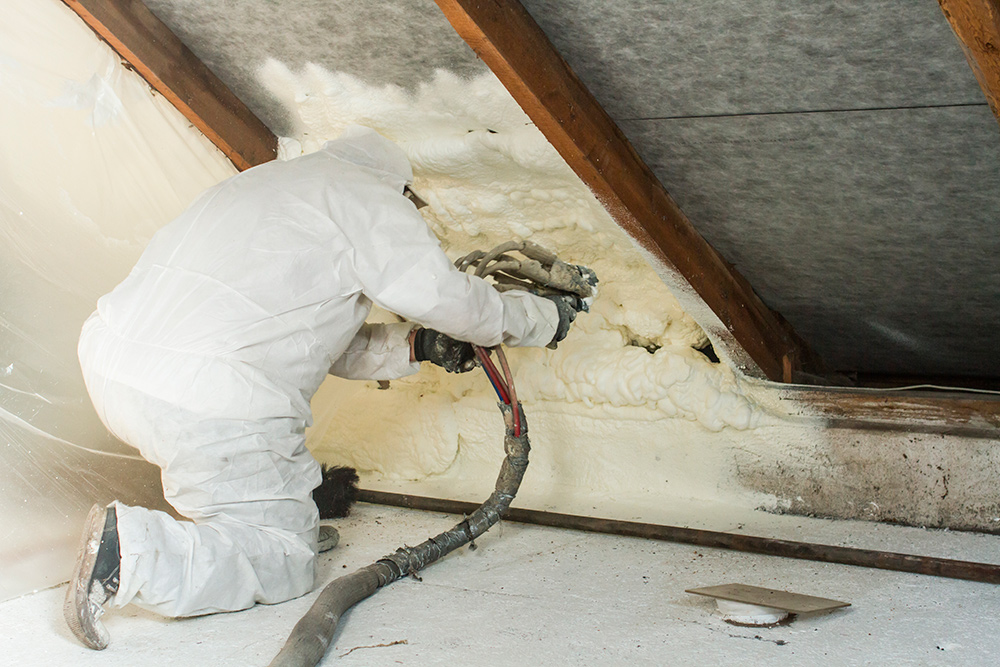
Initial Site Evaluation and Pre-Installation Checks
Every successful project starts with a detailed walkthrough of the target areas. The evaluator checks the physical state of your roof deck, wall cavities, or crawl space to identify potential obstacles.
During this stage, technicians perform an initial spray foam insulation assessment to detect structural flaws, roof leaks, or electrical hazards. Spraying over damp timber or unshielded knob-and-tube wiring creates severe safety hazards.
Inspectors also examine access routes and ventilation options. Equipment hoses require steady clearance, and the work zone must vent safely away from living areas while the crew applies the chemicals.
Building research shows that residential structures lose up to 40 percent of their heating energy through uncontrolled air leakage. Identifying gaps around band joists, top plates, and plumbing penetrations early guarantees that technicians seal every bypass point during the primary spray.
Why Does Moisture Testing Matter During the Evaluation Phase?
Moisture is the primary enemy of spray polyurethane materials. Liquid water or high humidity on a substrate prevents expanding foam from sticking to building materials.
An inspector uses a calibrated pin or pinless meter to measure framing moisture. Wood moisture content must register below 18 percent before spraying begins. Applying foam over wet wood traps water inside, accelerating rot and mold growth.
In marine and coastal environments like the Pacific Northwest, wet winters and constant humidity present unique installation challenges. Substrates often need supplemental heat or dehumidification equipment run for several days before application starts.
Qualified providers offering spray foam insulation services check both ambient relative humidity and substrate surface temperatures. If the surface dew point is within five degrees of the air temperature, condensation forms and prevents chemical bonding.
Bonus Tip: Ask the technician to measure substrate moisture in multiple locations, especially along north-facing walls and rim joists where moisture lingers longest.
Technical Standards Checked During Evaluation
Inspection ParameterOpen-Cell Target StandardClosed-Cell Target StandardVerification ToolSubstrate Moisture LimitBelow 18 percentBelow 18 percentPin-type moisture meterSubstrate Temperature50°F to 100°F typical50°F to 100°F typicalInfrared thermometerPass Thickness LimitUp to 4 to 6 inches1 to 2 inches maximumDepth probe gaugeAmbient Dew Point MarginMinimum 5°F above dew pointMinimum 5°F above dew pointPsychrometerCore Density Range0.5 lbs per cubic foot2.0 lbs per cubic footCore sample scaleKey Factors to Review Before Choosing an Insulation Approach
Before you sign a contract or commit funds, review critical preparation items with your contractor. The preparation work determines the eventual longevity of the work.
First, clarify whether open-cell or closed-cell foam matches your climate and assembly design. Open-cell works well for interior walls and roof decks where vapor permeability matters. Closed-cell serves better in exterior walls, crawl spaces, and flood-prone zones because it rejects bulk water.
Second, verify local building department requirements for ignition and thermal barriers. Code mandates a 15-minute thermal barrier, like half-inch drywall, over foam in occupied rooms. Unfinished attics usually require an approved intumescent paint coating.
Third, confirm that the spray foam insulation contractor maintains manufacturer training certifications and carries adequate commercial liability insurance. Poor mixing ratios can leave an unpleasant fishy odor that takes weeks to clear.
Bonus Tip: Request a written re-entry timeline before work begins. Most formulas require a 24-hour evacuation period for residents while the material off-gasses and cures.
Critical Review Points During the Application Stage
Once spraying starts, ongoing quality checks confirm that the chemical reaction functions properly. The applicator continuously monitors equipment pressure dials and line temperatures.
A mid-project spray foam insulation inspection confirms that workers apply the material in controlled lifts. Closed-cell foam generates substantial internal heat as it cures. Applying passes thicker than two inches at one time can scorch the core and cause internal pockets or shrinkage.
Inspectors look for uniform adhesion along wood studs, masonry walls, and metal plates. Foam should expand smoothly without pulling away from the edges or displaying spongy voids.
Technicians also protect mechanical units and recessed lights. Code requires clear space around high-heat fixtures, and unsealed flues must have metal barriers installed before foam application.
Field data indicates that homes with balanced, code-compliant air barrier installs see average heating and cooling demand drop by 15 percent in the first year. Proper mid-application reviews ensure you realize these operational savings.
Evaluating In-Progress Chemical Ratios and Depths
Chemical ratios between the "A" component (isocyanate) and the "B" component (resin blend) must remain at an exact 1:1 balance. Imbalances lead to soft, tacky material or brittle, crumbling foam.
A certified applicator uses a depth gauge probe throughout the spray foam insulation installation process. The gauge pushes through the cured foam to the wall substrate, showing the exact thickness applied across the entire cavity.
Open-cell applications frequently over-expand past the face of the studs. Crews trim excess foam flush with the framing using mechanical saws so drywall installers can hang sheets flat.
Closed-cell installations do not usually require trimming because applicators spray them to specific depth targets beneath the stud edge. Inspectors check these depths against thermal resistance goals to confirm R-value compliance.
Post-Application Review and Quality Assurance
After the spray hoses pack up, a final walkthrough validates job completion. The inspector examines the cured surface texture, which should resemble an orange peel rather than an oily, gummy film.
During this post-installation spray foam insulation inspection, technicians check that ventilation baffles in unconditioned attics remain open. Blocking eave vents causes attic moisture collection and ice damming on shingles.
Inspectors verify that trades have clear access to junction boxes, gas shutoffs, and plumbing cleanouts. Spray foam must never cover junction box covers or moving mechanical dampers.
If safety officials require it, technicians extract small core samples to evaluate density and cell structure. This step confirms that the insulation maintains structural stability for the life of the building.

Summary of Project Milestones for Long-Term Value
A complete inspection sequence protects your structure from moisture traps, chemical ratio failures, and building code violations. Evaluating your property before, during, and after application ensures your building envelope works as an integrated system. Take time to assess your specific attic, crawl space, or exterior wall needs, and insist on thorough job-site testing at every stage.
Connect with Dedicated Pacific Northwest Insulation Specialists for Quality Installation Support
Planning an insulation upgrade requires experienced hands and rigorous quality standards to keep your building dry and comfortable. Cascadia Spray Foam Insulation of Seattle provides residential and commercial property owners with reliable thermal solutions, moisture testing, and careful job monitoring from start to finish. Reach out directly to request your free quote today by emailing [email protected] or you can also speak with an experienced specialist by calling (425) 386-3500 to discuss your property needs.
Common Questions About Foam Evaluations and Project Quality
How long does a pre-spray inspection take on an average home?
Most pre-spray site assessments take between 45 and 90 minutes. Technicians spend this time measuring square footage, checking framing moisture with specialized probes, identifying electrical hazards, and reviewing work-zone ventilation points.
Can inspectors evaluate spray foam thickness without destroying the wall?
Yes, technicians use small, thin depth probes that slide through the foam down to the stud face without leaving visible damage. The foam self-seals around the needle hole, preserving thermal resistance and air barrier performance.
What happens if wood framing shows moisture above 18 percent?
Work stops immediately. The applicator brings in commercial air movers and dehumidifiers to dry out the framing lumber. Spraying proceeds only after follow-up pin-meter tests confirm the moisture content dropped below the safety threshold.
Does spray foam require an inspection from the local city building department?
Most jurisdictions require both a rough framing inspection before spraying and an insulation inspection afterward. City inspectors check thermal barrier coverage, fire-blocking compliance, and mechanical ventilation clearances.
How do applicators test if the chemical mixture cured correctly?
Crews perform density cup tests before spraying wall cavities. They check that the foam reaches proper tack-free firmness within seconds and produces no lingering chemical odors or discolored inner cores during sample cross-sections.