A stable internet connection is essential for work, streaming, and daily online tasks. If your router cannot cover every room, following the correct wavlink ac1200 setup instructions can help you boost your signal and remove dead zones. The AC1200 extender from Wavlink is designed to expand wireless coverage and improve connectivity when configured properly.
Things to Do Before Setup
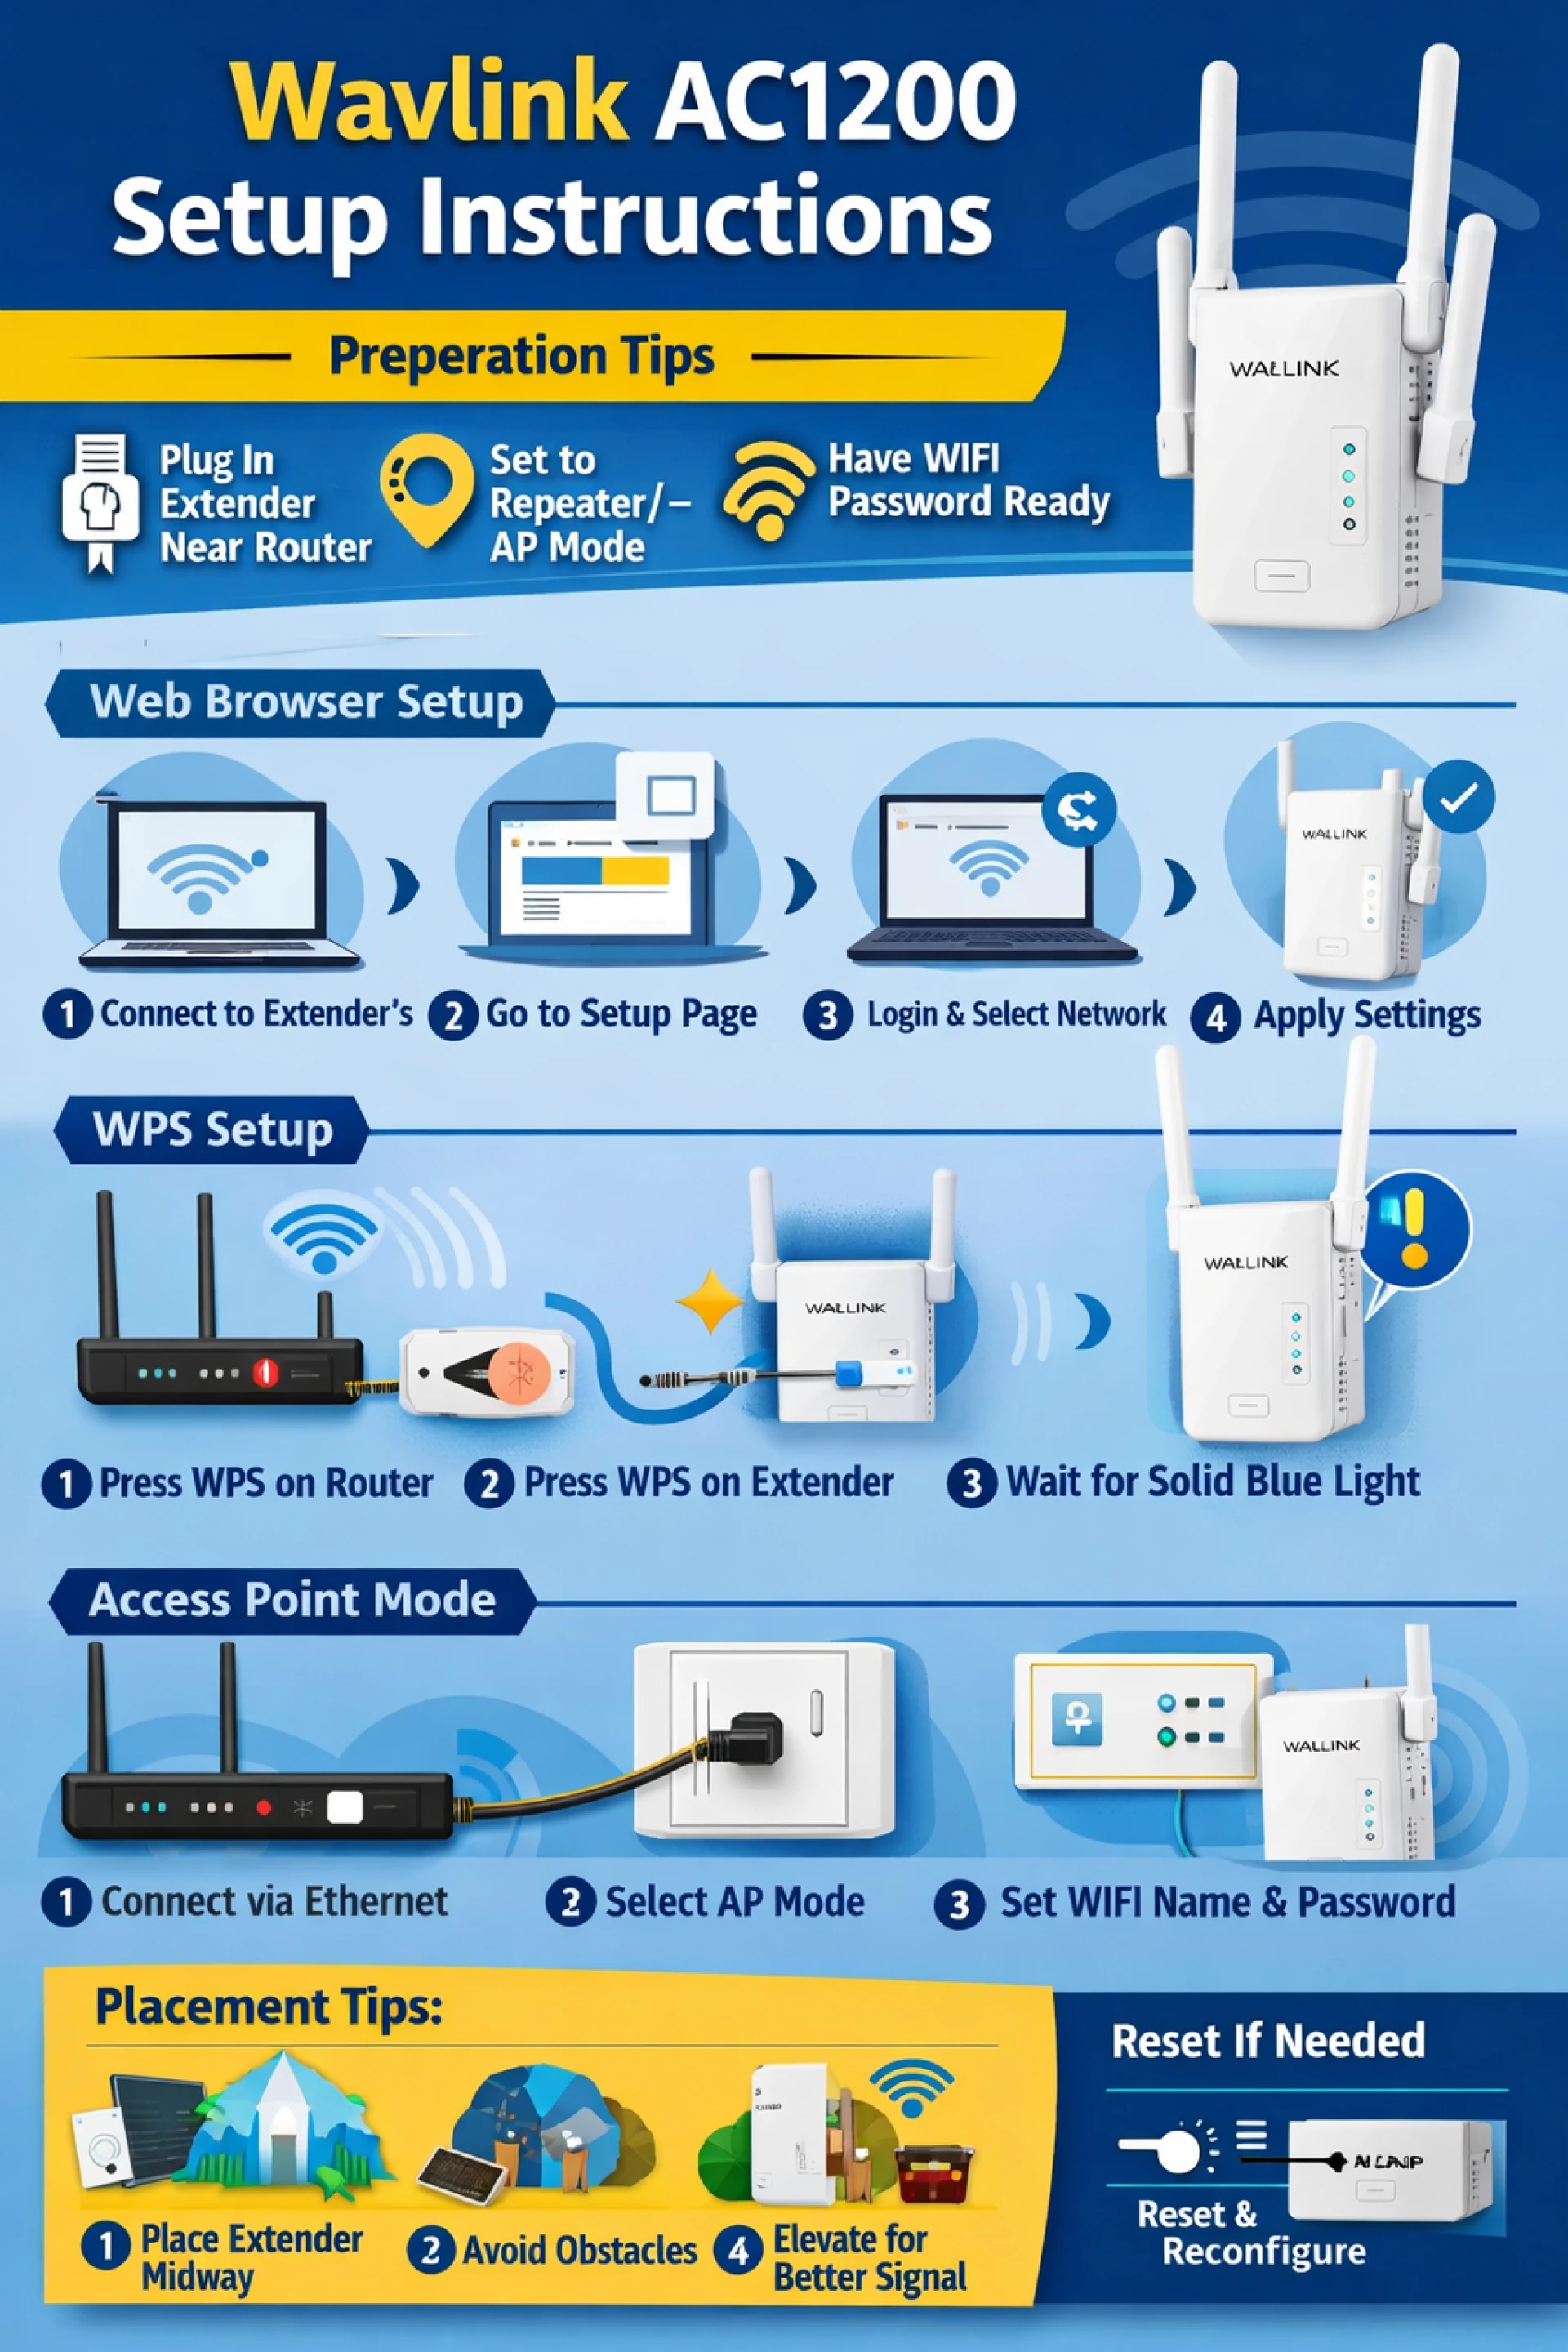
Before starting the configuration, place the extender near your main router and plug it into a power outlet. Allow the device to fully power on before moving to the next step.
Keep your existing WiFi network name and password ready, since you will need them during installation.
Connecting to the Extender Network
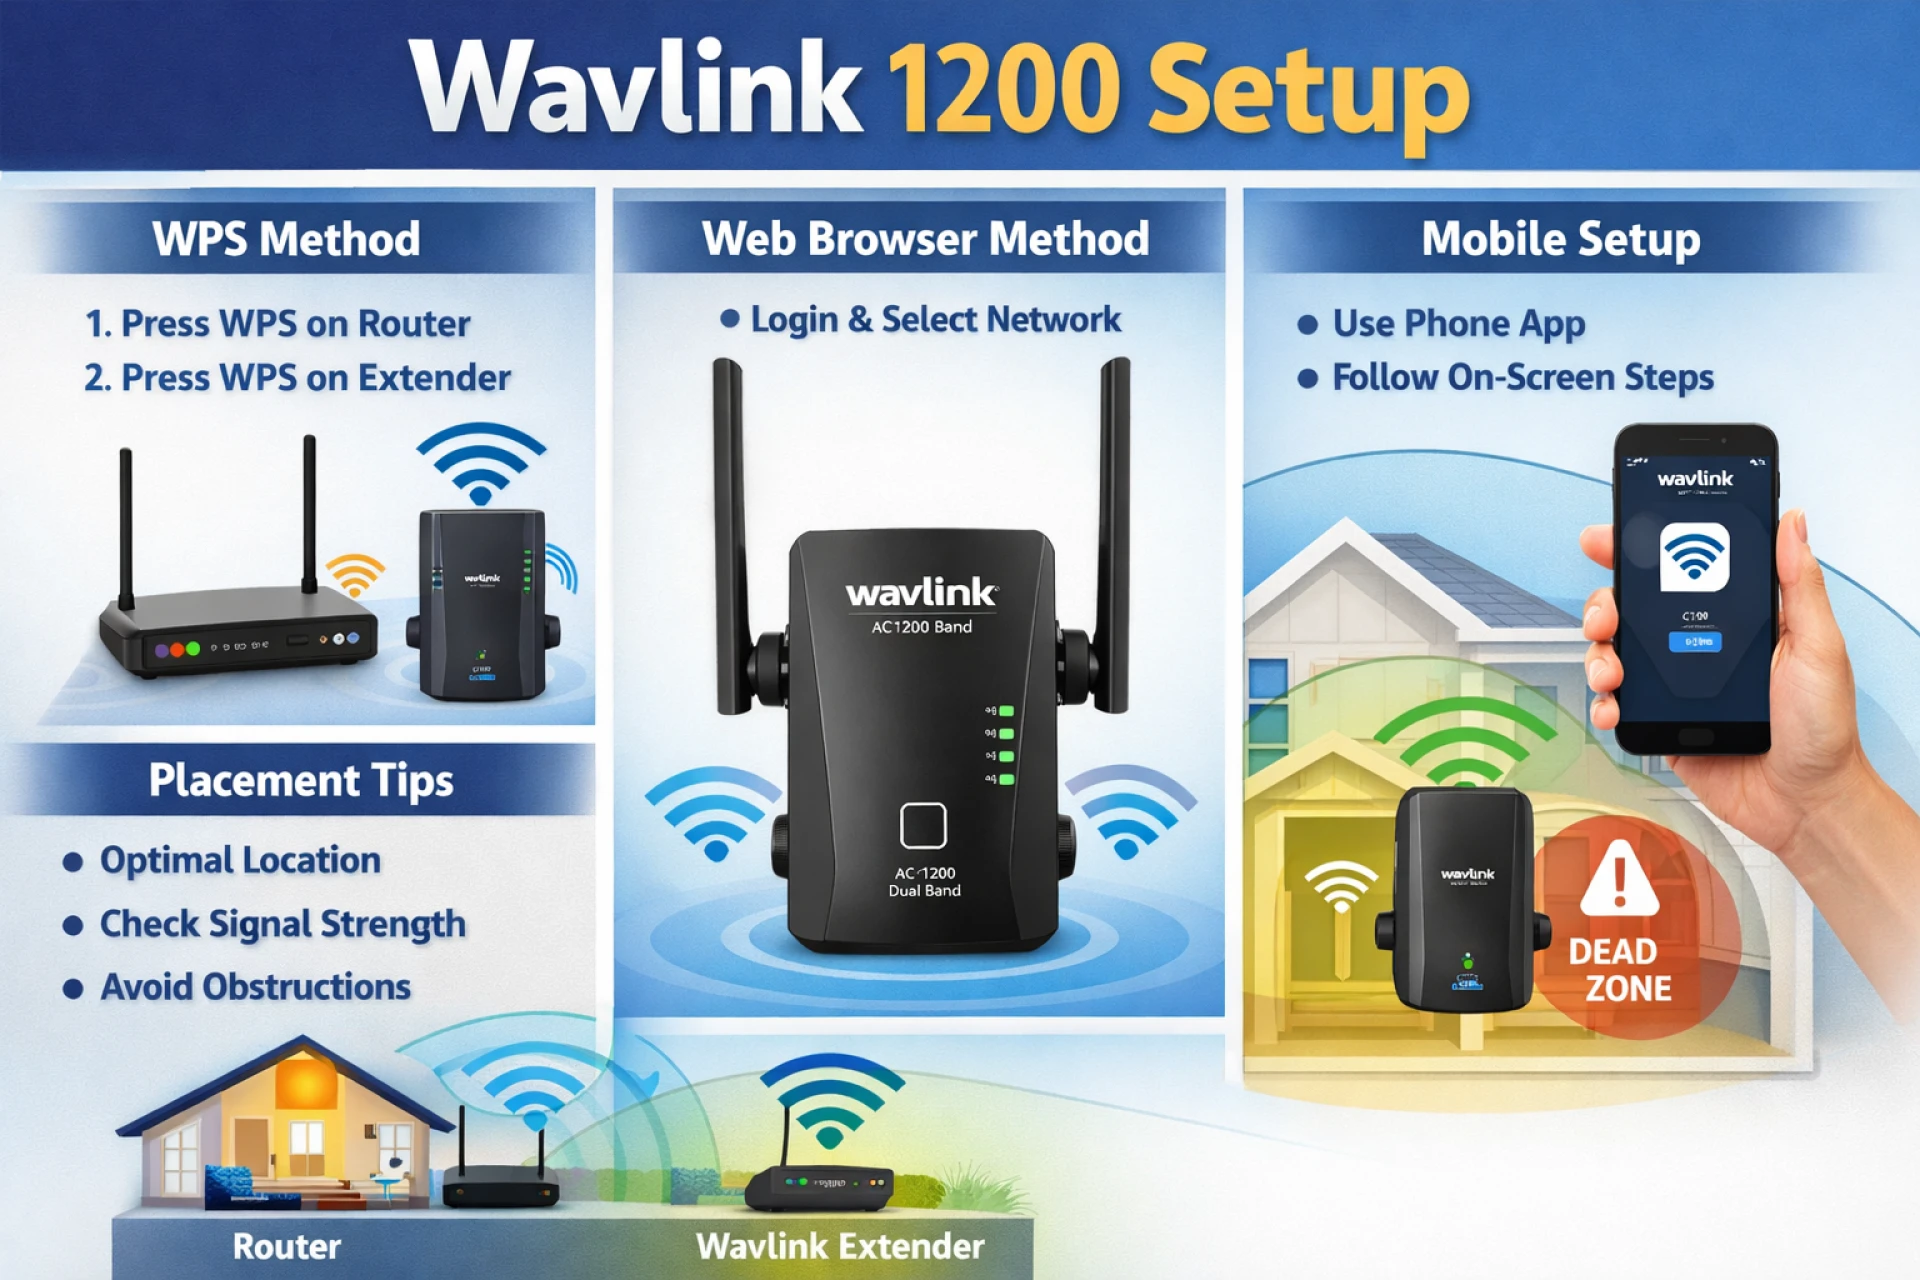
To begin the setup process, open the WiFi settings on your phone or computer and connect to the extender’s default network. Once connected, launch a web browser and enter the setup address to access the configuration page.
Log in with the default admin credentials to open the dashboard.
Configuring Repeater Mode
Repeater mode is the primary option mentioned in most wavlink ac1200 setup instructions.
After selecting repeater mode, the extender will scan for nearby networks. Choose your existing WiFi network from the list, enter the password, and apply the settings. The extender will reboot and connect automatically.
Once it reconnects, your extended network should be ready to use.
Quick Pairing Through WPS
For users who want a faster installation, the WPS method can connect the extender automatically.
Press the WPS button on your router first, then press the WPS button on the extender within two minutes. Wait until the indicator light becomes steady, confirming a successful connection.
This method avoids manual login steps and is ideal for quick setups.
Switching to Access Point Mode
The extender can also operate as an access point if connected to the router using an Ethernet cable. After selecting access point mode from the setup interface, you can create a new wireless network name and password.
This mode is useful when you want to generate a fresh WiFi network from a wired connection.
Choosing the Right Installation Spot
After configuration, unplug the extender and move it to a location between the router and the area with weak signal. The LED indicators will help you determine whether the placement is suitable.
A strong indicator means the extender is receiving a good signal, while a weak indicator suggests moving it closer to the router.
Troubleshooting Tips
If the extender fails to connect or settings were entered incorrectly, performing a reset can resolve the issue. Press and hold the reset button until the lights flash, then repeat the setup process from the beginning.
This step restores the device to its factory configuration.
Conclusion
Following proper wavlink ac1200 setup instructions ensures your extender works efficiently and provides wider wireless coverage. With the right setup method and placement, you can enjoy stronger signals, smoother streaming, and more reliable internet throughout your space.