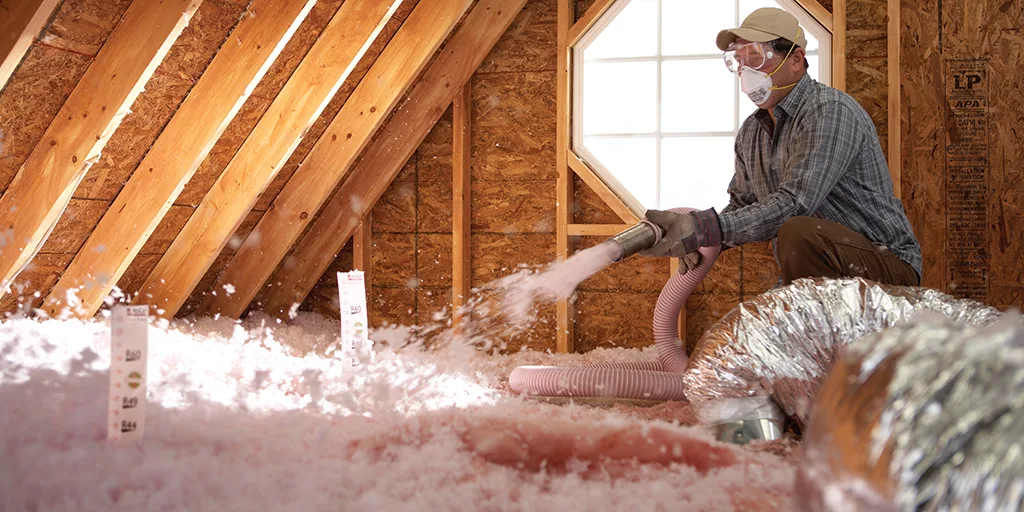
Successful Residential Insulation Replacement requires a thorough inspection of the attic and wall cavities for structural damage, leaks, and pests before any new material is installed. You must ensure the space is dry, airtight, and structurally sound to prevent trapping moisture or wasting energy once the project is finished.
This guide provides a detailed look at the preparation steps that save homeowners time and money. Drawing on years of building science experience, these recommendations focus on creating a high-performance thermal envelope that lasts for decades.
 Identify and Remove Failing Materials
Before you can add something new, you have to deal with the old insulation currently in your home. Often, this material is dusty, compressed, or contaminated by rodents, which significantly reduces its ability to hold heat. Removing it completely allows for a clear view of the floor joists and electrical wiring.
Leaving degraded material in place can hide serious issues like wood rot or mold. Professional teams usually use high-powered vacuums to extract loose fill or manually bag old batts to keep the rest of your living space clean during the process.
Conduct a Comprehensive Insulation Inspection
A detailed insulation inspection is your first line of defense against future home repairs. You should look for dark spots on the wood, which often indicate air leaks where conditioned air is escaping and pulling dust along with it. Checking the underside of the roof deck is also necessary to spot roofing leaks that might have gone unnoticed.
- Check for compressed areas where foot traffic has flattened the material.
- Look for "wind washing" near the eaves where outdoor air blows through the insulation.
- Inspect electrical boxes to ensure they are covered or rated for contact with insulation.
- Verify that all recessed "can" lights are airtight and IC-rated.
Address Existing Moisture Concerns
Moisture is the enemy of any thermal barrier. If you find damp spots or standing water, you must find the source before starting a Residential Insulation Replacement. Trapping moisture behind new materials leads to mold growth and can rot your home's framing over time.
Moisture concerns often stem from poor ventilation or bathroom fans venting directly into the attic. You should ensure all exhaust fans lead directly outside through the roof or a side wall. This simple fix prevents warm, moist air from condensing in your attic during the winter.
Prepare the Workspace for Success
Effective installation preparation involves more than just cleaning. It requires air sealing every gap, crack, and hole where wires or pipes go through the ceiling. Since air carries heat, even the thickest insulation won't work well if air is whistling through the floor beneath it.
Seal the Top Plates
Bonus Tip: Use expandable spray foam or caulk to seal the "top plates" of your interior walls. These are the horizontal wood beams at the top of your wall studs, and they are notorious for leaking air from the living space into the attic.
Evaluate Current Energy Loss Patterns
Understanding where your home loses the most heat helps you prioritize your budget. Energy loss usually happens at the highest and lowest points of a house due to the "stack effect." Warm air rises and escapes through the attic, while cold air is sucked in through the crawlspace or basement.
Assessment AreaCommon IssueRecommended ActionAttic FloorUnsealed wire penetrationsSeal with fire-rated foamKneewallsMissing air barriersInstall rigid foam or house wrapCrawlspaceOpen vents and dirt floorsConsider encapsulationRim JoistsLack of airtight sealApply spray foam or rigid board
Things to Evaluate Before Hiring a Professional
Choosing to replace your thermal barrier is a major decision that impacts your comfort for years. Before you sign a contract, you should evaluate the specific climate needs of the Pacific Northwest. Seattle's damp climate requires materials that can handle humidity without losing their R-value.
- R-Value Requirements: Ensure the new material meets or exceeds local building codes for your specific zone.
- Material Compatibility: Some homes benefit more from spray foam, while others are better suited for blown-in cellulose.
- Ventilation Balance: Adding more insulation can sometimes restrict airflow, so check that your soffit vents remain clear.
- Project Timeline: Most residential jobs take one to two days, but removal of old materials can add time.
 Regional Guidance for the Seattle Climate
In the Seattle area, the high humidity levels mean that vapor retarders must be placed correctly to avoid trapping dew point moisture inside walls. Many local homes also struggle with moss on roofs, which can lead to small leaks. You should always verify the roof's integrity during your Residential Insulation Replacement to protect your investment from the region's frequent rainfall.
Manage Crawlspace Water Issues
Bonus Tip: If you have a crawlspace, check for standing water during the rainy season. Improving drainage outside the home is often a necessary first step before upgrading the insulation under your floors.
How Does Air Sealing Impact Your New Insulation?
Does insulation alone stop air movement? The answer is generally no. Most traditional materials like fiberglass act as a filter rather than a barrier. This is why air sealing is a non-negotiable part of installation preparation. By stopping the physical movement of air, you allow the insulation to do its job of slowing down heat transfer.
Focus on Common Leak Points
- Seal the gaps around the chimney using metal flashing and high-temperature caulk.
- Use weatherstripping on the attic access hatch or install a pre-insulated cover.
- Check for gaps around plumbing stacks that run from the basement to the roof.
Summary of Best Practices for Homeowners
To get the most out of your home improvement project, start with a clean slate. Removing old insulation and performing a thorough insulation inspection ensures that no underlying issues like pests or rot are ignored. Focus on air sealing and fixing moisture concerns to prevent long-term damage and maximize comfort. By following these steps, you reduce energy loss and create a more sustainable living environment.
Connect With Local Experts for a Professional Insulation Assessment and Quote
If you are ready to improve your home's comfort and efficiency, reaching out to a local specialist is a smart move. Cascadia Spray Foam Insulation of Seattle provides detailed evaluations to help you determine the best course of action for your specific property. You can reach their team at (425) 386-3500 or via email at [email protected] to discuss your project. They offer expert guidance on the latest materials and techniques to ensure your home remains protected against the elements. Request a free quote today to see how a professional approach can make a difference in your energy bills and overall home health.
Common Questions About Replacing Residential Insulation
How do I know if my old insulation needs to be removed?
You should remove it if there is evidence of mold, rodent droppings, or significant water damage. Also, if the material has settled so much that it no longer meets the height of the floor joists, a full replacement is often more effective than simply adding more on top.
Can I install new insulation directly over the old stuff?
It is possible if the existing material is dry and clean, but it is not always recommended. Adding new material over old, dusty insulation can trap allergens and prevents you from sealing the air leaks on the floor of the attic.
Is spray foam better than fiberglass for Seattle homes?
Spray foam is often preferred in damp climates because it provides an air seal and a thermal barrier in one step. It does not hold moisture or provide a nesting ground for pests, which are common issues with fiberglass in the Pacific Northwest.
How long does it take for insulation to pay for itself?
Most homeowners see a return on their investment through lower utility bills within three to seven years. The exact timing depends on your current energy costs, the type of heating system you use, and the thoroughness of the air sealing performed.
What are the signs of a hidden air leak?
Look for "dirty" insulation. Fiberglass acts like a filter; if you see black or grey streaks in the pink or yellow batts, it means air is being pulled through that spot, leaving dust behind. These areas should be sealed with foam or caulk.