Direct-to-Film (DTF) printing has become a popular choice for businesses, clothing brands, and individuals who want to create customised apparel. From personalised T-shirts and hoodies to workwear and promotional clothing, DTF transfers make it possible to apply detailed, colourful designs to different fabrics.
However, achieving professional results requires more than simply placing a transfer on a garment and applying heat. Understanding how to press DTF transfers correctly is essential for creating durable designs, preventing peeling, and maintaining print quality.
Whether you are new to DTF printing or regularly produce custom apparel, knowing the correct temperature, pressing time, and pressure can make a significant difference. This guide covers the application process, important heat press settings, and practical solutions for common DTF transfer troubleshooting problems.
Understanding DTF Transfers
DTF transfers are produced by printing designs onto specialised transfer film using compatible inks and adhesive powder. The prepared design is then transferred onto fabric using a heat press.
One of the main advantages of DTF printing is its versatility. It can be used for cotton, polyester, and various fabric blends, depending on the transfer specifications and material compatibility.
DTF transfers are commonly used for:
- Custom T-shirts and hoodies.
- Business uniforms and workwear.
- Sportswear and promotional apparel.
- Personalised clothing and gifts.
- Custom clothing collections.
The final result depends on transfer quality, garment preparation, temperature, pressure, and pressing time.
How to Press DTF Transfers Correctly
Following a consistent application process helps prevent mistakes and produces better results. Here are the essential steps for applying DTF transfers.
1. Prepare Your Heat Press and Garment
Before starting, make sure your heat press is clean and working properly. Check the heating plate, temperature settings, and pressure adjustment.
Next, prepare your garment by placing it flat on the heat press.
Follow these preparation steps:
- Remove wrinkles from the application area.
- Check the garment for dust and lint.
- Make sure the fabric is clean and dry.
- Keep seams, buttons, and zippers away from the pressing area.
Pre-pressing the garment for approximately 3–5 seconds, when appropriate, can help remove moisture and create a smoother surface.
2. Position the DTF Transfer
Place the transfer on the garment in your desired position. The printed design should face the fabric, with the carrier film facing upward.
Check the alignment before pressing. Use a measuring ruler or placement guide when creating multiple garments with matching designs.
Make sure the transfer is flat and free from wrinkles. Incorrect positioning can affect the appearance of the finished garment.
3. Set the Correct Temperature and Pressing Time
Temperature and pressing time are two important factors in successful DTF application.
As a general starting point, many standard DTF transfers use the following settings:
Application SettingGeneral Starting RangeTemperature300–320°FPressing Time8–15 secondsPressureMedium to firmPre-Press3–5 secondsFinishing Press3–5 secondsThese settings are general guidelines. Always follow the specific instructions provided with your DTF transfers because different adhesives, films, and fabrics may require different settings.
4. Apply Consistent Heat and Pressure
Once the transfer is correctly positioned, close the heat press and apply the recommended settings.
Consistent pressure helps the adhesive make proper contact with the fabric. Uneven pressure can cause sections of the design to transfer incorrectly.
If you are working with thicker garments or areas containing seams, consider using an appropriate heat press pillow to create a more even pressing surface.
Avoid applying excessive heat or pressure, as this may damage certain fabrics.
5. Peel the Transfer Film
After pressing, follow the manufacturer's peeling instructions.
DTF transfers can have different peeling requirements, including hot peel, warm peel, or cold peel.
Remove the film carefully from one corner using a smooth, controlled movement. Avoid pulling too quickly because this may lift parts of the design.
If sections of the artwork remain attached to the film, follow the manufacturer's recommendations for corrective pressing.
6. Complete the Finishing Press
Some DTF transfers benefit from an additional finishing press after removing the carrier film.
Place a suitable protective sheet over the design and apply the recommended finishing settings.
This step can help improve the appearance and adhesion of the transferred design. Always check the supplier's instructions before applying additional heat.
Common DTF Transfer Troubleshooting Problems
Even when you follow the correct process, application problems can sometimes occur. Understanding their causes makes it easier to find the right solution.
1. DTF Transfers Peeling After Pressing
Peeling is one of the most common DTF transfer troubleshooting issues.
Possible causes include:
- Insufficient pressing temperature.
- Incorrect pressing time.
- Uneven heat or pressure.
- Incorrect peeling technique.
- Moisture in the garment.
Solution: Check the recommended temperature, time, and pressure. Ensure the entire design receives consistent heat and follow the correct peeling instructions.
2. Parts of the Design Stay on the Film
Sometimes, sections of a design remain attached to the carrier film instead of transferring completely.
This can happen when the adhesive does not receive sufficient heat or pressure.
Solution: Carefully place the carrier film back over the affected design and check whether additional pressing is recommended. Avoid increasing the temperature without checking the manufacturer's instructions.
3. Scorch Marks or Fabric Discolouration
Excessive heat or prolonged pressing can damage certain materials. Polyester and other heat-sensitive fabrics require particular attention.
Solution: Check the fabric's heat tolerance before applying a transfer. Use suitable settings and test the process on a spare garment before starting a large production order.
4. Bubbles or Wrinkles on the Transfer
Bubbles and wrinkles can make a finished design look uneven or unprofessional.
Common causes include moisture, an uneven garment surface, and incorrect transfer positioning.
Solution: Prepare the garment properly, remove wrinkles, and ensure the transfer lies flat before pressing. Pre-press when appropriate for the fabric.
5. DTF Designs Lifting After Washing
If a design begins lifting after washing, the adhesive may not have bonded properly during application. Incorrect garment care can also contribute to the problem.
Solution: Allow at least 24 hours before the first wash unless the manufacturer recommends a different waiting period. Turn the garment inside out, use cold water, and avoid harsh detergents.
Practical Tips for Better DTF Transfer Results
Producing consistent results requires attention to detail. Whether you are applying one design or handling a large apparel order, these practices can help improve your workflow.
Test Before Production: Apply a sample transfer to a spare garment to check the settings and fabric compatibility.
Check Heat Press Accuracy: The displayed temperature may not always reflect the actual temperature across the heating plate. Use an appropriate temperature measurement tool when necessary.
Choose Suitable Fabrics: Different fabrics respond differently to heat. Always check compatibility before applying transfers.
Keep the Application Area Clean: Dust, lint, and other contaminants can interfere with proper adhesion.
Store Transfers Properly: Keep unused transfers in a cool, dry environment and follow the supplier's storage recommendations.
Follow Manufacturer Instructions: Avoid using identical settings for every transfer. Temperature, pressure, pressing time, and peeling requirements can vary between products.
Choosing Quality DTF Transfers for Custom Apparel
Transfer quality plays an important role in the appearance and durability of customised clothing. Even with the correct heat press technique, poor-quality materials or incompatible adhesives can affect the finished result.
Businesses, clothing brands, and apparel decorators should consider print clarity, adhesive performance, fabric compatibility, and consistent transfer quality when selecting a supplier.
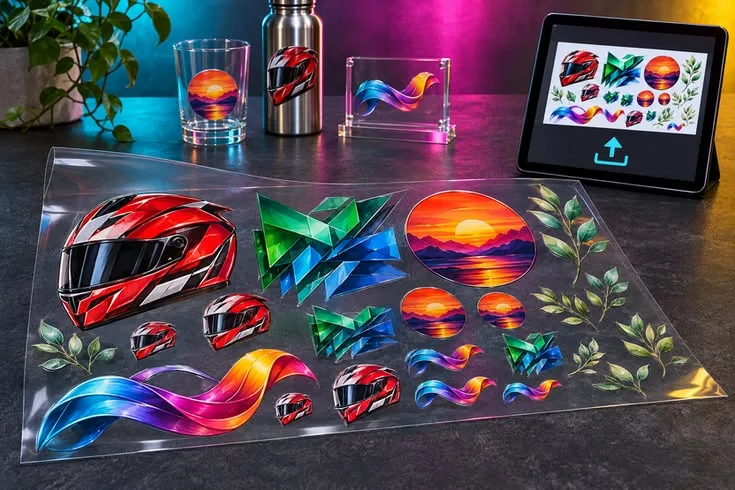
High Quality Transfers LLC helps makers, brands, and small businesses turn their designs into customised apparel, stickers, and hard-good decals through DTF and UV DTF transfer printing.
Choosing reliable transfers and following the correct application process can help reduce production errors and create professional-looking customised products.
Conclusion
Learning how to press DTF transfers correctly is essential for achieving clean, durable, and professional-looking designs. Proper garment preparation, suitable temperature settings, consistent pressure, and correct peeling techniques all contribute to successful applications.
When application problems occur, identifying the underlying cause is more effective than simply increasing the heat or pressing time. Following practical DTF transfer troubleshooting methods can help prevent repeated mistakes and improve production consistency.
Whether you are creating personalised T-shirts, branded uniforms, promotional apparel, or custom clothing collections, understanding the correct application process can make a significant difference in your results.
Contact High Quality Transfers LLC
For quality DTF and UV DTF transfers for custom apparel, stickers, and business projects, contact High Quality Transfers LLC.
Phone: (631) 316-8204
Frequently Asked Questions
1. What temperature should I use to press DTF transfers?
A general starting range is 300–320°F. However, the correct temperature depends on the transfer manufacturer, adhesive, and fabric. Always follow the supplied application instructions.
2. How long should I press a DTF transfer?
Many standard DTF transfers require approximately 8–15 seconds. The exact pressing time depends on the transfer type, temperature, pressure, and garment material.
3. Why is my DTF transfer peeling after pressing?
Peeling can happen because of insufficient heat, incorrect pressing time, uneven pressure, moisture, or incorrect peeling technique. Check the application settings and follow the manufacturer's recommendations.
4. How can I make DTF transfers last longer?
Use the recommended pressing settings and follow the garment care instructions. Allow sufficient time before washing, turn garments inside out, and use cold water with a mild detergent.