
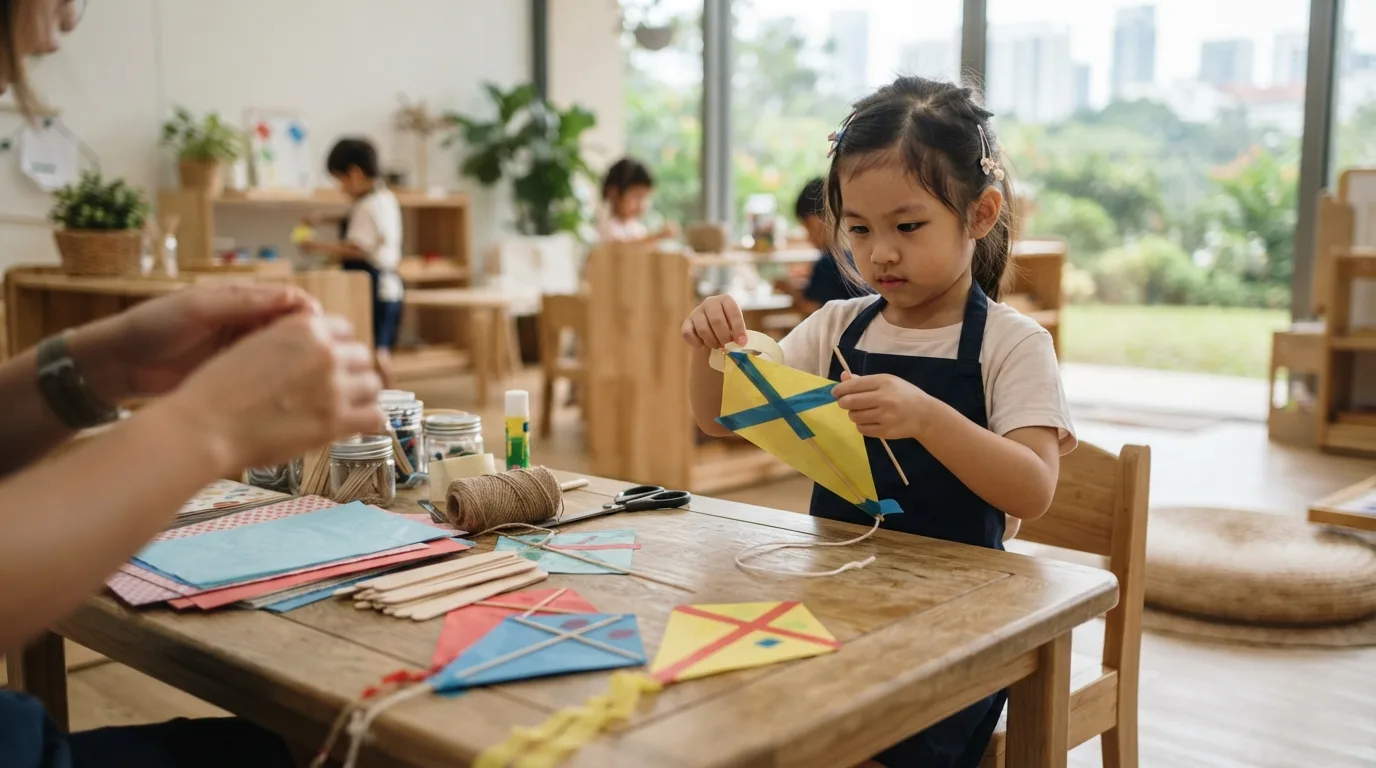
Watching a kite lift into the sky is a small moment of wonder for a young child. Making one themselves makes it even better. Making a kite for preschoolers takes only a few basic materials, and it gives children a hands-on way to cut, stick, decorate, and discover how things move through the air.
For families and preschools in Singapore, this activity brings creativity and outdoor play together. It works well at home on a rainy afternoon or in a classroom before a trip to a nearby park. In this guide, you will find eight easy steps, safety tips and ideas to extend the learning.
An adult should supervise children throughout the activity, especially when they use scissors or play outdoors.
What Do Preschoolers Learn From Making a Kite?
Making a kite gives children an opportunity to develop several skills through one hands-on activity. They practise fine motor skills, hand-eye coordination, creativity and following simple instructions while cutting, joining and decorating the kite. Along the way, children explore basic problem-solving by noticing how changes to the kite's shape, tail or balance affect how it flies. The activity introduces simple ideas about air and movement while encouraging outdoor physical activity, supporting wider early childhood development through active, creative learning.
Materials You Need
You do not need expensive materials to make a simple preschool kite. Lightweight paper, two thin wooden sticks or drinking straws, string, tape, glue, scissors, a ruler and a pencil are all you need. For the tail, use lightweight ribbon or strips of paper, and decorate with crayons, pencils or washable markers. For younger children, an adult should handle scissors and other sharp tools and help with cutting when needed.
Step 1: Choose the Kite Shape
Start by drawing a simple diamond shape on the paper using a ruler to help create straight lines. The shape does not need to be perfect, as the activity is mainly about giving preschoolers a chance to take part. Let your child help draw the shape or decorate the paper before cutting it out. This gives children an opportunity to practise pencil control while creating their own kite design.
Step 2:Cut Out the Kite
An adult should cut around the diamond shape when the child is too young to use scissors safely. Older preschoolers can use child-safe scissors to follow simple lines under close adult supervision. Cutting along a line helps children build hand control and coordination as they learn to guide their movements with purpose.
Step 3:Make the Kite Frame
Place one lightweight stick vertically along the centre of the diamond shape, then place the second stick across it to form a cross. Use tape to hold the two sticks together and keep the frame secure. Make sure the sticks are lightweight and free from sharp or broken edges. An adult should handle the frame and check the materials before giving the kite to a young child.
Step 4:Attach the Frame to the Paper
Place the frame on the back of the kite paper and use small pieces of tape to hold the sticks in place. Check that the frame is secure and does not move when the kite is lifted. An adult should check the finished kite before the child takes it outside. This step introduces children to simple construction by showing how separate materials can be joined to make one working object.
Step 5: Decorate the Kite
Let your preschooler decorate the kite with flowers, stars, animals, shapes or other simple designs. Children can also write their name or create a colourful pattern using crayons, pencils or washable markers. This creative activity gives preschoolers a chance to make choices and express their ideas through art. Keep the decorations lightweight, as too much extra weight can make the kite harder to fly.
Step 6: Add the Kite Tail
Attach a lightweight ribbon or a few narrow strips of paper to the bottom point of the kite to help with balance. Keep the tail light so it does not add too much weight to the kite. Ask your child what might happen when the tail is made longer or shorter, turning the activity into a simple exercise in prediction and observation as children watch what actually happens.
Step 7:Attach the Flying String
Tie the flying string securely to the centre of the kite frame and check that the knot is firmly attached. An adult should inspect the string and knot before using the kite. Choose an open outdoor area away from roads, power lines, water and crowded places. Never allow a child to fly a kite near electrical wires or other overhead cables.
Step 8: Test the Kite Outside
Choose an open outdoor area with enough space for the kite to move safely, such as a local park or other open space, while following park rules and staying away from crowded areas. Let your child hold the kite while an adult manages the flying string, then start by walking slowly into the wind. When the kite does not rise, check that the frame is straight, the paper is secure, and the tail is balanced.
Why Is Kite Making Good for Preschool Learning?
Kite making combines creative, physical and thinking skills in one hands-on activity. Children use their hands to cut, tape and decorate while following steps and solving small problems. Once outside, they observe how wind and movement affect the kite, watching how changes to the frame, tail or string change the result. This makes kite making a useful example of learning through play.
How to Make the Activity Safer for Young Children
Adults should supervise the activity from start to finish and take care when children use scissors, sticks and string. Keep the kite away from power lines, roads, tall trees, water, airports and crowded areas, and avoid flying during strong winds or storms. Children should never climb trees or structures to retrieve a kite. In Singapore's climate, adults should also watch for hot weather, sudden rain and changing wind conditions when choosing a suitable time and place.
Can You Make a Kite Without Wooden Sticks?
Yes, a simple preschool kite works well with lightweight drinking straws instead of wooden sticks. Straws are easy to handle and can be secured to the paper with tape. The finished kite might not fly quite as well as one made with stronger sticks, but it still works fine for a hands-on activity. For younger children, the main aim is making, exploring and learning rather than achieving perfect flight.
How Parents Can Extend the Learning
The kite activity opens the door to other simple learning experiences at home. Children can draw different kite shapes, count the tail strips, compare long and short tails or explore pictures of kites from different countries. Parents might also read stories about flying, wind or outdoor adventures and talk about what happens along the way. These follow-up activities build language and literacy, early maths and discovery of the world, all through the same simple idea.
How Teachers Can Use Kite Making in Preschool
Teachers can use kite making as an art, science or outdoor learning activity for preschoolers. Children work alone or in small groups as they explore simple ideas about wind, movement, shapes, and balance, creating, communicating, and learning through hands-on experience. Teachers can refer to resources from ECDA and the Ministry of Education when planning age-appropriate activities.
Final Thought
Making a kite for preschoolers is much more than a craft project. Children can practise cutting, sticking, drawing and decorating while developing fine motor skills and creativity. Once the kite is taken outdoors, they can observe wind, movement and balance while learning through hands-on exploration.
For parents and preschools in Singapore, this activity can bring indoor creativity and outdoor learning together. At Children’s Cove, choosing the right preschool in Singapore means investing in a child’s ability to thrive both socially and emotionally. Children can make predictions, ask questions and discover what happens when they change different parts of their kite.
The most important part is not whether the kite flies perfectly. The real value comes from giving children the chance to create something with their own hands, explore how it works and enjoy the learning process with an adult.
FAQs
1. What is the easiest kite for a preschooler to make?
A simple diamond-shaped paper kite is one of the easiest options for a preschool activity. It requires basic materials such as lightweight paper, tape, string and thin supports.
2. What type of paper is best for making a children's kite?
Lightweight paper works well because it is easier for a small kite to lift. Very thick or heavy paper can make the kite difficult to fly.
3. What is the best weather for flying a kite with children?
A gentle breeze is generally more suitable than very strong winds. Adults should avoid storms, heavy rain and unsafe outdoor conditions.
4. How long should a preschool kite's tail be?
There is no single length that works for every homemade kite. A lightweight tail can be added and adjusted during testing to see how it affects the kite's balance.
5. What skills does kite making develop in preschoolers?
Kite making can support fine motor skills, hand-eye coordination, creativity, communication, problem-solving and early understanding of movement, wind and balance.