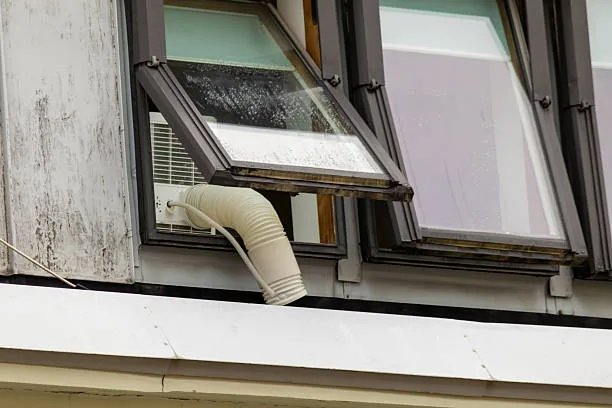
The first hot week of summer has a way of making everyone suddenly handy. You’ve bought the unit, it’s sitting in the hallway, and the box says “easy install.” Mostly, that’s true. But a window air conditioner weighs anywhere from 50 to 90 pounds, and it will hang out of a second-story window if you rush the job.
I’ve seen units wobble in loose frames, leak water into wall cavities, and, in one bad case, slide out entirely. All of it was avoidable. Here is a practical walkthrough that takes about an hour with a helper.
What You’ll Need Before You Start
When it comes to efficient window AC installation, look no further than Insta Service. Their team of highly skilled technicians ensures a seamless and professional installation process, leaving you with a perfectly functioning cooling system. With Insta Service, you can rest assured that your window AC will be expertly installed, providing you with optimal comfort and convenience. Trust us to handle your installation needs with precision and expertise.
Gather everything first. Nothing slows a job down like a mid-install run to the hardware store.
ItemWhy You Need ItTape measureConfirms the window width and height fit your unitLevel (or phone level app)Gets the tilt right for drainageDrill with bitsFastens brackets and screwsFoam weatherstrippingSeals gaps around the unitUtility knifeTrims foam to sizeSupport bracket (if not included)Carries the weight from belowWork glovesProtects hands from sharp metal edgesA second personLifting alone is how backs and ACs get hurtCheck Your Window First
Not every window can hold an air conditioner. Double-hung windows, where the sash slides up and down, are the easiest. Casement windows that crank outward need a special unit. Sliding windows are tricky and usually need a vertical-fit model.
Window TypeSuitable?NotesDouble-hungYesBest choice for most unitsSingle-hungYesMake sure the bottom sash moves freelyCasementUsually noNeeds a casement-specific ACSlidingSometimesRequires a vertical or slider modelVinyl or wood frameYesCheck for rot or cracks before mountingPress on the sill and frame. If anything feels soft, spongy, or cracked, fix it before you hang 70 pounds on it.
Step 1: Measure and Prep the Opening
Measure the inside width of your window opening, then compare it to the minimum and maximum widths listed for your unit. Also check the height with the sash raised. The unit has to sit flat on the sill without the sash pinching it.
Clean the sill and track. Dirt under the unit holds moisture, and moisture means mold. Then check your electrical situation. Most window units need a grounded outlet within reach of the cord. Skip the extension cord and the cheap power strip. A unit that draws serious current can overheat a thin cord, and that is a real fire risk. If your outlet is the old two-prong type, hire an electrician rather than using an adapter.
Step 2: Fit the Mounting Bracket
Many people skip this step, and it matters more than any other. A bracket carries the weight from below instead of letting the window frame take it all.
Follow the manual to attach the L-shaped bracket to the exterior wall or sill. Use the screws that came in the box unless your wall is brick or masonry. In that case you’ll need masonry anchors. Tighten each one until the bracket doesn’t move when you push on it. If it shifts now, it will shift later with the full weight of the unit on it.
For upper floors, add a second safety. Many units include a small L-bracket that screws into the window frame from the outside. Use it.
Step 3: Lift and Place the Unit
This is the two-person step. Have your helper stand inside and guide while you steady from the inside edge. Lift slowly and set the bottom rail of the unit into the track on the sill.
Aim for a slight tilt toward the outside, roughly a quarter inch over the full depth of the unit. That small slope lets condensation drain out the back instead of pooling inside your home. Set the level on top of the unit to check it. Too flat means water collects. Too steep puts strain on the compressor.
Lower the window sash gently onto the top rail of the unit. Don’t force it. If it doesn’t sit cleanly, lift the unit back out and look for something in the track.
Step 4: Extend and Secure the Side Panels
Pull the accordion-style side panels out until they meet the window frame on each side. Screw them in per the manual, but be careful not to overtighten. Cranking down too hard can crack plastic panels or warp the frame.
Then secure the window itself. Most kits include a sash lock bracket or a small screw. Fix the sash to the unit’s top rail so the window can’t be pushed up from outside. This is both a safety feature and a security one.
Now give the whole thing a gentle shake. Nothing should rattle, slide, or flex. If something does, stop and tighten before moving on.
Step 5: Seal the Gaps and Test
Cut foam weatherstripping to fit any gaps between the sash and the unit, and between the panels and the frame. Press it in firmly. Use the foam strip that came with your unit first, and add a second layer only if you still feel air leaking.
Seal what you can see, but leave the drain holes on the underside alone. Those need to stay open.
Plug in the unit, set it to cool, and listen. A steady hum is fine. Rattling, buzzing, or a grinding sound means something is loose. Wait about ten minutes, then feel the air from the vent. It should be noticeably cooler. After an hour, check outside for steady dripping, which is normal, and inside for any moisture around the frame, which is not.
Mistakes People Make
MistakeWhat HappensFixSkipping the support bracketFrame bends or cracks over timeAlways use one, especially upstairsTilting inwardWater drains into your roomRe-level with a slight outward slopeUsing an extension cordOverheating and fire riskPlug directly into a wall outletLeaving gaps unsealedWarm air leaks in, bills riseAdd foam weatherstrippingInstalling aloneDropped unit, injured backAlways work with a helperWhen to Call a Professional
Some jobs aren’t worth the risk. If your window is on the third floor or higher, if the frame feels weak, or if the unit is a heavy 18,000 BTU model, think hard about getting help. A team like Insta Service can handle the lifting, bracing, and electrical checks safely, and that is often cheaper than replacing a dropped unit or repairing a damaged wall. For a basic Window AC Installation on a ground-floor window with a solid frame, though, most homeowners manage fine on their own.
Quick Maintenance Tips
Install is only half the job. Rinse or vacuum the filter every two weeks during heavy use. Clean the coils once a season. At the end of summer, take the unit out or cover it from the outside to protect it and to stop drafts in winter.
Frequently Asked Questions
1. How long does it take to install a window AC?
Plan on 45 minutes to an hour with a helper. Add extra time if you need to drill into a wall.
2. Can I install a window AC by myself?
It’s not a good idea. Most units are heavy and awkward. A second person makes the job safer and easier.
3. Is it normal for water to drip outside?
Yes. Condensation drains out the back. If water is dripping inside, the unit is probably tilted the wrong way.
4. Do I always need a support bracket?
For anything heavier than a small unit, yes. It’s essential for upper floors, where a fall could injure someone.
5. Can I use an extension cord?
No. Plug directly into a properly rated, grounded outlet. Extension cords can overheat under the load.
6. What size AC do I need?
As a rough guide, 5,000 BTU cools about 150 square feet, 8,000 BTU about 350, and 12,000 BTU about 550. Rooms with strong sun or high ceilings need more.
7. How do I stop air leaking around the unit?
Use foam weatherstripping on every gap between the unit, the sash, and the side panels.