A clean and prepared Shopify navigation menu is important for any online shop. Properly based Shopify menus make it easy for traffic to discover products, collections, and pages, enhancing personal enjoyment (UX) and growing sales. This manual gives a step-by-step approach to preparing Shopify menus efficiently, making sure each one is professional and easy to navigate.
Why Organizing Shopify Menus Matters
Your Shopify navigation serves as the roadmap for your online shop. Disorganized menus can confuse customers, reduce engagement, and increase soar costs. Well-dependent Shopify menus assist:
Guide traffic to products and collections quickly.
Highlight crucial pages like Contact, About, or Sale.
Improve website online usability on desktop and cellular devices.
Enhance search engine optimization by presenting clear inner links.
Investing time to prepare your Shopify navigation menu properly ensures a seamless shopping experience.
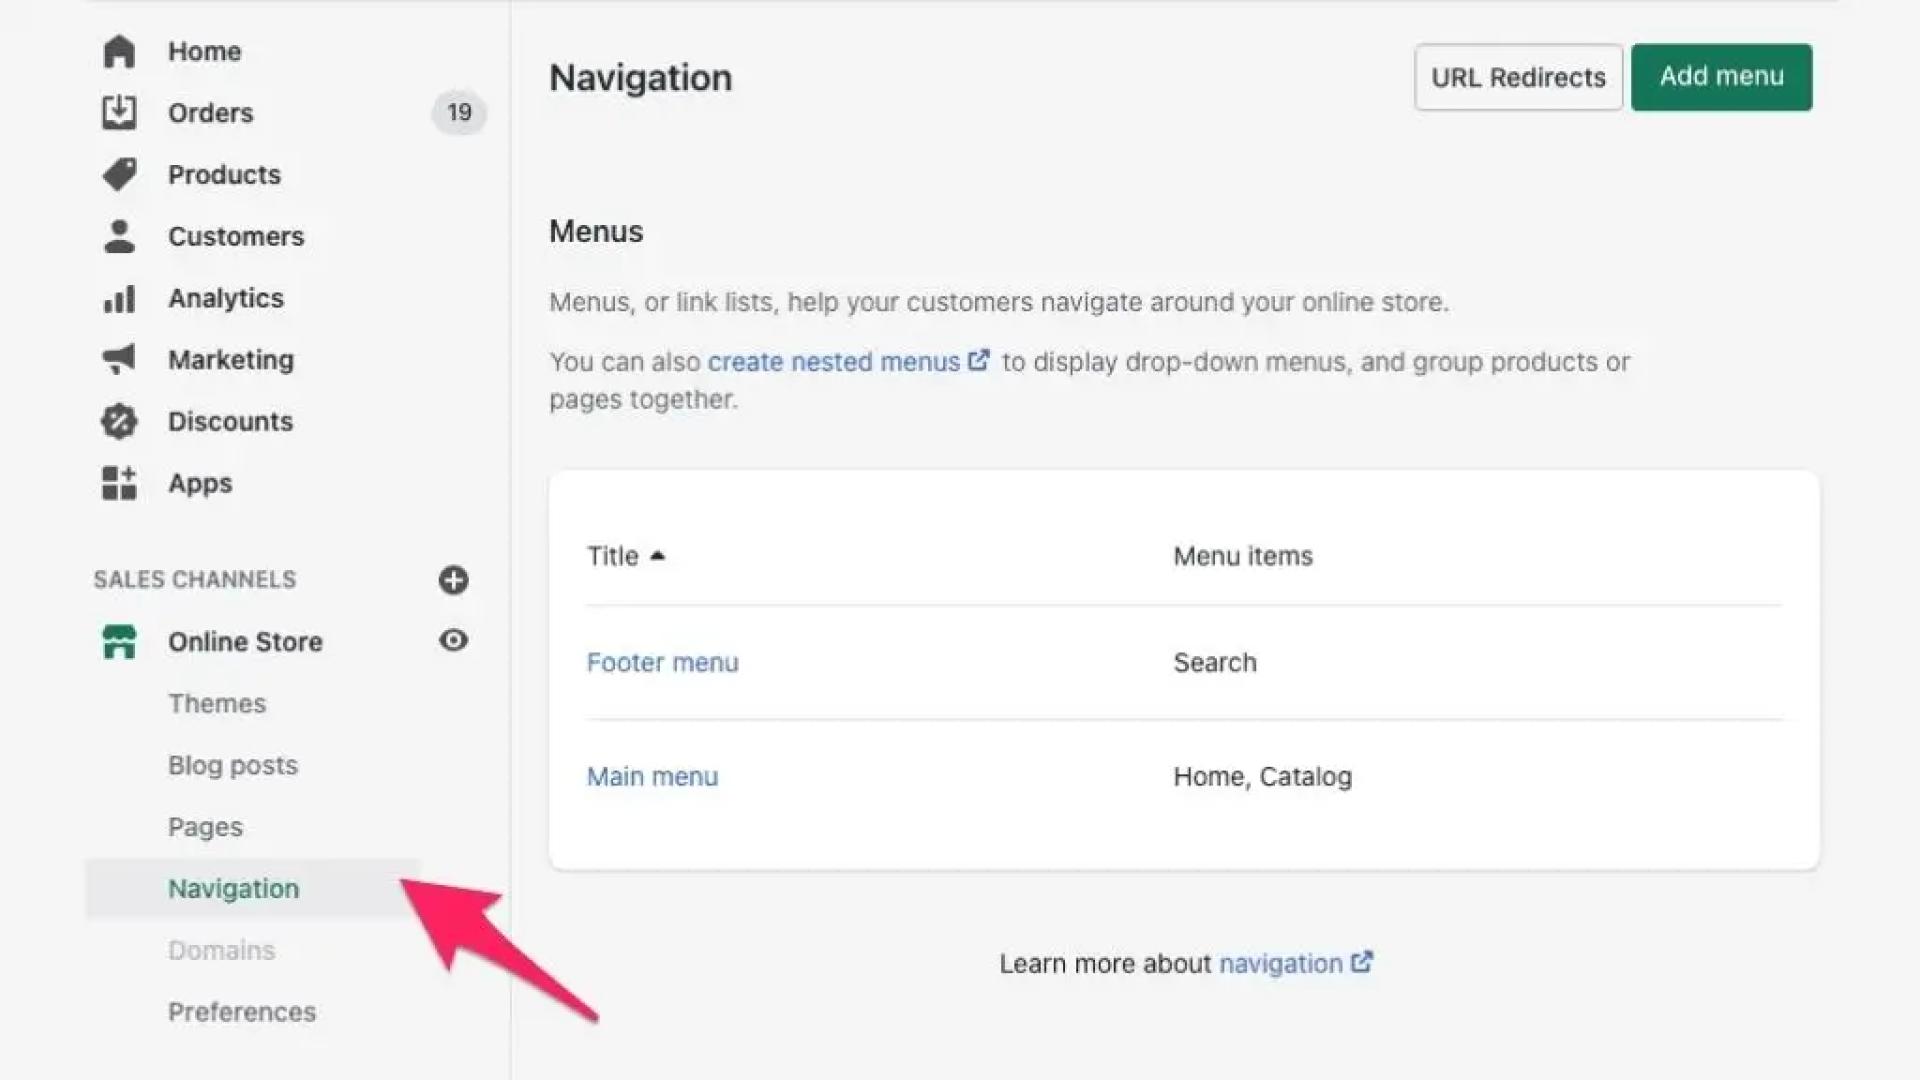
Step 1: Access Shopify Navigation
To start organizing Shopify menus:
Log in to your Shopify admin panel.
Click Online Store from the left-hand menu.
Select Navigation.
Here, you’ll see all of your existing Shopify menus, along with the Main Menu and Footer Menu. You can edit current menus or create a brand new menu for progressed organization.
Step 2: Plan Your Menu Structure
Before making adjustments, plan your Shopify navigation:
Top-stage gadgets include predominant categories like Shop, Collections, Contact, and About. Limit to five–7 objects.
Dropdowns: Nest subcategories under determined items (e.g., Shop > Women > Dresses).
Footer menus: Include guidelines, FAQs, and secondary hyperlinks, which can be essential but are not number one navigation items.
Planning guarantees your Shopify menus are logical and clean to observe.
Step 3: Add or Edit Menu Items
To add a menu object:
Click Add Menu Item.
Enter a descriptive name together with “New Arrivals” or “Men’s Accessories.”
Choose a hyperlink type: web page, collection, product, or outside URL.
Click Add and shop the menu.
To edit current menu objects, click on the item, adjust the textual content or link, and keep changes. Clear labels improve your Shopify navigation menu and reduce customer confusion.
Step 4: Organize Menu Items with Drag-and-Drop
Shopify allows drag-and-drop functionality to arrange menus:
Reorder objects to prioritize essential categories.
Create dropdown menus by way of nesting sub-gadgets below discernible objects.
Example: Shop > Electronics > Smart Devices.
Organized Shopify menus enhance usability and make it easier for clients to navigate massive shops.
Step 5: Customize Appearance (Optional)
Depending on your theme, you can visually beautify your Shopify navigation menu:
Change fonts, colorations, or patterns to be in shape with branding.
Add icons or snapshots to menu items.
Adjust dropdown layouts for better visible hierarchy.
Customizing your Shopify menu creates an attractive and professional look at the same time as preserving functionality.
Step 6: Test Your Organized Menus
Once organized:
Preview your store on laptops and cellular devices.
Click through each menu item to ensure links work efficiently.
Make changes if objects are misaligned or puzzling.
Testing ensures your Shopify navigation is absolutely practical and person-friendly.
Best Practices for Organizing Shopify Menus
Keep pinnacle-stage gadgets concise (five–7 hyperlinks).
Use descriptive, constant labels for clarity.
Group related gadgets underneath dropdown menus.
Highlight vital pages or collections at the pinnacle.
Update Shopify menus regularly to mirror new products or promotions.
Conclusion
Organizing Shopify menus is critical for offering a smooth buying experience. A properly dependent Shopify navigation menu courses visitors effectively, complements usability, and encourages exploration. By following this step-by-step guide, shop owners can create intuitive, professional, and absolutely practical Shopify navigation, enhancing each consumer experience and conversions.