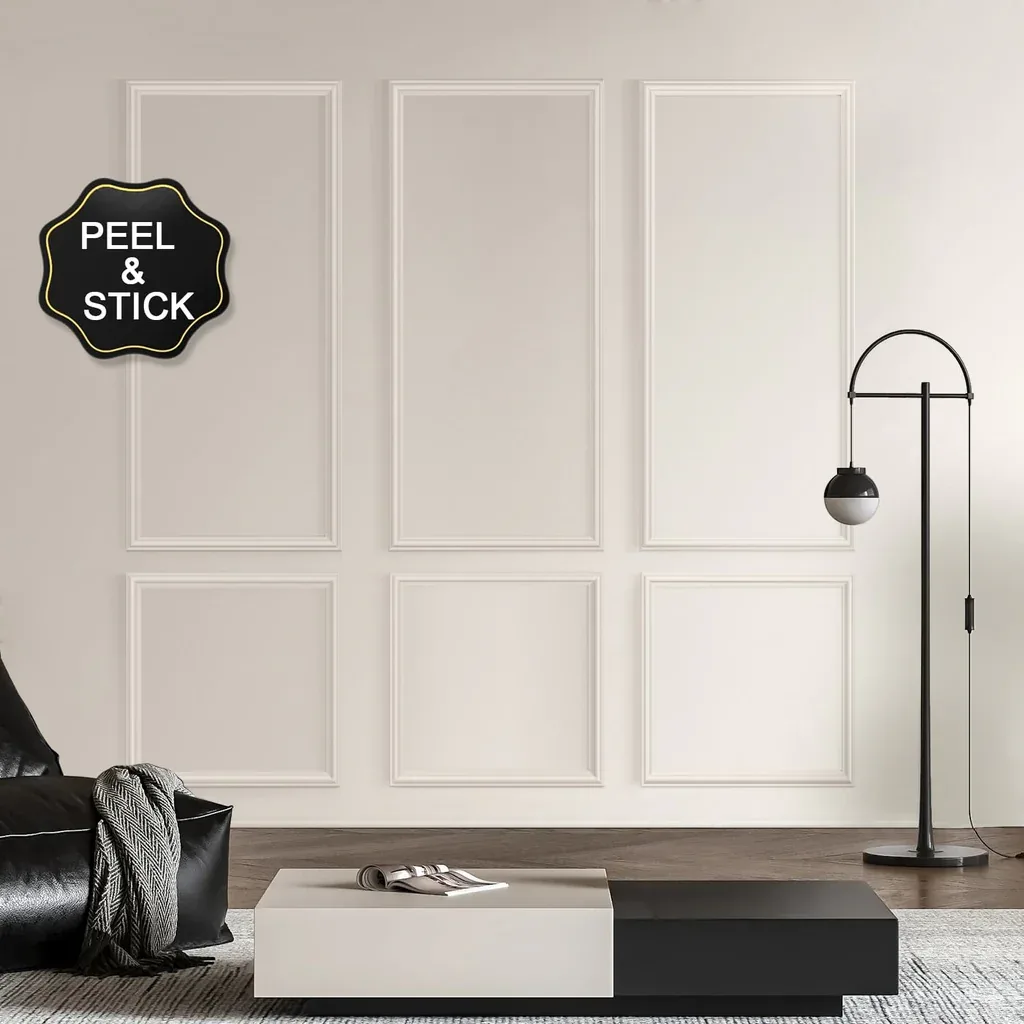
Let us be honest about something most home improvement articles dance around: not everyone owns a nail gun, and not every rental lease allows you to hammer things into walls. That reality has stopped more people from adding character to their spaces than any lack of design taste ever could. The peel and stick wall molding kit was built for exactly this gap between wanting elegance and being able to permanently alter your walls. These kits replace nails, adhesives that require clamping, and the general permanence of traditional trim with a simple pressure-sensitive backing that bonds firmly yet removes cleanly when the time comes. What you get is architectural detail that goes up in an afternoon and comes down just as easily, making it the perfect solution for apartment dwellers, indecisive decorators, and anyone who likes to refresh their home every few years without patching a hundred tiny holes afterward.
How Peel and Stick Technology Actually Works on Walls
The adhesive backing on these molding kits is not the same stuff you find on a child’s sticker collection, nor is it the aggressive, wall-damaging glue of cheap command strips. Most quality kits use a high-bonding acrylic foam tape that has been engineered specifically for trim applications. This tape creates an immediate grab when pressed into place, but it reaches its full holding strength over the next twenty-four hours as the foam conforms to the microscopic texture of your wall surface. The key detail here is that the bond is pressure-activated, meaning you cannot just stick the piece up and walk away. You need to apply firm, rolling pressure along the entire length—a wallpaper seam roller works beautifully for this—to ensure every inch of tape makes full contact. On flat painted drywall, this creates a surprisingly strong hold that can support lightweight polyurethane molding for years. On textured walls, the bond is less aggressive, which is actually a feature because it tells you honestly whether the product will work in your specific home before you commit to an entire room.
Comparing Stick Options to Traditional Installation Methods
Traditional molding installation feels like a marriage ceremony: you say your vows with construction adhesive and nail everything down with the clear understanding that separation will be expensive and messy. Peel and stick molding is more like a committed rental agreement—solid while you need it, but with a clean exit strategy. The trade-offs are real and worth understanding. You lose some holding power compared to mechanical fasteners, so very heavy or thick molding profiles are not good candidates for peel and stick. You also need to be more careful about surface preparation because the tape will only stick as well as the paint underneath it allows. What you gain is speed, simplicity, and reversibility. A traditional molding installation might take two days when you factor in drying times for adhesive and multiple rounds of caulking. A peel and stick kit can go from unboxed to finished in an afternoon, with no drying wait and no filler to sand. For renters especially, this difference is everything—you get the upgraded look now, and you get your security deposit back later.
Preparing Your Wall Surface for Success
The single biggest reason peel and stick molding fails is not the tape’s fault; it is the wall’s fault. Before you peel anything, spend twenty minutes on prep work that will determine whether your molding stays up for years or falls down overnight. Wash the wall surface with a mild degreaser or a solution of dish soap and water, then wipe it dry completely. Pay special attention to areas near kitchen stoves or bathroom sinks where invisible cooking oils or hair products have been slowly depositing themselves for months. Next, run a clean finger over the wall. If it feels dusty or chalky, wipe again with a tack cloth until the surface feels smooth and clean. Finally, test your wall’s paint quality by pressing a piece of the included tape to an inconspicuous spot and yanking it off firmly. If the paint peels away from the drywall, you have a poorly bonded paint layer that will fail no matter what you stick to it. That problem requires either a different installation method or a fresh coat of primer before proceeding.
Step by Step Application That Anyone Can Follow
With your walls clean and your layout marked with painter’s tape, application becomes almost meditative. Start at a corner or an edge, peeling back only about two inches of the adhesive liner to expose the sticky surface. Position the molding exactly where you want it, press that first exposed section firmly, then slowly pull the remaining liner away as you work your way down the length of the piece. This incremental approach prevents the tape from folding onto itself or picking up dust from the air before it meets the wall. Once the whole piece is in place, go over every inch with a seam roller or the back of a wooden spoon, applying steady pressure until you feel the tape compress fully against the wall. For inside corners where two pieces meet, leave a tiny gap—about the thickness of a credit card—to account for the fact that no wall is perfectly square. That gap gets filled with a dab of paintable caulk later, and no one will ever know it exists.
Painting and Finishing Without Damaging the Adhesive
One of the most common questions about peel and stick molding is whether you can paint it without weakening the bond. The answer is yes, with a few simple precautions. Let the molding sit untouched for at least twenty-four hours after installation so the adhesive reaches its full strength. When you do paint, use a water-based latex paint and apply it in thin, even coats. Avoid oil-based paints, which contain solvents that can soften the acrylic adhesive over time. Also avoid using a heat gun or hair dryer to speed drying, because heat is the one thing that reliably weakens pressure-sensitive adhesives. Use a small foam roller for the face of the molding and a brush to cut into the edges where the molding meets the wall. Be careful not to let paint seep behind the molding—the bond is strong, but it is not a waterproof seal, and pooled paint can act as a lubricant that lets the tape slide off the wall.
Removing the Molding When the Time Comes
The removal process is where peel and stick kits truly separate themselves from traditional options. When you are ready to take the molding down, warm the adhesive slightly with a hair dryer on its lowest setting, moving constantly to avoid overheating the molding itself. Slip a plastic putty knife or a flexible drywall knife behind one end of the piece and gently pry while continuing to apply heat. The tape should release gradually, leaving the foam layer on the wall or coming off cleanly with the molding depending on the brand. Any residue left behind comes off easily with a citrus-based adhesive remover or even just a pink eraser for smaller spots. Compare that to prying off nailed molding, which always takes chunks of drywall with it, or construction adhesive, which often requires cutting out and replacing entire sections of wallboard. Being able to reverse your design decision without calling a drywall repair specialist is a freedom that changes how you think about home decorating.
Best Rooms and Surfaces for Peel and Stick Applications
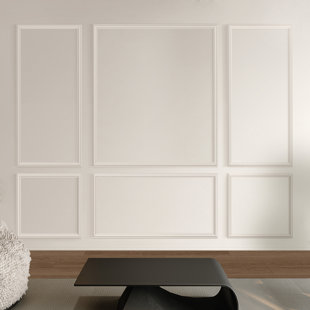
Not every wall in your house is a good candidate for peel and stick molding, and knowing where to use it saves you from disappointment. Smooth, flat, well-painted drywall is the ideal surface—think living rooms, dining rooms, bedrooms, and hallway walls that are not subject to direct moisture. Textured walls like orange peel or knockdown can work but require wider molding profiles that span multiple texture peaks, and you should expect a somewhat shorter lifespan before edges start lifting. Bathrooms are tricky because steam can soften the adhesive over time, though a properly installed kit in a well-ventilated bathroom away from the shower can still last for years. What you should never do is apply peel and stick molding to unpainted drywall, raw wood, wallpaper, or any surface with visible peeling paint. Those surfaces lack the solid foundation the adhesive needs, and the molding will fail no matter how carefully you press it down. Choose your location wisely, and this product will reward you with a beautiful, temporary upgrade that feels anything but temporary.