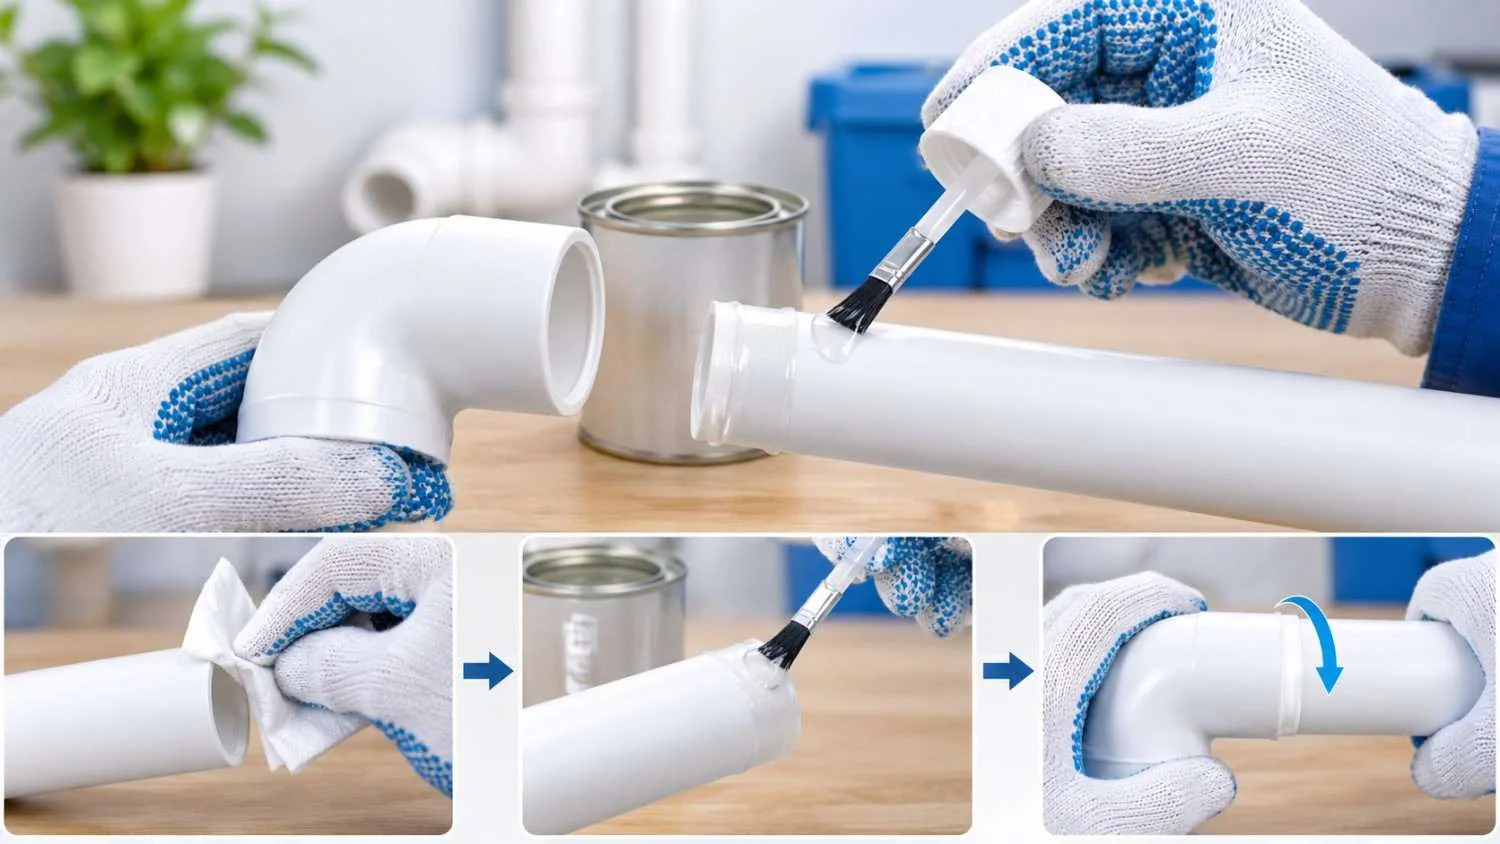
A plumbing line is only as good as its joints. You can buy the best pipes in the market, but one badly made joint can leak and ruin the whole job. The good news is that making a strong joint is simple once you know the right method. In this guide, we explain how to use UPVC solvent cement properly, step by step, with a few practical tips from StarmaX Pipes and Fittings.
What Is UPVC Solvent Cement?
UPVC solvent cement is not ordinary glue. It contains solvents that slightly melt the surface of the pipe and the fitting. When you press the two parts together, the softened plastic blends and hardens into one piece. This is called solvent welding, and it is why a well-made joint can be as strong as the pipe itself.
That is why UPVC pipe solvent cement is the standard choice for water supply, home plumbing and many irrigation lines.
Why Product Quality Matters
Cement that is too thin, too thick or old can fail under water pressure. When you look for the best UPVC solvent cement, check these things:
- It is made for UPVC and PVC, not for general use.
- Its thickness suits your pipe size.
- It gives you enough working time before it sets.
- It comes from a reliable UPVC solvent cement supplier who sells fresh stock.
Climate also plays a role. In most parts of India, summers are hot and cement dries quickly, so a dependable UPVC solvent cement India buyers trust makes your work easier.
StarmaX Pipes and Fittings makes SuperFix 710, a clear cement of medium consistency. It sets quickly, produces fewer harmful fumes than many older products, and works for pipes up to 160 mm (6 inches) and fittings up to 110 mm (4 inches). It comes in tins from 59 ml to 1 litre, so you can pick a pack that suits a small repair or a large site.
What You Need Before Starting
- UPVC pipes and fittings
- UPVC solvent cement with a brush
- Pipe cutter or fine-tooth saw
- Sandpaper or a deburring tool
- Clean cotton cloth
- Marker pen
Keep everything close by. Once you open the tin, you have limited time to finish the joint.
Step-by-Step Pipe Joining Guide
Step 1: Measure and cut. Mark the length on the pipe and cut it straight. A slanted cut leaves gaps inside the joint, and gaps lead to leaks.
Step 2: Smooth the edges. Remove rough edges from inside and outside the cut end. Then lightly bevel the outer edge. This stops the cement from being scraped off as the pipe slides into the fitting.
Step 3: Do a dry fit. Push the pipe into the fitting without any cement. It should go in part of the way and then feel snug. Mark the socket depth on the pipe so you know how far to push it later.
Step 4: Clean both surfaces. Wipe the pipe end and the inside of the fitting with a dry cloth. Dust, grease and moisture weaken the bond.
Step 5: Apply the cement. Brush a thin, even coat inside the fitting first. Then apply a slightly thicker coat on the pipe end up to your mark. Avoid heavy application, because extra cement can collect inside the pipe, soften the wall and slow down water flow.
Step 6: Join and turn. While the cement is still wet, push the pipe into the fitting with a quarter turn. The twist spreads the cement evenly and pushes out trapped air. Go all the way to the mark.
Step 7: Hold steady. Keep the joint pressed for about half a minute, because the pipe can try to slide back out. Wipe off any cement that has squeezed out.
Step 8: Let it cure. Do not run water straight away. Curing time depends on temperature, humidity and pipe size, so follow the instructions printed on the tin. Pressure testing too early is one of the most common reasons for failed joints.
Common Mistakes to Avoid
- Applying too much cement. A thin layer bonds better.
- Working on damp pipes. Water prevents proper welding.
- Moving slowly. If the cement starts to dry, wipe it off and apply fresh cement.
- Using old cement. If it looks lumpy or stringy, replace it.
- Skipping the dry fit. It takes a few seconds and saves a lot of rework.
For more help with leaks and bonding issues, read this guide on fixing common UPVC solvent cement problems.
Safety and Storage
The fumes are strong, so work in a well-ventilated space and keep the tin away from fire and heat. Wear gloves to protect your skin. After use, close the lid tightly and store the tin in a cool, shaded spot so it stays fresh.
Pick Matching Products
Pipes, fittings and cement work best when they are designed to go together. Along with cement, StarmaX offers UPVC pipes and fittings for homes, offices and industrial sites. Buying everything from one trusted source gives you better fit, better bonding and fewer surprises later.
Final Thoughts
Good joints come from simple habits: cut straight, clean well, apply a thin coat, join quickly and give the joint time to cure. Follow these steps with quality UPVC solvent cement, and your plumbing will stay leak-free for years.
Planning your next job? Explore the range from StarmaX Pipes and Fittings and get the right cement for your pipes.