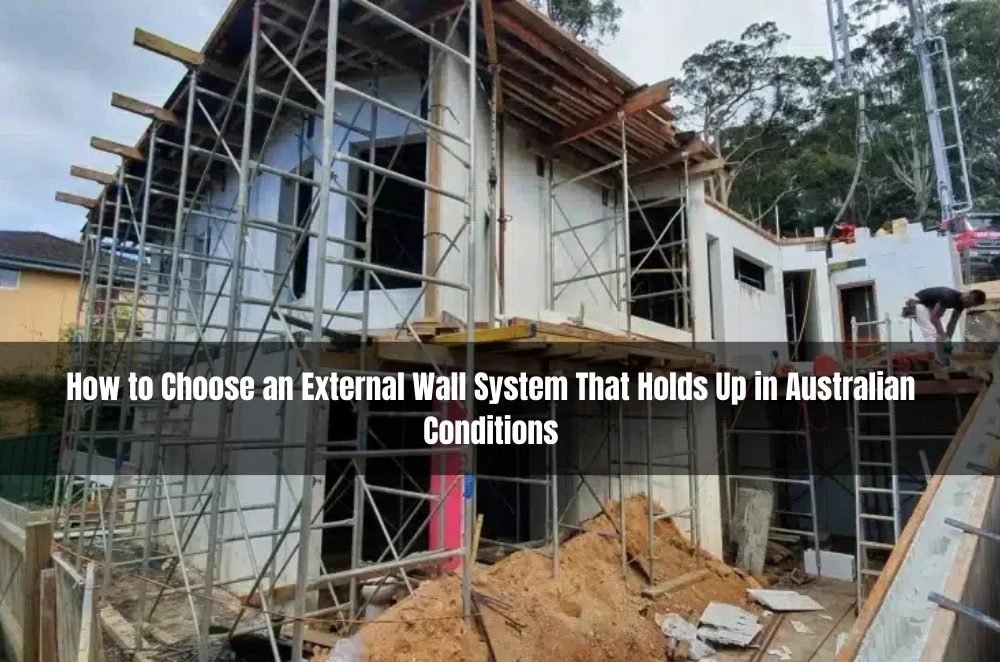
External walls have one job that matters more than the brochure: keep the inside comfortable and dry while the outside does its worst.
If you’re planning a new build, a major renovation, or a reclad, the “right” wall isn’t a single product—it’s a set of layers and details that work together under your site conditions, your buildability constraints, and your maintenance reality.
This guide walks through how to choose an external wall approach that reduces call-backs, avoids moisture surprises, and stays practical for real-world installs.
Start with the job, not the product
Begin by writing down what the wall must do on this project, because the same façade that performs well in one suburb can struggle in another.
1) Site exposure and microclimate
Wind-driven rain, salt air, high UV, and temperature swings all change the risk profile of joints, sealants, coatings, and fixings. A sheltered infill site can tolerate different detailing than an exposed corner lot, and a coastal location demands extra attention to corrosion resistance and maintenance access.
2) Building type and occupancy
A family home, a childcare centre, and a light-industrial office have different expectations for acoustic comfort, impact resistance, and how quickly any moisture issue must be detected and rectified.
3) Build program and trade availability
Some wall approaches are forgiving; others demand tight sequencing and specialist installers. If the program is compressed or the labour market is thin, favour a system that can be installed consistently and inspected easily.
4) Risk tolerance and maintenance appetite
If the owner expects “set and forget” for 15 years, choose details that are serviceable, robust, and not reliant on perfect sealant lines in inaccessible places.
A wall system that looks great on day one can still be a poor choice if it’s hard to execute and harder to maintain.
What “good” looks like in an external wall
A durable external wall is less about any single layer and more about controlling four flows: water, air, vapour, and heat.
Water management is the obvious one—keep bulk water out and make sure any that gets in can drain and dry without soaking the structure.
Air leakage matters because it carries moisture and undermines thermal comfort; even small gaps around junctions can turn a “high performance” wall into a drafty, condensation-prone assembly.
Vapour control is about recognising where moisture will move through materials and where it might hit a cold surface and condense, especially when indoor conditions differ sharply from outdoors.
Thermal performance isn’t just about a headline R-value; it’s about continuity, avoiding thermal bridges at slabs, openings, and fixings, and ensuring insulation stays dry enough to do its job.
If you keep those four flows in mind, the choices around cladding, wraps, cavities, insulation type, and internal linings become clearer.
Common mistakes that cause call-backs
Most expensive wall failures don’t start with “bad materials”—they start with small decisions that compound across junctions and trades.
Mistake 1: Treating penetrations as an afterthought
Pipes, cables, vents, and fixings turn a neat drawing into dozens of potential leak points. If penetrations aren’t designed as part of the wall build-up, the install ends up relying on site improvisation.
Mistake 2: Inconsistent cavity and drainage detailing
A cavity that’s too tight, bridged by mortar droppings, or interrupted by ad-hoc packers can trap water instead of draining it. The wall might look fine until a run of storms exposes the weak points.
Mistake 3: Flashings that don’t “talk” to the layers
Flashings only work when they integrate with the water-resistive layer and the drainage path. A beautifully folded flashing that dumps water behind a membrane is still a failure.
Mistake 4: Overconfidence in sealants
Sealants can be part of a weathering strategy, but they are not a strategy by themselves. They age, they move, they crack, and they are hardest to maintain where you most need them.
Mistake 5: Thermal bridges at the obvious spots
Slab edges, balcony penetrations, window frames, and steel elements can create cold surfaces where condensation forms. That condensation can mimic a leak and lead to costly investigations.
Mistake 6: No clear inspection points
If the system can’t be inspected during install (or later), quality becomes a matter of hope. Design in checkpoints: before cladding goes on, at window install, and at membrane continuity.
The best prevention is choosing an approach that makes correct installation the easiest path, not the heroic one.
Decision factors when choosing a wall approach or provider
Once you understand the project’s “job to be done,” choose an external wall approach by weighing these practical factors.
Documentation quality and clarity
Look for assemblies that are explained in plain terms with clear build-ups, junction details, and sequencing guidance. Good documentation reduces on-site guesswork and helps align expectations between designer, builder, and installer.
Detailing support at interfaces
Most complexity lives where materials meet: slab to wall, wall to roof, window to wall, and service penetrations. A provider who helps resolve these junctions early can prevent expensive redesign mid-build.
Tolerance and buildability
Some systems assume straight substrates, perfect plumb, and consistent fixing patterns; real sites are rarely that kind. Ask how the wall approach handles minor deviations, movement, and trade variability without compromising the weathering line.
Moisture strategy you can explain in one minute
If no one on site can articulate “where water goes if it gets behind the cladding,” it’s a red flag. A simple, shared mental model is often the difference between a wall that drains and one that traps.
Maintenance and access
Cladding and coatings age; joints move; sealants fail. Decide what needs periodic inspection and how it will be reached safely and affordably, especially on upper levels and tight boundaries.
Compatibility with the rest of the specification
Check how the wall approach interacts with the window schedule, insulation strategy, fire considerations, and acoustic goals. Misalignment here is where “scope gaps” become disputes.
If a project is moving quickly, having a single reference page to align drawings, detailing questions, and scope assumptions can help—see the Rise Products external wall guide.
Operator Experience Moment
On busy sites, the fastest way to lose quality is to assume the wall will “come together” once the cladding turns up. I’ve found the most reliable outcomes happen when the team agrees early on three things: the drainage path, the critical junction details, and the inspection moments before everything gets covered up. It sounds basic, but it prevents the late-stage scramble where every trade is trying to solve the same interface in a different way.
A simple first-actions plan for the next 7–14 days
You don’t need a full redesign to reduce risk; you need a short, disciplined sprint that turns assumptions into decisions.
Day 1–2: Write the wall “brief”
Document exposure, occupant needs, acoustic/thermal expectations, and maintenance appetite in a single page.
Day 2–4: Map the interfaces
List every junction and penetration type: windows, doors, balconies, roof abutments, meter boxes, AC penetrations, downpipes, decks, and garage transitions.
Day 4–6: Choose a draft wall build-up
Pick a candidate assembly and sketch the layer order from outside to inside, including where drainage and air control sit.
Day 6–8: Pressure-test buildability
Walk the sequence with the builder (or installer): what gets installed first, what must be inspected, and what commonly gets missed.
Day 8–10: Turn “nice to have” into “must show” details
Create a short list of junctions that must be drawn before procurement and nominate who owns each detail.
Day 10–14: Lock a QA plan
Set inspection checkpoints and photo requirements, and confirm how nonconformances are documented and fixed before cladding hides them.
One good week of alignment can save months of frustration later.
Local SMB mini-walkthrough (Australia)
A small design-and-construct builder is pricing a two-storey extension with new windows and a mix of old and new wall lines.
The site gets afternoon storms, and the boundary is tight, so access for future resealing is limited.
They pick a wall approach with a clear drainage cavity story and agree on window-to-wall details before frames are ordered.
The foreman schedules a membrane continuity check the day before cladding starts, with photos stored in the job folder.
Penetrations are standardised: same sleeves, same sealant system, same finishing method across trades.
They add one maintenance note to handover: what to inspect annually and which joints to re-check after the first year.
Practical Opinions
Prioritise a wall approach that makes drainage and drying obvious at every junction.
Pay extra attention to windows, balconies, and penetrations before spending energy on façade aesthetics.
If the install sequence feels fragile, simplify the system rather than betting on perfect execution.
Key Takeaways
- Choose external wall systems by site exposure, buildability, and maintenance reality—not just material preference.
- “Good” walls manage water, air, vapour, and heat as a connected set of layers and details.
- Most failures start at interfaces: penetrations, flashings, windows, and inconsistent cavities.
- A 7–14 day planning sprint can lock critical details and quality checks before the cladding hides everything.
Common questions we get from Aussie business owners
Q1) How do we choose between different external wall approaches without becoming building scientists?
Usually the fastest method is to write a one-page wall brief (exposure, comfort goals, maintenance appetite) and then compare options on buildability and interface detailing. Next step: list your top five junctions (windows, balconies, roof abutments, service penetrations, slab edge) and ask for details on those before you commit. In an Australian context, remember that wind-driven rain and high UV can punish small detailing shortcuts over time.
Q2) What’s the biggest risk factor for moisture issues in a new build or extension?
In most cases it’s not the cladding itself—it’s the interfaces and sequencing that determine whether water can drain and the wall can dry. Next step: set two inspection checkpoints (membrane continuity and window flashing integration) before cladding starts. Locally, mixed old/new junctions in extensions are common and deserve extra attention because legacy layers don’t always line up neatly.
Q3) Do we need to plan maintenance for external walls, or is that only for older buildings?
It depends on the materials and access constraints, but almost every façade benefits from a simple inspection routine. Next step: add a handover note that specifies what to check annually (sealant joints, coatings, visible flashings, drainage exit points) and who is responsible. In coastal Australian areas, salt and wind can accelerate wear, so the “easy-to-reach” details matter more than people expect.
Q4) When should we involve the installer or builder in wall decisions?
Usually earlier than feels necessary—ideally before windows are ordered and before finalising the wall build-up at all key junctions. Next step: run a 30–60 minute sequencing walk-through (what goes on first, what must be inspected, what gets covered up) and document the agreed checkpoints. In most Australian projects with tight programs, early alignment reduces rework when trades overlap and access becomes limited.