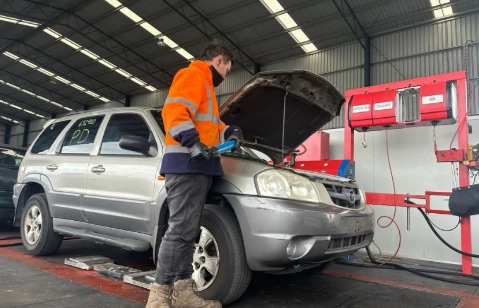
I head to the yard with a short checklist and a small kit: a torch, paper towels, gloves, a basic socket set with spark plug socket, flat and Phillips screwdrivers, a breaker bar, a magnetic tray, a notepad, and my phone for photos. If I expect to turn the crank by hand, I bring the right socket for the crank pulley. A cheap borescope that plugs into the phone helps, and so does a small OBD2 scanner if the engine is still in the car. I wear old clothes, boots, and eye protection—oil and grit have a way of finding faces.
At the counter, I confirm how cores and returns work, what’s included (loom, sensors, manifolds), and any yard markings I should keep intact. I note the donor’s VIN, odometer (if shown), build date, and engine code. I don’t chase low kilometres alone; condition and service clues matter more. On the walk over, I set the mindset: quick checks first, then deeper checks if the engine passes the sniff test. If it fails early on, I move on—rows of engines mean options.
I also make sure the yard allows hand-cranking, plug removal, and sump peeks. A clear yes lets me do proper checks without guessing. If the donor car is still on stands, I check for crash impact near the front—hard hits can crack housings or warp mounts.
Signs that save time
First, I stand back and scan for broken tabs, cracked plastic fittings, smashed sensors, or butchered looms. I look for mismatched bolts that suggest the engine’s been apart. Fresh silicone smeared around the head gasket line or sump seam can be fine—but combined with metal flake in oil, it’s a red flag. I check the oil cap and filler neck for coffee-coloured sludge. A light film might be short-trip use; thick milky paste often hints at coolant in oil. I pull the dipstick and wipe it on paper towel. Glitter is a no-go. A dark but smooth smear is normal for an older engine.
Coolant checks are next. I peek inside the radiator or header tank. Oily sheen or chocolate milk look means I keep walking. Clean green (or pink) coolant with no floaties is encouraging. I scan hoses for collapse marks and the thermostat housing for dry trails of old leaks. Then I check the intake. An intact airbox and filter usually mean less dust in cylinders; a missing or torn filter suggests abrasion wear.
If access allows, I pull the plugs. Even wear across cylinders is good. A single steam-cleaned plug can point to coolant entry; a black, oily plug can show ring or guide wear on that pot. I take photos of each plug with its cylinder number so I don’t mix things up later. With plugs out, I put a finger over each hole and hand-crank the engine. I want firm pulses on every turn. It’s not a gauge reading, but it tells me enough to sort a strong candidate from a lazy one. If the engine fights the bar, I ease off—seized bearings aren’t worth coaxing.
Deeper checks without a workshop
Where allowed, I slip the borescope into a cylinder and glance at crosshatch, carbon, and edge wear. Visible crosshatch on a high-km motor is rare but lovely; heavy scoring or chunks missing is a deal-breaker. I shoot pics of each cylinder to compare. I also check the throttle body for oil, the PCV for blockage, and around the rear main area for baked-on leaks. A sweaty weep is fine; a thick, caked band can mean a messy rear main seal job soon.
Belts and pulleys tell stories. A crank pulley wobble, missing damper rubber, or bent accessory bracket means extra parts and time. I spin idlers and the water pump by hand—roughness or noise adds to the parts list. On chain engines, I look for timing cover marks and ask whether the yard heard it running. Some places tag engines they’ve compression-tested. If there’s a test sheet, I read it but still do my own basic checks.
I always check mounts and the sump. A dented lower pan can crush the pickup and starve oil. If allowed, I crack the sump plug a touch to see oil condition at the bottom; metal flakes here are the deal-breakers. If the motor is still in the car, I plug in the OBD2 scanner, turn ignition on, and read codes and freeze-frame data. A stack of misfires on one bank plus low fuel trims might be a simple coil issue; even so, I plan time to swap good coils during install.
Across wrecking yards melbourne, warranty terms differ. I read the invoice line: test period, exchange options, and what voids coverage. I don’t expect a long warranty on engines, but a short test window helps. I also confirm whether ancillaries are included as “free with engine” or actually covered. Alternators and starters often ride along but aren’t guaranteed.
Price, paperwork, and the smart exit
Once I’m happy, I price the total job, not just the engine. I list extras I’ll need: gasket kit, rear main, water pump, thermostat, belts, hoses, fluids, filters, new plugs, and any broken sensors. A fair engine that’s missing small items can still be the right call if the sum stacks up. I ask for the engine code on the receipt, plus donor VIN if they’ll add it. Clear notes help later with registration or ECU matching.
At pickup or pull time, I photograph mount locations, bracket paths, loom routing, and hose runs. These photos save hours during install. If I’m buying the loom and ECU, I label every plug with masking tape. I also check that immobiliser parts, keys, or body modules needed for a swap are available—no point owning a good engine the ECU won’t wake up.
Before paying, I run through my quick list:
- Oil free of glitter?
- Coolant free of oil?
- Even plug condition?
- Strong pulses while hand-cranking?
- No obvious cracks, broken tabs, or sump crush?
- Receipt shows engine code and test window?
Back at the counter, I keep it simple and polite. Good operators remember straight talk and tidy work. On days I want a ready-to-run option, I ask around auto wreckers melbourne for engines they’ve already compression-tested. When that lines up with solid checks in the yard, I’m confident loading it on the ute and getting the install underway.