1. Why Surgical Instrument Sterilization Matters
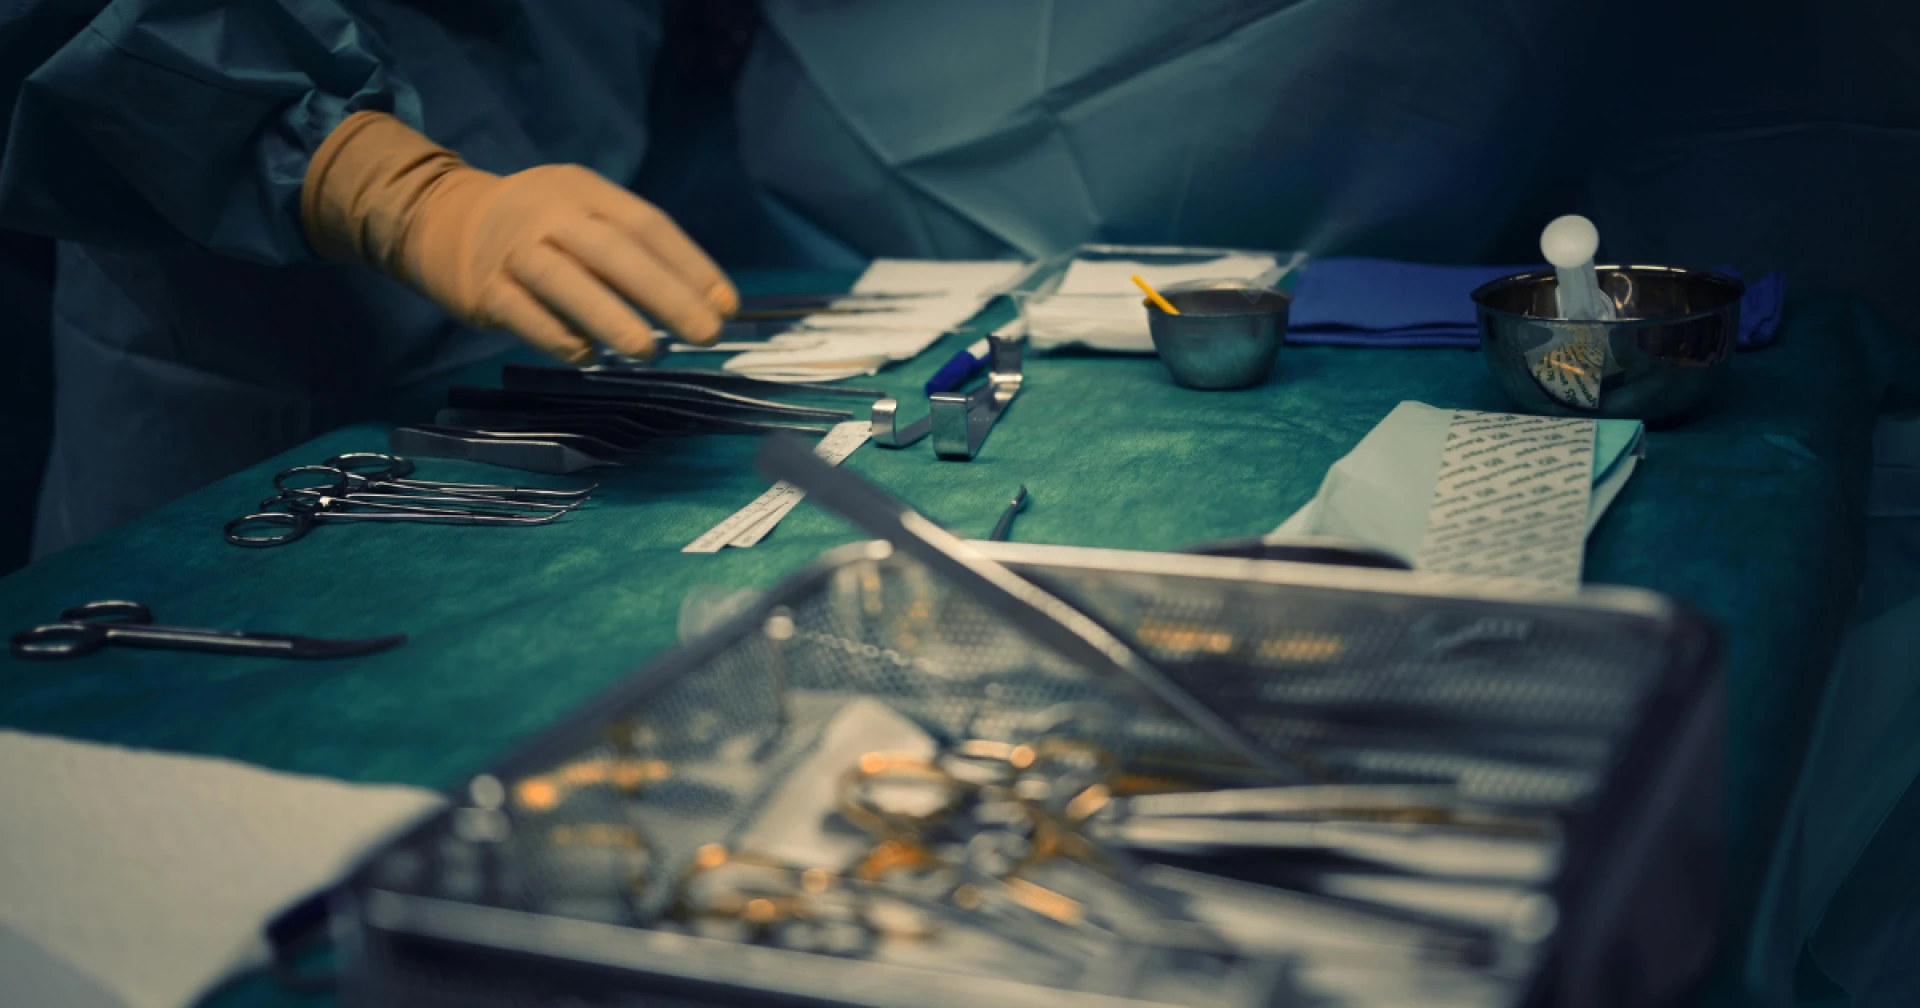
Every time a surgeon picks up a scalpel or a needle driver, that instrument has been through a precise, multi-step cleaning and sterilization process. This process is not optional, and it is not simple.
Surgical instruments from basic forceps to complex robotic components are classified as critical items because they come into direct contact with sterile body tissues and fluids. The CDC states clearly that any microbial contamination on these instruments can result in disease transmission, including dangerous pathogens like Pseudomonas aeruginosa and hepatitis B virus. Surgical site infections (SSIs) are a direct consequence of sterilization failure.
What does "sterile" actually mean in a hospital? It is defined by a probability standard called the Sterility Assurance Level (SAL), expressed as 10⁻⁶. This means the chance of finding even one living microorganism on a properly sterilized instrument is 1 in 1,000,000 an extraordinarily high standard that protects every patient.
2. The Sterile Processing Department (SPD): Where It All Happens
Most people have never heard of the Sterile Processing Department (SPD), also called the Central Sterile Services Department (CSSD). Yet this department is one of the most critical in any hospital.
The SPD is the place where all reusable surgical instruments are received after use, thoroughly cleaned, inspected, packaged, sterilized, and sent back to the operating room (OR). It is typically divided into at least three physically separated zones decontamination, packaging, and sterilization/sterile storage with airflow systems designed to prevent contamination from flowing from dirty areas to clean ones.
A well-designed SPD workflow directly affects patient safety, OR efficiency, and infection control outcomes. When this workflow breaks down, the result can be instrument shortages, surgical delays, or worse a patient infection.
3. Step-by-Step: The Complete Sterilization Process
Step 1: Pre-Cleaning at the Point of Use
Sterilization starts in the operating room itself, before the instrument ever reaches the SPD. OR staff should remove gross soil (blood, tissue, body fluids) from instruments immediately after use. This is called point-of-use treatment, and it matters because blood and organic debris dry quickly on metal surfaces, making them much harder to remove later.
Instruments are typically soaked or flushed with water or enzymatic solution to prevent bioburden from drying. The CDC and AORN both emphasize that pre-cleaning protects both the instrument's integrity and the patient's safety.
Step 2: Decontamination and Deep Cleaning
Once instruments arrive at the SPD's decontamination area, they go through a structured cleaning process. First, technicians wearing full PPE (gloves, mask, face shield, gown) sort and inspect instruments for damage. Then cleaning begins, typically using:
- Manual cleaning with enzymatic detergent and instrument brushes in a two- or three-bay sink
- Ultrasonic cleaners, which use high-frequency sound waves to dislodge debris from hard-to-reach areas like box locks, serrations, and lumens
- Automated washer-disinfectors, which mechanically clean and thermally disinfect instruments in a controlled cycle
This stage is critical because an instrument cannot be sterilized until it is completely clean. Organic residue like blood acts as a physical barrier that blocks the sterilizing agent from reaching microorganisms on the surface.
Step 3: Inspection and Assembly
After washing, instruments are carefully inspected visually and functionally. Technicians check that scissors cut cleanly, hinges move freely, and tips are intact. Damaged instruments are removed from circulation. Hinged instruments are opened fully, and multi-part instruments are disassembled to ensure sterilant can penetrate all surfaces.
Instruments are then assembled into surgical sets or trays according to standardized checklists. This organization ensures the right instruments are available for each surgical procedure.
Step 4: Packaging
Proper packaging is what keeps instruments sterile from the moment they leave the sterilizer to the moment they are opened in the OR. The packaging must allow the sterilizing agent (steam, gas, or plasma) to penetrate and reach all surfaces, while also forming a barrier that prevents contamination after the cycle.
Common packaging systems include:
- Sterilization wrap (woven or non-woven fabric), applied using a sequential double-wrap technique for extra protection
- Peel pouches (paper/plastic), used for individual instruments with self-sealing or heat-sealed edges
- Rigid sterilization containers, reusable metal or polymer cases with filter media or electromagnetic sealing
Each package is then labeled with the sterilizer ID, load number, date of sterilization, and expiration information all essential for traceability in case of a recall.
Step 5: Sterilization
This is the core step. Based on the instrument's material and design, the SPD technician selects the appropriate sterilization method and cycle. Packaged instruments are carefully loaded into the sterilizer, following manufacturer specifications for positioning, weight, and spacing to allow sterilant to reach all surfaces.
Step 6: Sterility Monitoring and Load Release
After each cycle, the SPD technician reviews the sterilizer printout to confirm that all critical parameters were met. No single test is used alone hospitals use a three-layer monitoring system (described in detail in Section 5 below). A cycle is only approved for release when all indicators confirm success.
Loads containing implantable devices have the strictest requirements: biological indicator results must be confirmed negative before those devices can be released for use.
Step 7: Sterile Storage and Distribution
Sterile packages are stored in covered or closed cabinets in a clean, dry environment. Wet, damaged, or compromised packages are considered contaminated and must be reprocessed. Items are distributed to the OR based on surgical schedules, completing the cycle.
4. Main Sterilization Methods Used in Hospitals
MethodHow It WorksBest ForTemperatureSteam (Autoclave)Pressurized saturated steam kills all microorganismsMost metal instruments; heat-stable items121–134°CEthylene Oxide (EtO) GasAlkylating gas penetrates materials and disrupts microbial DNAHeat/moisture-sensitive devices; plastics, electronicsRoom temperatureHydrogen Peroxide Gas Plasma (VHP)Vaporized H₂O₂ creates reactive plasma that destroys pathogensDelicate scopes, cameras, heat-sensitive instruments~50°CDry HeatSustained high temperature in hot-air ovenAnhydrous oils, powders; items that cannot tolerate moisture160–170°CPeracetic Acid (Liquid)Immersion in liquid peracid solutionFlexible endoscopes needing rapid turnaroundRoom temperatureOzoneOxidizing gas; emerging as an eco-friendly optionPlastics, synthetic devices; outpatient settingsRoom temperature
Steam sterilization (autoclaving) is by far the most common method in hospitals worldwide. It is affordable, reliable, and has the largest safety margin of any method. The FDA and CDC both recommend steam as the first choice for heat-resistant instruments.
Low-temperature methods like EtO, VHP, and peracetic acid are essential for the growing range of heat-sensitive instruments, including advanced laparoscopic equipment, robotic surgical tools, and devices with electronic components.
A 2024 peer-reviewed study published in Annals of Surgery Open (University of Wisconsin) confirmed that steam sterilization remains the dominant method in developed countries, while low-temperature alternatives are increasingly necessary as surgical technology evolves.
5. Sterilization Monitoring: How Hospitals Verify It Worked
Hospitals do not simply assume a cycle worked. Every sterilization load is verified using three independent monitoring systems, as required by AAMI (Association for the Advancement of Medical Instrumentation) standards:
Mechanical (Physical) Monitors
The sterilizer itself generates a printed cycle record showing time, temperature, and pressure throughout the cycle. This printout is reviewed and retained for every load.
Chemical Indicators (CI)
Chemical indicators change color or appearance when exposed to the conditions of a sterilization cycle. There are two types used together:
- External CIs are placed on the outside of each package to show it was processed
- Internal CIs are placed inside the package at its most challenging point to confirm sterilant penetration
Chemical indicators are fast and convenient, but they do not confirm actual microbial killing they confirm that conditions were present.
Biological Indicators (BI)
Biological indicators are the gold standard. They contain live, heat-resistant bacterial spores (Geobacillus stearothermophilus for steam; Bacillus atrophaeus for EtO). If all spores are killed after the cycle, the sterilization process is confirmed effective.
Per AAMI standards, BIs should be used at least weekly, but best practice is to run a BI test pack in every load. For loads containing implantable devices, a BI is required in every single load, and the load must be quarantined until the BI result is confirmed negative.
The CDC also recommends that sterilizers be tested with biological and chemical indicators upon installation, after relocation, after major repair, and after any sterilization failure.
6. Common Questions About Surgical Instrument Sterilization
Q: Can sterilized instruments expire?
Yes. Sterility is considered "event-related," not just time-related. A properly sealed package in ideal storage conditions can remain sterile indefinitely but any event that compromises the package (wetness, tears, falls) makes it no longer sterile, regardless of the labeled date.
Q: What is "flash sterilization" or immediate-use steam sterilization (IUSS)?
IUSS is a shortened steam cycle used when an instrument is urgently needed mid-surgery and there is no time for full packaging. It carries higher risk and is only used when absolutely necessary, following strict protocols. AORN's updated 2025 guidelines include a formal definition and clear requirements for its safe implementation.
Q: What happens if a sterilization cycle fails?
If a biological indicator comes back positive (meaning spores survived), all items from that load must be recalled if they have already been used, and an investigation is launched. The sterilizer is taken out of service until the cause is identified and corrected.
Q: Are robotic surgical instruments sterilized the same way?
Not always. Robotic instruments contain electronic and optical components that often cannot withstand steam. They typically require low-temperature methods like VHP or EtO, following the manufacturer's precise Instructions for Use (IFU).
Q: Who oversees sterilization standards in the U.S.?
Multiple bodies regulate and guide sterilization practices, including the CDC, the FDA, AAMI (ANSI/AAMI ST79 standard for steam sterilization), and AORN (Association of periOperative Registered Nurses). The Joint Commission also evaluates hospital compliance during accreditation surveys.
7. Key Takeaways
- Surgical instrument sterilization is a precise, multi-step process governed by strict national and international standards.
- The full cycle includes pre-cleaning, decontamination, inspection, assembly, packaging, sterilization, monitoring, and sterile storage skipping or rushing any step can compromise patient safety.
- Steam sterilization (autoclaving) is the most widely used and trusted method; low-temperature methods (EtO, VHP) are essential for heat-sensitive devices.
- Every sterilization load is verified using mechanical monitors, chemical indicators, and biological indicators no single test is sufficient alone.
- The Sterility Assurance Level (SAL) of 10⁻⁶ is the universal benchmark: the probability of a living organism on a properly sterilized instrument is 1 in 1,000,000.
- Emerging technologies in 2025 and beyond include AI-powered sterilizer monitoring, ozone sterilization, and smart container systems with electromagnetic seals all aimed at making this critical process faster, safer, and more traceable.
Final Thought
Proper sterilization of surgical instruments is not just a hospital policy it is the invisible foundation of every safe surgery performed around the world. From the moment a scalpel leaves the operating table to the moment it returns sterile and ready for the next patient, a dedicated team of sterile processing professionals follows strict, science-backed protocols to ensure zero margin for error. The quality of the instrument itself also plays a role in this equation instruments that are well-manufactured, durable, and built to withstand repeated sterilization cycles are far easier to reprocess safely and reliably. Companies like GerMedUSA, known for producing high-grade stainless steel surgical instruments, understand that instrument design and material quality are not separate from sterilization they are deeply connected to it. When hospitals invest in quality instruments alongside rigorous sterilization practices, they are making a complete commitment to patient safety, infection prevention, and the highest standard of surgical care.