Tile removal often gets a bad reputation—and honestly, it’s not entirely undeserved. If you’ve ever tried to rip up old tiles without a plan, you know how quickly things can spiral into a dusty, backbreaking nightmare. But here’s the truth: tile removal doesn’t have to be stressful, messy, or exhausting. With the right approach, tools, and a few clever tricks, you can transform the process into something surprisingly manageable—even satisfying.
In this comprehensive guide, we’ll walk you through everything you need to know to remove tiles efficiently and safely. Whether you’re tackling a bathroom renovation, kitchen upgrade, or flooring overhaul, these genius hacks will help you work smarter—not harder.
Why Tile Removal Feels So Hard (And How to Fix It)
Let’s start with the obvious: tile removal is tough because tiles are designed to last. They’re bonded tightly to surfaces using strong adhesives or mortar, making them resistant to wear—and removal.
The key problems most people face include:
- Tiles cracking unpredictably
- Adhesive that won’t budge
- Dust and debris everywhere
- Damage to subfloors or walls
The solution? Preparation and technique. Once you understand how tiles are installed, you can reverse the process more efficiently.
Essential Tools You’ll Need Before You Start
Before you even think about swinging a hammer, gather the right tools. Having the proper equipment can cut your workload in half.
Must-Have Tools:
- Hammer or rubber mallet
- Cold chisel or masonry chisel
- Pry bar
- Floor scraper
- Utility knife
- Power drill with chisel attachment (optional but highly recommended)
- Heat gun or hair dryer
- Shop vacuum
Safety Gear (Non-Negotiable):
- Safety goggles
- Work gloves
- Dust mask or respirator
- Knee pads
Pro Tip: Investing in a rotary hammer with a tile chisel attachment can make a huge difference, especially for large areas.
Hack #1: Start Where the Tile Is Already Weak
One of the smartest ways to begin tile removal is by finding a weak point.
Look for:
- Cracked tiles
- Loose edges
- Grout lines that are deteriorating
Use your chisel and hammer to gently break into this area. Once you get under the first tile, the rest often becomes much easier.
Why this works: Tiles are interconnected. Breaking one weak spot reduces the structural integrity of the surrounding tiles.
Hack #2: Remove Grout First for Easier Lifting
Many people skip this step—but it’s a game-changer.
Use a grout saw or oscillating tool to remove grout around the tiles before prying them up.
Benefits:
- Reduces resistance
- Prevents tile breakage from spreading
- Makes tiles easier to lift cleanly
Bonus Tip: Less breakage means less debris—and less cleanup later.
Hack #3: Use Heat to Soften Adhesive
Adhesive can be stubborn, but heat is your secret weapon.
Apply heat using:
- A heat gun
- A standard hair dryer (for smaller jobs)
Hold it over a tile for a few minutes to soften the adhesive underneath.
Why it works:
Heat weakens the bond between the tile and the surface, making it easier to lift tiles without excessive force.
Hack #4: Work at the Right Angle
Angle matters more than you think.
Instead of hammering straight down, position your chisel at a 30–45 degree angle and work underneath the tile.
Advantages:
- Minimizes damage to subfloor or wall
- Helps lift tiles in larger pieces
- Reduces effort
Remember: You’re not trying to smash the tile—you’re trying to separate it from the surface.
Hack #5: Use a Floor Scraper for Speed
Once you’ve removed a few tiles, switch to a floor scraper for faster progress.
This tool is especially effective for:
- Large floor areas
- Thin-set tiles
- Vinyl or ceramic tiles
Push the scraper under the tiles using steady pressure. It’s much faster than using a hammer and chisel alone.
Hack #6: Tackle Adhesive Residue Immediately
After removing tiles, you’ll likely be left with adhesive or mortar residue.
Don’t leave it for later—it hardens and becomes more difficult to remove.
Best Methods:
- Use a scraper while the adhesive is still slightly soft
- Apply warm water to loosen residue
- Use a grinding tool for stubborn spots
Pro Tip: A clean surface is essential if you plan to install new tiles.
Hack #7: Control Dust Like a Pro
Tile removal can create a surprising amount of dust—especially with older installations.
Smart Dust Control Tips:
- Lightly mist the area with water before working
- Use a shop vacuum while removing tiles
- Seal off nearby rooms with plastic sheets
Why this matters: Dust isn’t just messy—it can also be harmful to your lungs.
Hack #8: Protect Your Subfloor or Wall
One of the biggest mistakes people make is damaging the surface beneath the tile.
How to avoid it:
- Use controlled force—not brute strength
- Keep your chisel at a shallow angle
- Stop immediately if you notice gouging
If you damage the subfloor, you’ll add unnecessary repair work to your project.
Hack #9: Work in Small Sections
Trying to remove tiles all at once is a recipe for burnout.
Instead:
- Divide the area into manageable sections
- Focus on one section at a time
- Take breaks between sections
This approach keeps you energized and ensures consistent results.
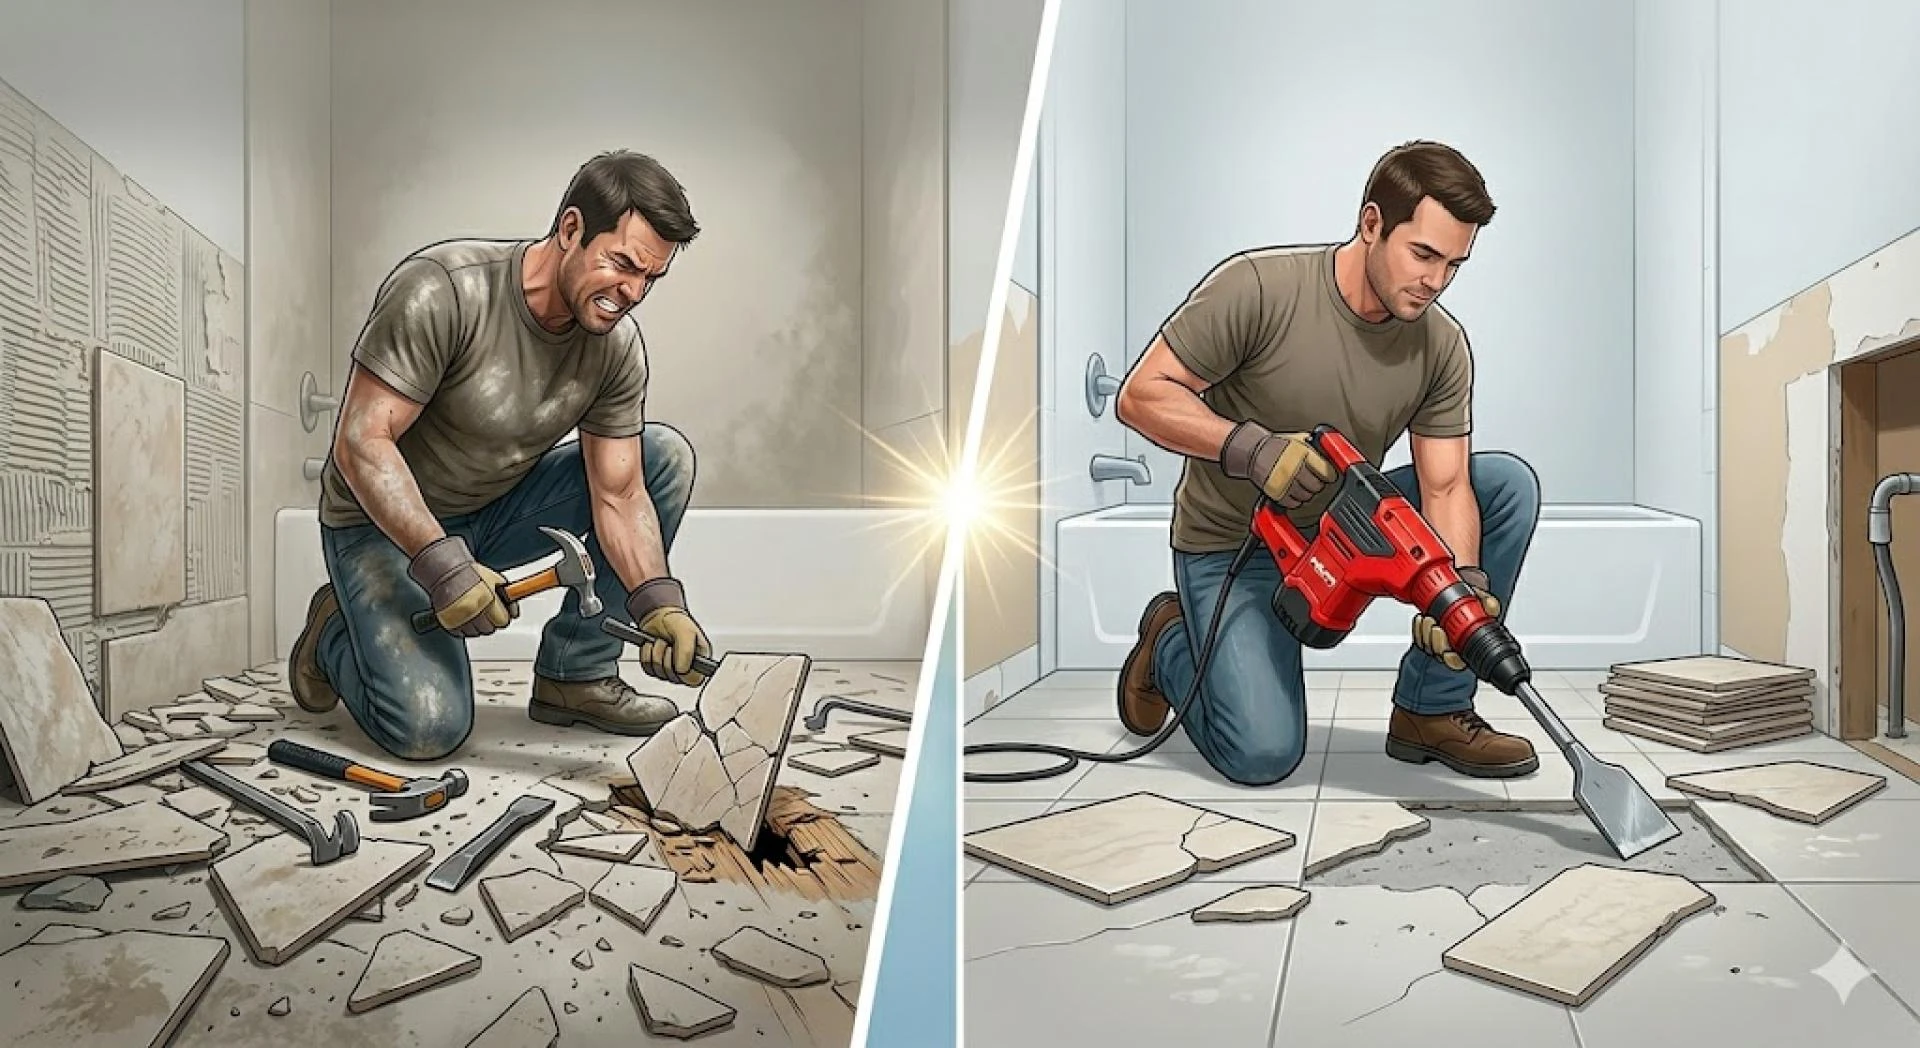
Hack #10: Know When to Use Power Tools
Manual tools are great—but sometimes you need extra power.
Best Power Tools for Tile Removal:
- Rotary hammer with chisel bit
- Oscillating multi-tool
- Angle grinder (for adhesive removal)
When to use them:
- Large areas
- Thick mortar beds
- Stubborn tiles that won’t budge
Just be careful—power tools can damage surfaces if used incorrectly.
Common Tile Removal Mistakes to Avoid
Even with the best hacks, mistakes can still happen. Here are the most common ones—and how to avoid them.
1. Skipping Preparation
Jumping in without a plan leads to frustration and wasted time.
2. Using Too Much Force
Brute force often causes more harm than good.
3. Ignoring Safety Gear
Flying tile shards and dust can be dangerous.
4. Not Removing Grout
This makes tile removal significantly harder.
5. Leaving Adhesive Behind
It complicates the installation of new flooring.
How to Remove Different Types of Tiles
Not all tiles are created equal. Here’s how to handle different materials.
Ceramic Tiles
- Easier to break and remove
- Respond well to chiseling and scraping
Porcelain Tiles
- Harder and more durable
- Often require power tools
Vinyl Tiles
- Usually easier to peel up
- Adhesive may still be stubborn
Natural Stone Tiles
- Heavier and more fragile
- Require careful handling to avoid damage
What to Do After Tile Removal
Once the tiles are gone, your job isn’t quite finished.
Post-Removal Checklist:
- Remove all adhesive residue
- Inspect the subfloor for damage
- Repair cracks or uneven areas
- Clean thoroughly
A properly prepared surface ensures your next installation goes smoothly.
DIY vs. Hiring a Professional
While tile removal is doable for many homeowners, it’s not always the best choice.
DIY Is Best If:
- The area is small
- You have basic tools
- You’re comfortable with physical labor
Hire a Pro If:
- The space is large
- Tiles are heavily bonded
- You’re short on time
Remember: Sometimes paying for professional help can save you money in the long run.
Time-Saving Tips for Faster Tile Removal
Want to speed things up even more? Try these:
- Use power tools for large areas
- Work with a partner
- Remove debris as you go
- Keep tools within reach
Efficiency is all about minimizing wasted motion.
Eco-Friendly Tile Disposal Tips
After removal, you’ll need to deal with debris.
Smart Disposal Options:
- Recycle tiles if possible
- Donate reusable materials
- Use proper waste disposal facilities
Reducing waste is better for both your wallet and the environment.
Conclusion: Turn Tile Removal Into a Simple, Stress-Free Task
Tile removal doesn’t have to be the nightmare many people expect. With the right mindset, tools, and techniques, you can turn a difficult project into a smooth and even enjoyable process. The key is to work strategically, not forcefully, and to take advantage of simple hacks like removing grout, using heat, and working at the correct angle. For professional guidance, visit Salem Tile Setters.
By following these expert tips, you’ll not only save time and energy but also protect your surfaces and achieve professional-level results. Whether you’re renovating a single room or tackling a full home upgrade, these genius tile removal hacks will make the job faster, cleaner, and far less stressful.
Now that you’re equipped with the right knowledge, it’s time to grab your tools and get started—your hassle-free tile removal project awaits!