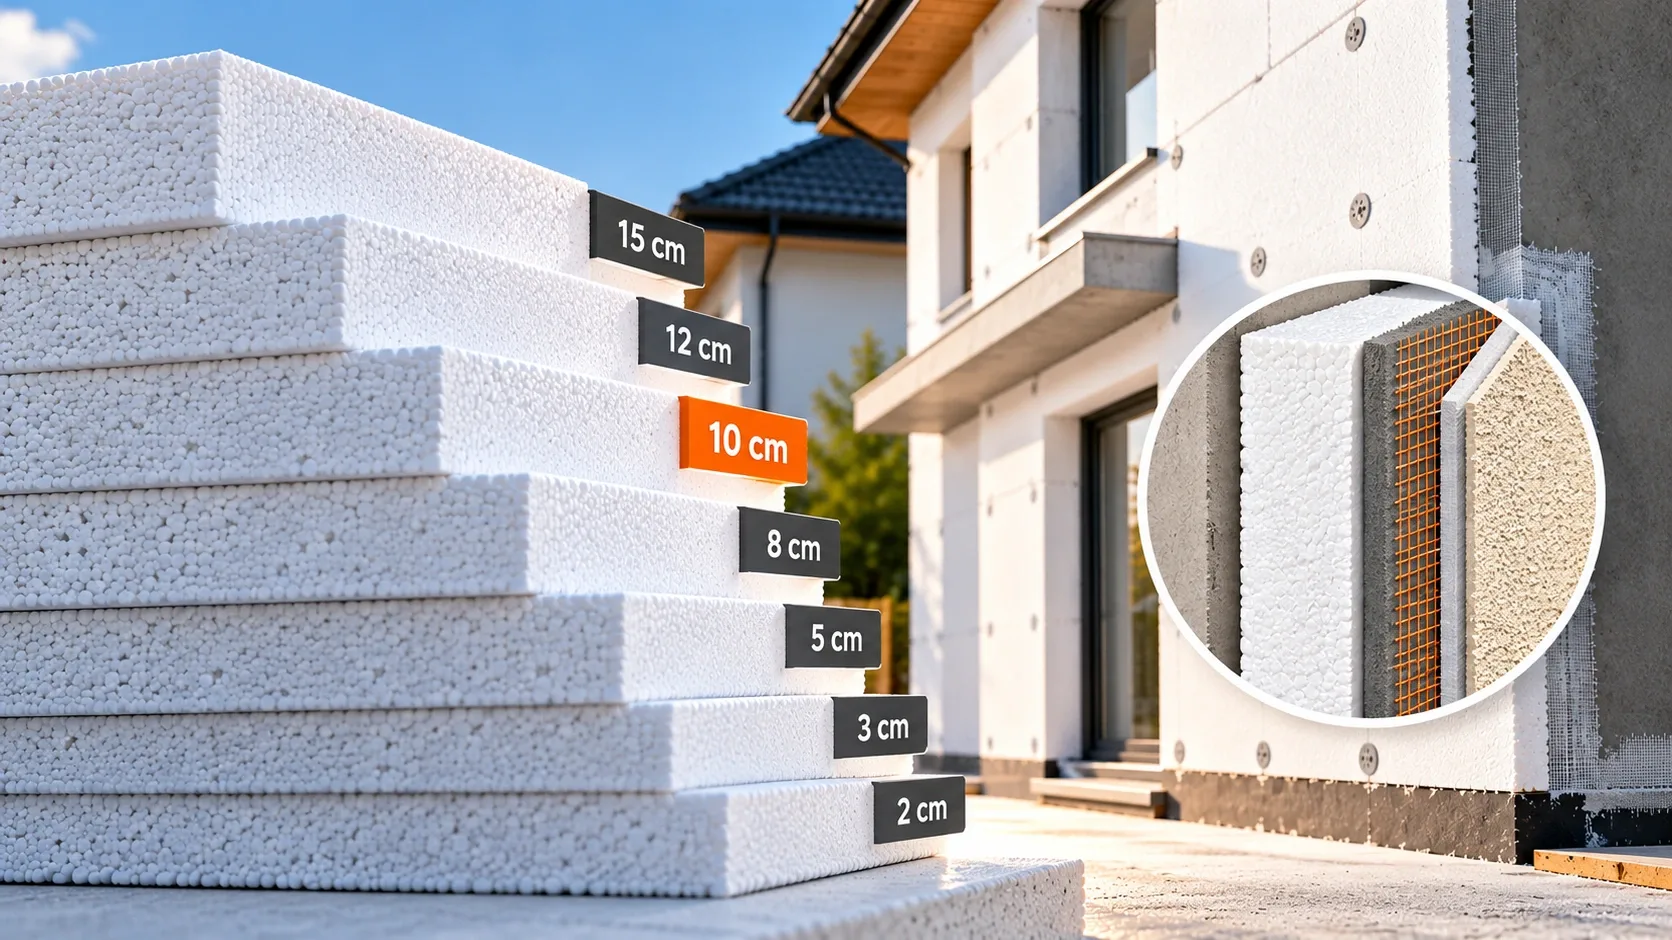
Ten centimeter styrofoam has become one of the most popular choices for facade insulation in residential buildings. It offers a practical balance between thermal performance, cost and ease of installation. Many homeowners choose this thickness when renovating older houses or finishing new ones. Understanding both the price factors and the correct installation process helps ensure that the investment delivers real comfort and energy savings. This guide explains why 10 cm boards are so widely used and how to install them properly for lasting results.
Why 10 cm Is a Popular Thickness
Ten centimeters provides noticeably better insulation than thinner boards while remaining affordable and easy to handle. For most climates, this thickness significantly reduces heat loss through walls without making the facade too bulky around windows and doors. It also aligns well with modern energy efficiency expectations for residential buildings. Many contractors recommend it as a sensible standard for family houses. While some projects may benefit from thicker insulation, 10 cm boards remain a reliable and cost-effective choice for a wide range of buildings.
Factors That Shape the Price
The price of 10 cm styrofoam depends on density, quality class and type. Standard white boards are generally more affordable, while graphite versions cost more but offer improved thermal performance. Board dimensions, packaging and brand reputation also influence pricing. Market conditions and transport distances can cause variations between suppliers. Buyers should compare boards with identical specifications to understand true price differences. Considering the complete facade system, including adhesive and render, also helps create a realistic estimate of the overall project cost.
Preparing the Wall Surface
Proper surface preparation is essential for a durable facade. Walls should be clean, dry and free from loose plaster, dust or old coatings that may weaken adhesion. Uneven areas may need leveling before insulation begins. Applying a primer can improve the bond between the wall and the adhesive. Installing a starter profile at the base of the wall ensures the first row of boards sits straight and level. Careful preparation may take time, but it prevents problems that are difficult to fix once the facade is finished.
Applying Adhesive and Fixing the Boards
Adhesive should be applied around the edges of each board and in several spots across the center. This method ensures strong bonding while allowing air to escape. Boards are then pressed firmly against the wall and placed in a staggered pattern, similar to brickwork, to avoid continuous vertical joints. Gaps between boards should be minimal and filled with suitable foam if necessary. Once the adhesive sets, mechanical dowels are added for extra security, especially on taller buildings or areas exposed to strong wind.
Reinforcement Mesh and Base Coat
After fixing the boards, the surface is sanded lightly to remove irregularities. A layer of base coat adhesive is then applied, and fiberglass reinforcement mesh is embedded into it. The mesh strengthens the surface and helps prevent cracks caused by temperature changes and building movement. Mesh strips should overlap by several centimeters at the joints. Corners and window edges often receive additional reinforcement. A second thin layer of base coat smooths the surface and prepares it for the final decorative finish.
Choosing the Final Render
The final render protects the facade from rain, sunlight and pollution while giving the building its appearance. Options include acrylic, silicone and mineral renders, each with different benefits. Silicone renders offer excellent water resistance and self-cleaning properties, while mineral renders allow good breathability. Color choice also matters, since very dark shades absorb more heat and may stress the insulation. Applying a primer before the render improves adhesion and color consistency. A well-chosen finish ensures the facade looks attractive and remains protected for years.
Planning Your Budget Wisely
Insulating with 10 cm boards is a smart investment that combines comfort, savings and long-term durability. Accurate measurements, quality materials and correct installation all contribute to a successful result. Before starting, it helps to compare the stiropor 10cm cena at KupiFasadu, where buyers can also find the adhesive, mesh and render needed for a complete system. With careful planning and reliable materials, your facade can deliver warmth in winter, coolness in summer and lower energy bills for many years.