The Ultimate Guide to Installing SPC Flooring Like a Pro!
SPC (Stone Polymer Composite) flooring has taken the world of home improvement by storm. Its durability, affordability, and ease of installation make it a popular choice for homeowners and DIY enthusiasts alike. In this comprehensive guide, we’ll walk you through the step-by-step process of installing SPC flooring like a pro. Whether you’re a seasoned DIYer or a novice looking to tackle your first flooring project, we’ve got you covered.
Table of Contents
- Introduction
- What is SPC Flooring?
- Benefits of SPC Flooring
- Tools and Materials
- Essential Tools
- Materials Needed
- Preparing Your Space
- Clearing the Area
- Subfloor Inspection and Preparation
- Acclimating Your SPC Flooring
- Installation Process
- Starting Point and Layout
- Cutting and Fitting
- Click-and-Lock Mechanism
- Underlayment
- Glue-Down Installation
- Tips and Tricks
- Dealing with Irregularities
- Transition Strips
- Maintenance and Cleaning
- Troubleshooting
- Common Installation Mistakes
- Repairing SPC Flooring
- Final Touches
- Trim and Molding
- Reinstalling Furniture
- Pros and Cons of SPC Flooring
- Advantages
- Disadvantages
- Conclusion
- FAQs (Frequently Asked Questions)
- Is SPC flooring suitable for all rooms in the house?
- Can I install SPC flooring over existing tile or hardwood?
- How long does it take to acclimate SPC flooring?
- What is the average lifespan of SPC flooring?
- Can I install SPC flooring in a bathroom?
Introduction
What is SPC Flooring?
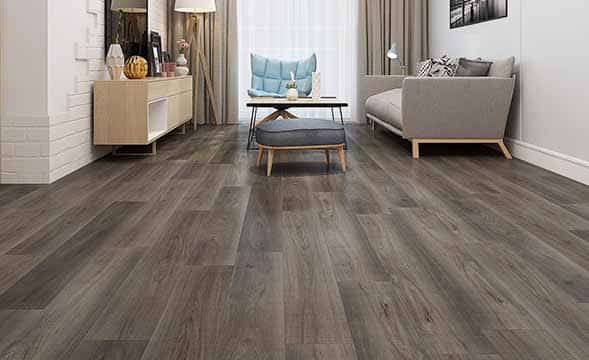
SPC stands for Stone Polymer Composite. It’s a type of rigid core vinyl flooring that combines limestone and stabilizers to create an incredibly durable and stable flooring material. SPC flooring is known for its high resistance to moisture, making it an ideal choice for areas prone to spills or humidity.
Benefits of SPC Flooring
- Durability: SPC flooring is highly resistant to wear and tear, making it suitable for high-traffic areas.
- Waterproof: Unlike traditional hardwood, SPC flooring won’t swell or warp when exposed to moisture.
- Easy Installation: The click-and-lock mechanism simplifies installation, making it a DIY-friendly option.
- Variety of Styles: SPC flooring comes in a wide range of designs, mimicking the look of natural materials such as wood and stone.
- Low Maintenance: Cleaning SPC flooring is a breeze, requiring minimal effort to keep it looking pristine.
Tools and Materials
Essential Tools
Before you embark on your SPC flooring installation journey, gather the following tools:
- Tape Measure
- Utility Knife
- Rubber Mallet
- Tapping Block
- Spacers
- Circular Saw (if necessary)
- Safety Gear (gloves and safety glasses)
Materials Needed
You’ll also need the following materials:
- SPC Flooring Planks
- Underlayment (if required)
- Adhesive (for glue-down installation)
- Transition Strips
- Trim and Molding
Preparing Your Space
Clearing the Area
Start by removing all furniture and obstructions from the room where you plan to install the SPC flooring. This will provide you with a clear, open space to work in.
Subfloor Inspection and Preparation
Inspect your subfloor for any imperfections, such as bumps or unevenness. If you notice any issues, address them before proceeding with the installation. A smooth subfloor is essential for a flawless SPC flooring installation.
Acclimating Your SPC Flooring
Allow your SPC flooring planks to acclimate to the room’s temperature and humidity for at least 48 hours. This helps prevent expansion or contraction after installation.
Installation Process
Starting Point and Layout
Begin installing your SPC flooring from the longest wall in the room, as this will create a more appealing visual effect. Lay out the first row of planks, leaving a 1/4-inch gap from the wall for expansion.
Cutting and Fitting
Measure and cut planks to fit at the ends of rows or around obstacles like door frames. Use a circular saw or a utility knife for precision cuts.
Click-and-Lock Mechanism
SPC flooring typically features a click-and-lock mechanism, allowing planks to fit securely together. Ensure each plank clicks into place with a gentle tap from a rubber mallet and tapping block.
Underlayment
In some cases, you may need an underlayment to provide extra cushioning or soundproofing. Follow the manufacturer’s recommendations for the specific SPC flooring you’ve chosen.
Glue-Down Installation
If you opt for glue-down installation, apply adhesive to the subfloor and press the SPC planks firmly into place. Follow the manufacturer’s instructions for adhesive application and drying times.
Tips and Tricks
Dealing with Irregularities
During installation, pay close attention to any irregularities in the subfloor. Use spacers to maintain consistent gaps between planks, and be meticulous about alignment.
Transition Strips
Install transition strips where your SPC flooring meets other types of flooring, such as carpet or tile. This provides a clean and finished look while allowing for natural expansion and contraction.
Maintenance and Cleaning
To keep your SPC flooring looking its best, sweep or vacuum regularly to remove dirt and debris. Clean up spills promptly using a damp cloth or mop.
Troubleshooting
Common Installation Mistakes
- Not acclimating the flooring before installation.
- Failing to prepare the subfloor adequately.
- Incorrectly aligning the planks during installation.
- Neglecting to leave expansion gaps.
Repairing SPC Flooring
If you encounter issues with your SPC flooring, such as scratches or damaged planks, don’t worry. Many problems can be repaired with the help of a professional or a DIY repair kit.
Final Touches
Trim and Molding
Complete the installation by adding trim and molding to the edges of the room. This not only enhances the aesthetic appeal but also hides the expansion gaps for a polished look.
Reinstalling Furniture
Once your SPC flooring is securely in place, you can move your furniture back into the room. Be sure to use furniture pads or felt protectors to prevent scratches.
Pros and Cons of SPC Flooring
Advantages
- Durable and long-lasting.
- Waterproof and moisture-resistant.
- Easy to clean and maintain.
- Versatile design options.
- Suitable for various rooms in the house.
Disadvantages
- Can be challenging to repair if damaged.
- Limited ability to refinish.
- May not provide the same warmth as natural wood.
Conclusion
SPC flooring is an excellent choice for homeowners seeking a durable, stylish, and cost-effective flooring solution. By following this ultimate guide, you can install SPC flooring like a pro and enjoy the benefits of this remarkable material for years to come.
FAQs (Frequently Asked Questions)
- Is SPC flooring suitable for all rooms in the house?
- Yes, SPC flooring’s waterproof and durable properties make it suitable for kitchens, bathrooms, living rooms, and more.
- Can I install SPC flooring over existing tile or hardwood?
- In most cases, yes. However, it’s essential to ensure the existing floor is in good condition and level before installation.
- How long does it take to acclimate SPC flooring?
- Allow at least 48 hours for the SPC flooring to acclimate to the room’s temperature and humidity.
- What is the average lifespan of SPC flooring?
- With proper care and maintenance, SPC flooring can last 10-20 years or more.
- Can I install SPC flooring in a bathroom?
- Yes, SPC flooring’s waterproof nature makes it an excellent choice for bathroom installations.
