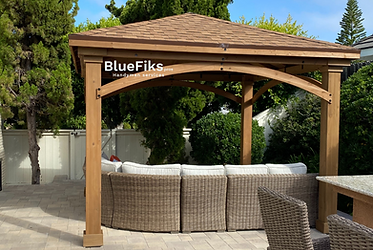
Mastering the Art of Pergola Assembly: A Step-by-Step Guide
Pergolas have long been admired for their charm, providing both aesthetic appeal and functional benefits to outdoor spaces. These versatile structures offer shade, create intimate gathering areas, and enhance the overall ambiance of gardens, patios, and backyards. However, the idea of assembling a pergola might seem daunting to some. Fear not, as we embark on a journey to demystify the process and empower you to master the art of pergola assembly.
Step 1: Pre-Assembly Preparation Before diving into assembly, it’s crucial to gather all necessary tools and materials. Typical requirements include lumber, screws, a drill, a level, a hammer, and a ladder. Ensure you have a clear understanding of the pergola design and layout, consulting the provided instructions or blueprints.
Step 2: Selecting the Location Choose the ideal location for your pergola, considering factors such as sunlight exposure, proximity to the house, and desired functionality. Use stakes and string to outline the perimeter, ensuring proper alignment and dimensions.
Step 3: Laying the Foundation Depending on your preference and local building codes, you may opt for concrete footings, patio stones, or deck blocks as the foundation for your pergola. Dig holes at designated intervals, pour concrete if necessary, and allow it to cure before proceeding.
Step 4: Assembling the Posts With the foundation in place, it’s time to erect the posts. Position them according to the layout, using a level to ensure they’re perfectly plumb. Secure the posts to the foundation using appropriate hardware, such as anchor bolts or post brackets.
Step 5: Attaching the Headers and Beams Next, attach the headers and beams to the posts, forming the basic framework of the pergola. Take care to align them properly and fasten securely with screws or bolts. Use a level throughout this process to maintain accuracy and stability.
Step 6: Installing the Crossbeams Once the main framework is in place, install the crossbeams perpendicular to the headers, evenly spacing them apart. This step adds structural integrity to the pergola while creating visually appealing patterns of light and shadow.
Step 7: Adding Decorative Elements Enhance the aesthetics of your pergola by incorporating decorative elements such as lattice panels, potted plants, or climbing vines. These additions not only complement the overall design but also provide additional shade and privacy.
Step 8: Finishing Touches Inspect the assembled pergola for any loose components or imperfections, making adjustments as needed. Apply a protective finish or stain to the wood to prolong its lifespan and enhance its appearance. Finally, step back and admire your handiwork – you’ve successfully mastered the art of pergola assembly!
Conclusion: Assembling a pergola may seem like a daunting task at first, but with careful planning and attention to detail, it can be a rewarding DIY project. By following this step-by-step guide, you’ll be well-equipped to create a stunning outdoor retreat that enhances your living space and brings years of enjoyment to you and your loved ones. So roll up your sleeves, gather your tools, and get ready to transform your backyard into a haven of style and comfort with your newly acquired pergola assembly service.
Source Url:-https://sites.google.com/view/bluefikscom15/home

