


A leaking pool is every pool owner's nightmare. Not only does it waste thousands of gallons of water, but it can also damage your landscaping, foundation, and equipment. The good news? Most pool leaks can be identified and repaired without calling in expensive professional help. In this comprehensive guide, we'll walk you through everything you need to know about detecting and fixing pool leaks, from the initial assessment to implementing long-term solutions.
Understanding Pool Leaks: Why They Happen
Pool leaks occur for several reasons, and understanding the root cause is crucial for effective repair. Water loss in pools isn't always obvious—some leaks develop slowly over time, while others manifest suddenly. Common causes include structural cracks in the pool shell, punctures in vinyl liners, deteriorated grout in tile work, faulty pool pump seals, and corroded plumbing lines.
The type of pool you own—whether it's concrete, vinyl, or fiberglass—determines both how leaks develop and how you should address them. Concrete pools are susceptible to cracking due to ground shifting and freeze-thaw cycles. Vinyl-lined pools often experience tears and punctures, while fiberglass pools may develop stress cracks. Understanding your pool's composition helps you diagnose problems more accurately.
How to Detect a Pool Leak
Before you can fix a leak, you need to confirm one exists. Not all water loss is due to leaks; evaporation accounts for significant water loss, especially during hot months. A simple way to determine if you have a leak is the bucket test.
The Bucket Test Method: Fill a bucket with pool water and place it on the pool deck. Mark both the water level in the bucket and in the pool. Wait 24 hours without using the pool. If the pool water level drops more than the bucket water level, you likely have a leak. This accounts for evaporation and helps distinguish between normal water loss and an actual leak.
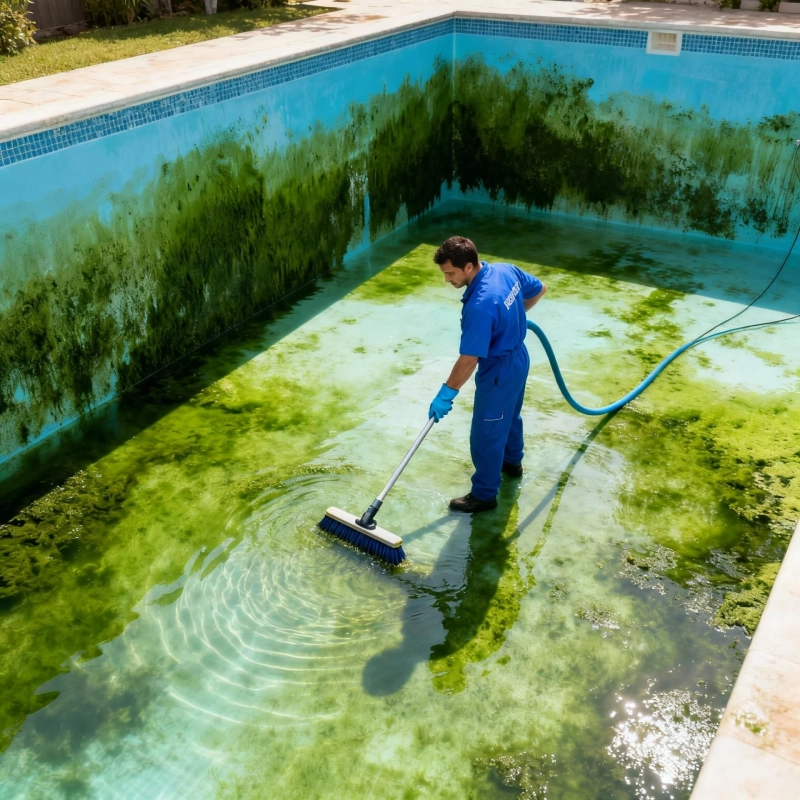
Other signs of a pool leak include constant water loss, cracks in the pool structure, wet spots around the pool area, unusual algae growth, and increased chemical use despite proper maintenance. If you notice any of these signs, investigate further before the problem worsens.
Locating the Leak: A Systematic Approach
Once you've confirmed a leak exists, the next step is finding its location. This can be challenging, but systematic inspection significantly increases your chances of success. Pool Cleaning Glen Waverly specialists recommend starting with the most common problem areas.
Check the Pump and Equipment: Begin by inspecting your pool pump, filter, and plumbing connections. Look for water spraying, pooling beneath equipment, or visible cracks. Leaks in equipment are often easier to detect and repair than structural leaks. Check all visible pipes, hose connections, and valve seals. Tighten any loose connections—sometimes this simple step resolves the issue entirely.
Inspect the Pool Shell and Liner: For vinyl pools, look for obvious tears or punctures. You may need to drain sections of the pool to examine the walls thoroughly. For concrete pools, look for cracks, particularly around the waterline. Use a dye test around suspected areas; the dye will be drawn toward the leak. Fiberglass pools should be examined for spiderwebbing or hairline cracks that could indicate stress fractures.
Test the Drains and Returns: Turn off the pump and observe the drains and return lines. Place dye near each component to see if it's pulled toward any opening. A leak in the drain system will show immediate dye movement.
Step-by-Step Pool Leak Repair Process
For Vinyl Liner Leaks
Vinyl pools are popular because they're relatively affordable and easy to repair. Here's how to fix a vinyl liner leak:
Step 1: Locate the Exact Puncture or Tear Use the dye method to pinpoint the exact location. Mark the area with a waterproof marker or tape. For very small leaks, try the leak detection powder—it will be sucked toward the opening.
Step 2: Purchase a Vinyl Patch Kit Visit your local pool supply store and purchase a vinyl repair kit appropriate for your pool's liner thickness (usually 20-40 mil). Kits typically include patches, adhesive, and applicators.
Step 3: Prepare the Area Clean the area around the leak thoroughly with a soft cloth. The surface must be completely dry and free of debris for the patch to adhere properly. For leaks above the waterline, temporarily lower the water level slightly.
Step 4: Apply the Patch Cut the patch into a rounded shape with no sharp corners—sharp edges are prone to peeling. Apply vinyl cement to both the patch and the liner according to kit instructions. Press the patch firmly over the leak, smoothing out air bubbles. Hold in place for the recommended time (usually 30 seconds to several minutes).
Step 5: Allow Proper Curing Wait the full curing time before returning the pool to normal operation. Most patches require 24-48 hours before the pool can be used.
For Concrete Pool Leaks
Concrete pool repairs are more involved but follow a similar diagnostic-to-repair progression:
Step 1: Drain and Prepare Partially or fully drain the pool depending on leak location. Use a pressure washer to clean the area around the crack or puncture, removing dirt, algae, and loose concrete.
Step 2: Clean the Crack Use a concrete crack filler tool or chisel to remove loose material from within the crack. Create a V-shaped groove for better adhesion. Vacuum out all dust and debris.
Step 3: Choose Your Repair Method For small hairline cracks, use a hydraulic cement or pool patch compound. For larger cracks, you may need to use a concrete caulk or epoxy injection system. Follow product instructions carefully.
Step 4: Apply the Repair Material Fill the crack completely, slightly overfilling to account for settling. Use a putty knife or applicator to smooth the surface level with the surrounding concrete. For epoxy, follow the two-part mixing instructions precisely.
Step 5: Seal and Test Once cured, apply pool-safe waterproof sealant over the repair. Wait the recommended curing time before refilling the pool and resuming normal operations.
For Equipment and Plumbing Leaks
Pump Seal Leaks: If water drips from where the pump motor connects to the pump housing, the mechanical seal has likely failed. This requires replacing the seal cartridge, which typically costs $50-150 and involves disassembling the pump.
Pipe Connection Leaks: Tighten the fitting first using appropriate wrenches. If tightening doesn't stop the leak, you'll need to replace the connection. Turn off the pump, drain the affected line, remove the old fitting, and install a new one with thread sealant tape.
Valve Leaks: Check the valve stem by tightening the packing nut slightly. If this doesn't resolve the leak, the valve cartridge or seal may need replacement.
Prevention: Maintain Your Pool Properly
Preventing leaks is far easier than repairing them. Regular maintenance extends your pool's lifespan and helps you catch problems early:
Regular Inspections: Monthly visual inspections of your pool structure, equipment, and surrounding areas help identify issues before they become serious. Look for cracks, discoloration, soft spots, and unusual water loss patterns.
Maintain Proper Chemistry: Balanced water chemistry prevents corrosion of metal components and degradation of vinyl liners. Test your water at least twice weekly and maintain proper pH, alkalinity, and chlorine levels.
Equipment Maintenance: Replace filter media on schedule, clean baskets and strainers regularly, and run your pump during appropriate hours. Well-maintained equipment operates efficiently and is less prone to failure.
Landscape Management: Keep vegetation away from your pool and underground pipes. Tree roots can damage buried plumbing lines, and excessive foliage contributes to water contamination.
Seasonal Care: Winterize your pool properly and prepare it for spring. Drain lines in freezing climates to prevent ice damage, and inspect equipment before reopening.
When to Call a Professional
While many pool owners can handle basic repairs, some situations warrant professional assistance. Call a pool repair specialist if:
- You cannot locate the leak despite thorough investigation
- The leak is in underground plumbing or the pool structure requires major reconstruction
- Your pool is under warranty and repairs might affect coverage
- You're uncomfortable performing the repair or lack necessary tools
- The leak involves complex equipment or automation systems
Professional leak detection services use sophisticated equipment like acoustic listening devices and thermal imaging cameras that can pinpoint elusive leaks quickly and accurately.
Conclusion
Pool leaks don't have to derail your summer fun or drain your wallet. By understanding how to detect leaks, systematically locate them, and apply appropriate repairs, most pool owners can successfully address common leak problems. Remember that prevention through regular maintenance is always more cost-effective than emergency repairs.
Whether you're dealing with a minor vinyl tear or investigating persistent water loss, following this step-by-step process will guide you toward a solution. Start with proper diagnosis, proceed methodically through repairs, and invest in preventive maintenance to keep your pool healthy for years to come. With patience and attention to detail, you'll keep your pool in top condition and enjoy many seasons of swimming ahead.