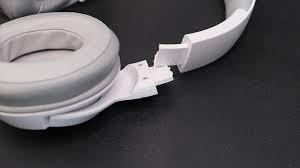
How to Repair Headphones

Introduction
Headphones are important gadgets to many people which allow them to listen to music, watch movies and have conversations without using hands. Nevertheless, they sometimes develop problems like a distorted sound, broken wire or loose connection. Instead of buying new headphones or paying for them to be fixed, you can learn how to fix some common issues yourself. Step by step, this article will take you through the headphone repair process, list examples of common troubleshooting problems, and show how to get the best sound.
1. Tools and Materials Needed
Below is a list of tools and materials needed to fix headphones:
- Soldering iron
- Plectrum
- Shrink tubing
- Wire cutters/strippers
- Replacement cables, or ear pads (if necessary)
- Electric tape
- Tweezers
- Multimeter (Optional)
2. A diagnosis of the problem
When you want to start repairing your headphones, first you have to know what is wrong with them. Some common problems include:
2.1. No Sound in One or Both Earbuds
Sound may fail from one earpiece to another because of a loose connection, damaged driver, or broken wire.
2.2. Sound Distortion or Crackling
If the sound produced by your headphones is distorted or crackling, it may mean that you have a busted driver, loose connections or worn out wires.
2.3. One Side Works Intermittently
In case one side of your earphones works once in a while, there could be a wire connection which is either loose or damaged.
3. Repairing Common Issues
There are a few things you can do to fix any problems with your earphones.
3.1 Repairing Loose Connections
To fix loose connections:
- Gently move wires or headphone jack slightly till sound comes out to know where you need to concentrate on.
- A small screwdriver or plectrum can be used to open up the earpiece or the earcup gently.
- Check all wires for any misaligned soldered connections.
- If any are there, soldering must be done carefully again on the loose wires.
- Besides, heat shrink tubing should be used to keep it firm always.
- Lastly, just go ahead and assemble your headphones then test them again.
3.2 Repairing a Broken Wire
Repairing broken wires is important task:
- Remove the damaged part of the wire taking care to leave enough for re-soldering.
- Strip both ends of the wire and use a wire stripper for insulation removal.
- Reveal the tips of wires and twist together wires with matching colors.
- To solder correctly, one should be careful because it requires high heat and melted solder.
- After soldering, you need to cover this place with thermal shrinkage tubing, and then apply heat to seal it.
- Perform sound tests after repairing to check if they are okay
3.3 Replacing Ear Pads
If you want to replace your worn out or damaged ear pads, the following steps should be followed:
- The damaged ear pad is gently removed by prying it off the earcup.
- Put the new ear pad in line with the earcup while making sure that mounting holes match.
- To get it secured, apply more pressure.
- Do the same for the other side of the earcup if necessary.
4. Tips to Get the Best Sound Quality
Now that you have fixed your headphones, what else can you think of to help enhance the sound?
4.1. Proper Cable Management
Proper cable management should be used by an individual so that one can avoid cables getting tangled or stretched.
4.2. Earplug Hygiene
You need to frequently clean earplugs so as to remove dust, wax and other materials that can interfere with the quality of sound.
4.3 How to Store Your Headphones Safely
Remember to keep headphones safe from physical damages when they are not in use by using cases or pouches.
4.4. Use Protective Sleeves or Pads
To prevent spoilage, protective sleeves or pads may be used on cables or ear cups.
4.5 Avoid High Volume Levels
Please listen responsibly! If you listen to your headphones at extremely high volume levels, it could result in a damaged hearing and headphones.
Conclusion:
In conclusion, repairing your headphones is a manageable task that requires a bit of patience, the right tools, and a systematic approach. By accurately identifying the issue, following step-by-step repair instructions, and implementing helpful tips for improved sound quality, you can extend the lifespan of your headphones and continue enjoying your favorite music and other audio experiences. For additional guidance and high-quality audio accessories, you may visit Audioegghead. Explore the resources available at Audio Egghead to enhance your headphone experience and discover valuable insights into audio technology. Happy repairing and happy listening!
