

Creating a salon-quality manicure from the comfort of your home has never been more achievable. With the rise in popularity of UV LED nail kits and professional-grade gel polishes, beauty lovers are opting for DIY solutions that offer both affordability and durability. However, with countless products flooding the market, choosing the right kit and polish can feel overwhelming. In this blog, we’ll guide you through how to select an affordable UV LED nail gel polish kit and explore what makes some gel polish brands truly stand out in terms of quality and performance.
The Basics: What to Look for in a UV LED Nail Kit
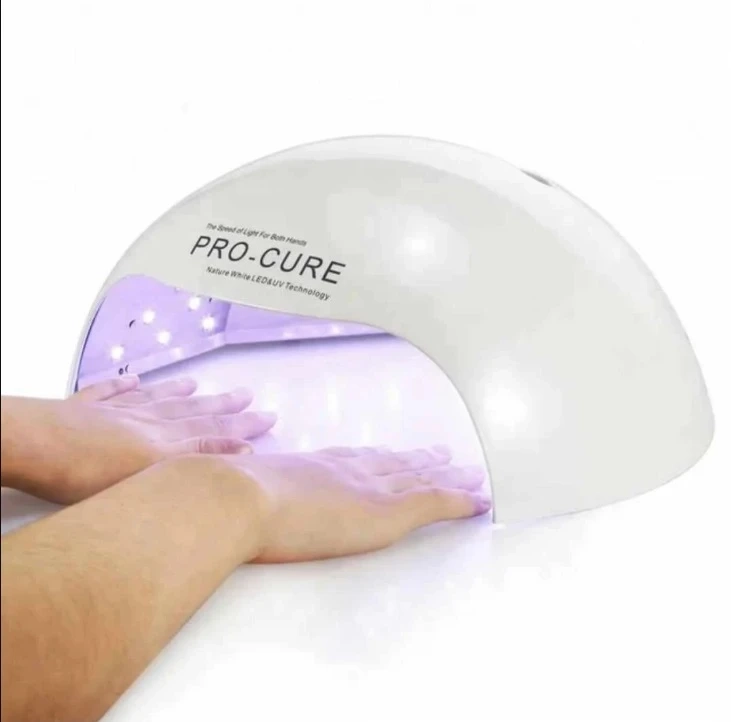
Before diving into specific features, it's essential to understand what a UV LED nail kit typically includes. Most starter kits come with a curing lamp, base coat, top coat, gel polishes, and nail prep tools like files or buffers. A good-quality lamp is the heart of the kit—ensuring your gel polish cures evenly, lasts long, and delivers a smooth finish.
When shopping for a kit, consider the wattage of the lamp. A 48W or higher UV/LED dual light source lamp is ideal for faster curing and compatibility with a wide range of gels. Also, make sure the kit includes a variety of tools and at least a few color options to get you started without additional purchases.
Durability and Curing Time: A Balancing Act
One of the primary reasons people switch to gel manicures is the durability. But durability is heavily influenced by both the polish quality and the curing equipment. Lower wattage lamps may require longer curing times and can sometimes result in uneven finishes. On the flip side, high-wattage lamps that pair well with premium gels will ensure nails remain chip-free for up to three weeks.
Many users find value in kits that offer both UV and LED curing options. This compatibility is especially helpful if you’re planning to try different gel brands, some of which may cure better under specific types of light.
Consider the Kit’s Value Over Time
It's easy to be lured by the cheapest kit on the shelf, but the best investment balances upfront cost with long-term usability. An affordable UV LED nail gel polish kit should be reasonably priced but also include enough supplies to last through multiple applications. Think about polish quantity, lamp quality, and whether you’ll need to replace any tools soon after purchasing.
Also, consider how easily you can restock polish colors or replace parts like nail buffers or files. Kits tied to exclusive polish brands can limit your flexibility, so go for a setup that supports third-party or refill options.
Features of the Best Gel Polishes
Now that you’ve selected a reliable kit, it’s time to talk about the gel polish itself. Not all gel polishes are created equal. The best formulas glide on smoothly, cure quickly, and remain glossy without chipping or peeling.
When evaluating top gel polish brands for nails, look for the following qualities:
● Highly pigmented colors for fewer coats
● Long-lasting wear of at least 14 days
● Easy soak-off removal without damaging the natural nail
● Non-toxic and odor-free formulas for safer use at home
Some brands also offer special finishes like magnetic cat-eye gels, glitter top coats, or thermal color-changing options, which add fun and creativity to your home manicures.
User Reviews and Community Recommendations
Real customer feedback can make a big difference when selecting a product online. Don’t just rely on flashy product descriptions. Check user reviews for insight on how well the lamp performs, how long the polish lasts, and how intuitive the kit is for beginners.
Beauty forums and social media communities can also be goldmines of information. Influencers and nail technicians frequently share their favorite products and post tutorials that can help you get the best results from your new kit.
Tips for First-Time Users
If you’re just starting out, it’s easy to make mistakes like applying polish too thickly or not prepping the nail correctly. These can lead to early chipping or a tacky finish. To avoid this, follow these simple steps:
1. Clean and buff your nails before application to help polish adhere.
2. Apply thin coats of gel polish, curing each layer properly under the lamp.
3. Seal the edges of your nails with the top coat to prevent lifting.
4. Wipe the tacky layer off the top coat using isopropyl alcohol after curing, unless your top coat is a no-wipe formula.
Practicing good technique not only gives you a longer-lasting manicure but also protects your natural nails from damage.
Investing in Your Nail Routine
Choosing the right products for your DIY manicures doesn’t mean you have to splurge. It’s all about finding that sweet spot between price, performance, and product longevity. A well-chosen UV LED nail kit combined with quality gel polishes can offer you countless salon-style manicures without ever leaving your home. Whether you're a beauty enthusiast or someone just looking to save on salon visits, this investment pays for itself over time.