


Let me ask you something. Have you ever watched a gas fitter at work? There’s something oddly calming about it — the quiet confidence, the way they inspect every pipe and joint like they’re reading a story written in metal. And if you’re living on the Central Coast, chances are your home has a gas system that deserves this kind of attention.
Gas systems aren’t dramatic. They don’t scream when something’s wrong. They whisper. And that’s exactly why knowing how gas fitters test, seal and certify your system matters. If you’ve ever wondered what really happens during a gas inspection — beyond the mysterious toolbox and the occasional hiss of pressure — you’re in the right place.
So grab a cup of coffee, get comfy, and I’ll walk you through everything in simple language, just like we’re chatting on your back deck overlooking a breeze coming off the water.
What Gas Fitters Actually Do (That Most People Never See)
Most people think gas fitters only fix leaks or hook up new stoves. But in reality, they follow a process that’s more detailed, more careful, and honestly way more interesting than you’d expect.
They check gas lines, pressure levels, appliance connections, valves, seals, vents and pretty much anything that carries or releases gas. It’s safety mixed with science, wrapped in experience.
And if you're looking for someone reliable, the Best Gas Fitters in central coast can take care of the entire process from testing to certification — but more on that later.
For now, let’s break down exactly how they do it.
Step 1: The Visual Inspection (The Detective Phase)
Before any tools come out, a gas fitter does a slow, methodical walk-through.
Think of it like they’re scanning your home for clues.
They look for:
- rust or corrosion on metal pipes
- loose fittings
- outdated valves
- flexible hoses past their lifespan
- scorch marks (yes, that’s a red flag)
- odd odours
- poorly placed appliances
This step often reveals hidden problems early — long before they become expensive or dangerous.
Image suggestion: Insert image of a gas fitter visually inspecting a gas line or checking behind a stove.
Step 2: Pressure Testing — The Heart of the Process
Now we get into the part that looks the most “technical” but is actually pretty simple to understand.
Your gas fitter connects a pressure gauge or manometer to the system. Then they shut off all appliances and introduce a steady level of pressure.
Why? Because gas pressure behaves predictably.
If it drops — even slightly — there’s a leak.
Here’s a simple table that shows what they look for:
Pressure Test Result Meaning Action Pressure stays the same No leaks System is healthy Small pressure drop Minor leak Locate & fix Large pressure drop Serious issue Shut off gas + urgent repair The pressure test is like the heartbeat monitor of your gas system — silent, accurate, honest.
Step 3: Leak Detection — The “CSI Moment”
Once the gas fitter notices any pressure loss, they get into detective mode.
They might:
- Use a spray bottle with soapy solution (bubbles reveal leaks)
- Use an electronic leak detector
- Use a combustible gas sensor
- Check each joint, valve and seal one-by-one
Sometimes leaks are stubborn and hide in the smallest places. That’s when experience matters. And honestly, this is where gas fitters shine — finding the leaks you never knew existed.
Step 4: Sealing the System — Where Precision Matters
Once the leak is found, sealing begins.
Depending on what’s wrong, the gas fitter may:
- Replace a worn rubber seal
- Tighten or reseal a joint
- Replace a corroded pipe section
- Install a new valve
- Add thread tape or compound
- Repair a damaged appliance connector
Think of this as giving your gas system a fresh breath of life.
It’s not glamorous, but it works.
And a well-sealed system means:
- safer operation
- lower bills
- longer appliance lifespan
- better efficiency
Not to mention peace of mind every time you turn on your heater or cooktop.
Step 5: Secondary Testing — The Double Check
Good gas fitters don’t fix things “once.” They verify.
After sealing, they repeat:
- the pressure test
- the leak detection
- the visual inspection
It’s the equivalent of proofreading a message before sending it — only this time, the message is your home’s safety.
Step 6: Appliance Assessment — Making Sure Everything Works Smoothly
Testing the system doesn’t stop at pipes and valves. Gas appliances play a huge role in safety and efficiency.
A gas fitter will usually check:
- burners
- ignition
- flame colour
- ventilation
- temperature regulation
- hot water system performance
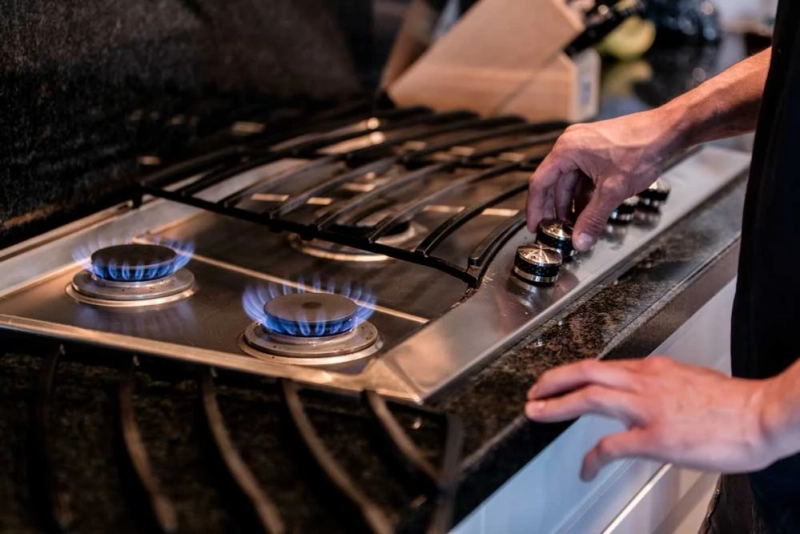
A healthy flame should be blue, steady and even.
If it’s yellow or flickering, there’s an issue.
Picture a gas cooktop with a perfect, clean blue flame — it’s like the home version of latte art: simple but pleasing.
Step 7: Certification — The Official “All Good”
Once everything passes inspection, testing and sealing, the gas fitter certifies your system.
This certificate means:
- your system is safe
- it’s compliant with Australian standards
- appliances are working correctly
- pressure levels are optimal
- you’re covered for insurance purposes
It also gives you a clear record of the work done — which can be handy when selling or renting your home.
Certification may feel like paperwork, but it’s actually the moment your home officially becomes safe again.
Why This Entire Process Matters (And Why You Should Care)
Let me tell you a quick story. A friend of mine on the Central Coast once thought his gas system was fine because “nothing felt wrong.” But after an inspection, the fitter found two tiny leaks behind the oven and a partially blocked vent.
Left alone, these could have caused health risks or led to high gas bills.
The moral? Gas problems rarely announce themselves loudly.
They whisper. And only trained gas fitters can hear them.
When Should You Call a Gas Fitter?
You don’t need to wait for a disaster. If you notice:
- gas smells
- flickering flames
- hissing near pipes
- higher gas bills
- weak hot water pressure
- old appliances
- recent renovations
… it’s time to make that call.
Gas is amazing — efficient, powerful and clean. But only when the system behind it is properly tested, sealed and certified.
Quick Comparison: DIY vs Professional Testing
Task DIY Professional Pressure testing Not possible Accurate + safe Leak detection Not reliable Precise tools Sealing joints Risky Guaranteed Safety compliance None Full certification Insurance validity No Yes Time taken Longer Faster Risk High Low DIY might save you a few dollars today, but a professional saves you money, safety and time tomorrow.
Conclusion
So, here’s the real truth — the work gas fitters do is the backbone of your home’s safety. They test, they seal, they certify — and they do it in a way that blends skill, precision and experience.
If you’ve been putting off getting your system checked, now’s the perfect time. Your home deserves to be safe, efficient and worry-free.
And if you want the job done properly, reach out to the Best Gas Fitters in central coast. Your home — and your peace of mind — will thank you.
FAQs
Q: How often should I get my gas system tested?
Once a year is ideal, especially for older homes on the Central Coast.
Q: How long does the testing and certification process take?
Usually between one to three hours, depending on the size of your system.
Q: Can I test my own gas system?
No. Pressure testing and certification require licensed professionals.
Q: What’s the most common issue gas fitters find?
Small leaks around joints and worn seals — they’re easy to miss.
Q: Do I get documentation after the job?
Yes, a certified gas fitter will provide a compliance certificate for your records.