


A cracked driveway can be an eyesore and a safety hazard. If you’ve noticed cracks forming in your concrete driveway, you might be wondering if you need to call in the pros or if you can handle the repairs yourself. The good news is that many concrete driveway cracks can be repaired with DIY solutions that are cost-effective and long-lasting. In this guide, we’ll cover the best DIY concrete repair hacks that actually work, so you can restore your driveway without breaking the bank.
1. Understanding Why Driveways Crack
Before diving into repair solutions, it’s essential to understand why concrete driveways crack in the first place. Here are some common reasons:
Weather changes – Temperature fluctuations cause concrete to expand and contract, leading to cracks.
Heavy loads – Excessive weight from vehicles or equipment can stress the concrete.
Improper installation – Poorly mixed or incorrectly poured concrete can develop cracks over time.
Tree roots – Expanding roots can lift and crack concrete slabs.
Moisture issues – Water penetration weakens concrete, leading to damage.
By identifying the cause, you can choose the most appropriate repair method.
2. Tools and Materials You’ll Need
Before starting your DIY concrete repair, gather the necessary tools and materials. Here’s what you’ll need:
Concrete patching compound or vinyl concrete patch
Concrete resurfacer (for larger repairs)
Wire brush or pressure washer (for cleaning cracks)
Trowel or putty knife
Chisel and hammer (for widening cracks if necessary)
Sealer (to protect against future damage)
Protective gloves and safety glasses
3. Cleaning the Cracks for a Lasting Repair
One of the biggest mistakes homeowners make when fixing cracks is not properly cleaning the damaged area. Dirt, debris, and loose concrete can prevent patching compounds from adhering correctly.
How to Clean the Cracks:
Use a wire brush to remove loose concrete and debris.
A pressure washer can help flush out dust and dirt.
Let the crack dry completely before applying any repair material.
4. Filling Small Cracks with Concrete Patch
For cracks smaller than 1/4 inch, a simple concrete patching compound works best.
Steps to Repair Small Cracks:
Mix the concrete patching compound according to the manufacturer’s instructions.
Use a putty knife or trowel to press the patch into the crack.
Smooth the surface and let it dry for at least 24 hours.
Apply a sealant to protect against water penetration.
5. Repairing Large Cracks with a Resurfacer
If your driveway has larger cracks or surface damage, a concrete resurfacer is the best option.
Steps to Resurface a Cracked Driveway:
Clean the driveway thoroughly.
Mix the concrete resurfacer to a smooth consistency.
Pour the resurfacer over the cracks and spread it evenly with a trowel or squeegee.
Let it dry completely before using the driveway again.
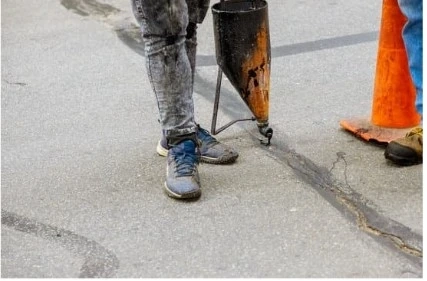
6. Using Epoxy for Deep Cracks
For deep or structural cracks, an epoxy injection is a great solution.
How to Use Epoxy:
Clean the crack thoroughly.
Mix the epoxy filler and inject it into the crack.
Use a putty knife to smooth out the surface.
Allow it to cure as per the manufacturer’s instructions.
7. Preventing Future Driveway Cracks
Once you’ve repaired your driveway, you want to make sure it stays in good condition for years to come. Here are some tips to prevent future cracks:
Apply a concrete sealer every 1-2 years to protect against moisture and weather damage.
Avoid heavy loads that exceed the weight capacity of your driveway.
Fix drainage issues to prevent water from seeping into the concrete.
Trim tree roots near the driveway to prevent lifting.
Patch small cracks early before they become bigger problems.
8. DIY vs. Professional Repair – When to Call for Help
While many concrete driveway cracks can be fixed with DIY methods, some larger or more severe damage may require professional help. Here’s when you should call an expert:
Cracks wider than ½ inch or spreading quickly.
Deep foundation cracks that indicate structural problems.
Extensive surface damage that covers large areas.
Severe water damage that weakens the entire slab.
If your driveway is beyond repair, a professional may recommend replacing it entirely rather than patching it.
9. Budget-Friendly DIY Repair Costs
DIY driveway repair is significantly cheaper than hiring a professional. Here’s an estimated cost breakdown:
Concrete patching compound: $10–$30
Concrete resurfacer: $20–$50
Epoxy filler: $20–$40
Sealer: $30–$100
Tools (brush, trowel, chisel, etc.): $10–$50
Total cost for a typical DIY repair: $50–$200, compared to $500–$2,000 for professional services.
10. Final Thoughts: Keep Your Driveway in Top Shape
Repairing driveway cracks doesn’t have to be complicated or expensive. With the right tools, techniques, and preventative measures, you can extend the life of your concrete driveway and keep it looking great for years to come. Whether you’re filling small cracks, resurfacing the driveway, or sealing the concrete, these DIY repair hacks actually work. If the damage is beyond your expertise, don’t hesitate to call a professional to ensure the job is done right.
For expert concrete repair services, visit Concrete Pros Bend.
Got cracks in your driveway? Try these DIY repair tips today and save money while maintaining your home’s curb appeal!