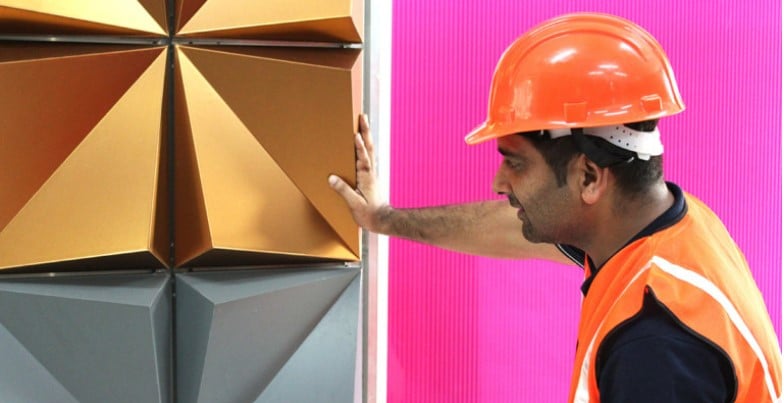
A Comprehensive Guide: How to Install an Aluminium Composite Panel

Aluminium Composite Panels (ACPs) have gained immense popularity in the construction industry due to their durability, versatility, and aesthetic appeal. Whether you’re a homeowner, architect, or contractor, understanding the proper installation process is essential to ensure a successful outcome. In this comprehensive guide, we will walk you through the step-by-step process of installing an aluminium composite panel. So let’s dive in and learn how to achieve a seamless and professional installation.
What are the tools required for the installation of ACP sheets?
Generally, to install ACP sheets, the following tools are required:
- CNC Router or Hand Router
- Blade Thickness of 10mm or 12mm
- If we have to roll the ACP then we would require a 3 roller bending machine
- Measuring Tape
- Leveller
- Drilling Machine
- Safety gears: Gloves, helmets, construction boots, safety rope, safety goggles and all necessary safety equipments are required
Understanding the design process
Important note – All the elements sizes and numbers need to be calculated according to dead load, live load and wind load coming on the facade
Let’s have a look at the stepwise design process –
- Calculate the bracket size and the distance between the two brackets.
- Wind load determines the panel size calculation
- Calculate the size of mullions (Vertical hollow rectangular aluminium pipes) and transom (Horizontal hollow rectangular aluminium pipes).
- If panels require a stiffener, the stiffener size and numbers should be calculated and usually it is of the same size as that of mullion and transom
- Load on steel bolts which would be connecting mullion and transom to brackets needs to be calculated which will decide the sizes accordingly
- Finally, calculate the load on the anchor fastener and select the particular anchor fastener suitably
- Also we need to calculate the linear thermal expansion of the panels to keep the expansion joints between two panels.
- L Cleat sizes and numbers should be calculated
- Size of screws and rivets to be calculated for joining the ACP to the back frame with the help of L Cleats
Want to know how the entire installation process takes place? Here’s a breakdown of the process of ACP sheet installation –
Installation:
- Check the level of the surface initially by the leveller.
- Drill holes to place the brackets on the surface
- Brackets are attached to the surface by Anchor fasteners.
- Mullions and transoms according to the leveller values are attached to the brackets by steel bolts
- On a levelled surface we will cut the ACP to sizes by hand/cnc router.
- Then, the ACPs are routed to form the tray.
- A minimum of 25mm fold is required to form the tray
- At the middle of the fold i.e. at around 12mm, holes are drilled to attach L Cleats
- The hole sizes will be in accordance to the size of screws or rivets
- The L cleats are attached to the ACP from one side and the other side is attached to the frame.
- Expansion Joints kept between two ACP’s will be first filled by Backer Rod
- A masking tape is attached on all the four sides of the ACP before filling the non-bleeding weather silicon sealant.
- After filling the non bleeding weather silicon sealant, the masking tape is removed so that the silicon sealant remains in a straight line.
- If there are stiffeners to be used that helps to make the tray at equal distances. Depending on the number of stiffeners, double tape is placed.
- Stiffeners are attached to the back side of the tray with the double tape and the entire process takes place on the ground itself.
Nitty-gritty of the ACP Sheet Installation Process:
Prepare the Surface:
Ensure that the surface where the ACP will be installed is clean, dry, and free from any dirt, dust, or debris. Make any necessary repairs to achieve a smooth and even surface.
Take Accurate Measurements:
Measure the area accurately to determine the panel sizes required for the installation. Use a measuring tape and level to ensure precise measurements.
Cut the ACP Panels:
Using an electric saw or panel cutter, cut the ACP panels according to the measured dimensions. Follow safety precautions and the manufacturer’s guidelines for cutting the panels.
How the ACP panels are attached to the Wall?
Choose either mechanical fixing or adhesive fixing method for attaching the ACP panels:
a. Mechanical Fixing:
- Place the cut ACP panel onto the prepared surface.
- Secure the panel by drilling holes through the panel and into the surface.
- Insert screws into the holes and tighten them appropriately.
- Repeat this process for each panel, ensuring proper alignment and spacing.
b. Adhesive Fixing:
- Apply a high-quality adhesive tape or adhesive sealant to the back of the ACP panel.
- Carefully place the panel onto the prepared surface, ensuring proper alignment.
- Press the panel firmly to ensure a strong bond.
- Use clamps or brackets to hold the panels in place until the adhesive sets.
- Repeat this process for each panel, maintaining uniform spacing.
Finishing Touches:
Inspect the installation for any gaps, misalignments, or imperfections. Make necessary adjustments or corrections to achieve a seamless finish.
Clean and Maintain:
After the installation is complete, clean the ACP panels using a mild detergent and a soft cloth. Regularly inspect and maintain the panels to ensure their longevity and performance.
Bottom Line
Installing an aluminium composite panel requires precision and adherence to specific guidelines. By following the step-by-step instructions outlined in this guide, you can achieve a professional and flawless ACP installation. Prioritize safety, use the right tools and materials, and consult the manufacturer’s instructions for specific recommendations. Embrace the versatility and beauty of aluminium composite panels while transforming your space with confidence.

