Introduction
If you are a developer, entrepreneur, or even a user, chances are you may need a string of a long alphanumerical Unique Device Identifier or UDID for iOS app development. This number is exclusive to your physical device, your iPhone, iPad, and iPod Touch. Developers, especially, need the UDID to register devices in the process of development.
What is a Unique Device Identifier?
A Unique Device Identifier (UDID) is a unique sequence of alphanumerical (a combination of letters and numbers), particular to your device alone. All iPhones, iPad, or iPod Touch have this UDID. It is a string of a 40 alphanumerical identity (for iPhone X models and ones before that). It may resemble serial numbers you find on the packaging. For iPhone XS and the later models, it comes as a 24 alphanumeric string with a dash after the 8th digit.
What is the significance of UDID?
Apple must affirm and sanction all programs installed on your Apple device. All apps you come across on your App Store are there post Apple’s approval. However, during the beta testing stage, the app can be tried before it is officially launched for general consumption. For this very reason, UDID is registered with Apple- to approve the application for your device.
6 Steps to Find UDID on iPhone
In order to register a device for testing, you need to first find its UDID.
Step One: Initiate iTunes and connect your device
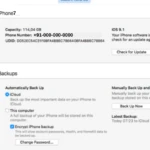
Step Two: Go to Devices and select your device by clicking on it.
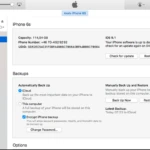
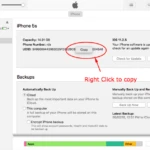
Step Three: Click on ‘serial number
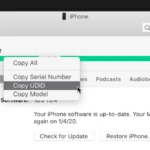
Step Four: Your ‘serial number’ will automatically change to your UDID
Step Five: Click on the ‘Edit’ icon, then ‘Copy’
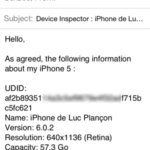
Step Six: ‘Paste’ the same (taken from iTunes menu) into your email. The email message will display your UDID.
Alternative Way to find UDID
Finding your UDID with Xcode
- Connect your iOS device to Xcode
- Open the Window > Devices and Simulators menu
- Find your device displayed on this list and view it on the “identifier”
Finding your UDID with Finder (macOS Catalina)
- Locate your UDID in the Finder on macOS Catalina for a connected device.
How to add UDID to your Apple Developer Account?
Having completed the UDID finding process, your next step is to add it in the ‘Devices’ tab in the Certificates, IDs & Profiles segment which is on the Apple development portal
Put in your test devices to your Apple developer account using the following track:
- Sign in to http://developer.apple.com
- Go to, “Certificates, Identifiers & Profiles” visible on the right sidebar (http://developer.apple.com/account/ressources/devices/list).
- Click on Devices.
- Press the plus icon (+) so you can add a new device.
- Then click ‘Register Device’.
- Write the name of the device and the UDID you found.
- Continue and then Register
The next process involves adding your device to the application’s provisioning profile that will be circulated to your testers:
- Click on Profiles on the left sidebar.
- Choose the provisioning profile where you wish to add the new device and click on Edit.
- Choose the App ID for your application.
- In the list of all devices, you can either select all or choose only the ones that you wish to include in the provisioning profile.
- Go on ‘Generate’. The profile is generated. Now you can easily download it.
In the final process, you build or rebuild the application with the updated provisioning profile you just generated.
- Import the profile you generated and downloaded to Xcode
- Open Xcode. From there you can choose your project, displayed in the left sidebar
- Choose ‘Build Settings’
- Use the search bar to enter ‘Code Sign’.
- Select your release configuration and choose the provisioning profile you generated
- Create a new build Product > Archive
Conclusion
Using these simple steps, you have found and registered your UDID and can now successfully beta test your app with Apple’s approval. Onward to develop cutting edge iOS applications.
If you are looking for an iOS App Development get an idea how much it will cost with app cost calculator
0


